
Introduction
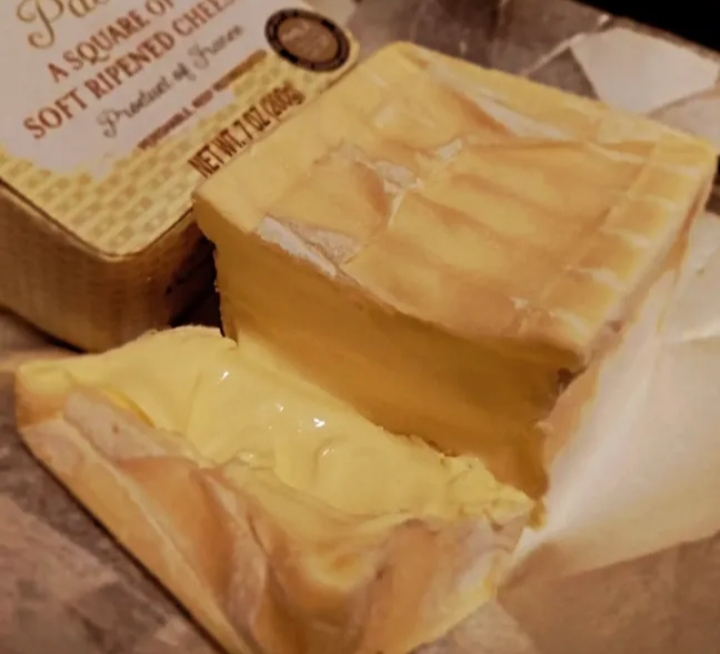
Homemade Double-Cream Square Soft-Ripened Cheese is a luxurious, creamy cheese with a delicate white bloomy rind and a rich, buttery interior. Made with whole milk and heavy whipping cream, this artisan-style cheese develops a soft, velvety texture and a beautifully balanced flavor during its slow aging process.
Inspired by traditional French soft-ripened cheeses, this recipe is perfect for cheese enthusiasts who enjoy making specialty cheeses at home. With patience, careful temperature control, and proper aging conditions, you can create two elegant cheese squares with a creamy center and delicate rind.
Origin and Cultural Significance
Soft-ripened cheeses are strongly associated with French cheesemaking traditions, particularly the regions of Normandy and northern France. Famous varieties such as Brie and Camembert are known for their white mold-covered rinds, rich interiors, and distinctive earthy flavors.
Double-cream cheeses take this tradition further by incorporating additional cream, producing a richer and more buttery texture. This homemade version uses traditional cheesemaking cultures and molds to recreate the characteristics of artisan soft-ripened cheese.
Recipe Overview
- Preparation Time: Approximately 2 hours, spread across draining and flipping.
- Aging Time: 3–4 weeks.
- Difficulty: Intermediate.
- Yield: Two 7-oz (200 g) cheese squares.
- Cheese Style: Double-cream, soft-ripened, bloomy-rind cheese.
Ingredients Quantity
For the Cheese
- 1 gallon (3.8 liters) whole cow’s milk, pasteurized but not ultra-pasteurized.
- 1 cup (240 ml) heavy whipping cream, pasteurized but not ultra-pasteurized.
- ¼ teaspoon calcium chloride, diluted in ¼ cup cool, non-chlorinated water.
- ⅛ teaspoon mesophilic starter culture, such as Flora Danica or MM100.
- 1/16 teaspoon Penicillium candidum mold powder.
- 1/32 teaspoon Geotrichum candidum mold powder.
- ¼ teaspoon double-strength liquid rennet, diluted in ¼ cup cool, non-chlorinated water.
- 2 teaspoons non-iodized kosher or cheese salt, divided.
Equipment Needed
- Large stainless steel pot.
- Accurate cheesemaking thermometer.
- Slotted spoon.
- Long curd knife.
- Two small square cheese molds, approximately 3.5 × 3.5 inches (9 × 9 cm).
- Cheese draining mats.
- Covered plastic aging box or ripening container.
- Measuring spoons.
- Food-safe gloves.
- Hygrometer for monitoring humidity.
- Refrigerator or temperature-controlled cheese-aging space.
Optional Additions
- Fresh thyme or rosemary for serving.
- Cracked black pepper for a savory presentation.
- Honey for a sweet-and-savory cheese board.
- Toasted walnuts or almonds for added texture.
- Fresh grapes, figs, or sliced pears for pairing.
Tips for Success
- Choose the right milk: Avoid ultra-pasteurized milk because it may not form a suitable curd.
- Measure cultures carefully: Small quantities of starter cultures and mold powders are important for consistent results.
- Maintain temperature: Use a reliable thermometer throughout the cheesemaking process.
- Handle curds gently: Excessive stirring or rough handling can affect the final texture.
- Control humidity: A suitable aging environment helps the white rind develop evenly.
- Flip regularly: Turning the cheese helps maintain its shape and encourages even moisture distribution.
- Monitor the rind: Watch for unusual colors, odors, or excessive moisture during aging.
- Use food-safe equipment: Sanitize all equipment and work surfaces before beginning.
Instructions
Step 1: Prepare the Milk and Cream
Clean and sanitize all cheesemaking equipment thoroughly. Pour the whole milk and heavy cream into a large stainless steel pot. Slowly warm the mixture to approximately 86°F (30°C), stirring gently to distribute the cream evenly.
Step 2: Add the Cultures and Molds
Sprinkle the mesophilic starter culture evenly over the surface of the milk. Allow it to rehydrate before gently stirring.
Add the Penicillium candidum and Geotrichum candidum powders, distributing them evenly throughout the milk.
Allow the cultures to develop according to the manufacturer’s instructions.
Step 3: Add Calcium Chloride
Add the diluted calcium chloride to the milk and stir gently for approximately 30 seconds.
This helps improve curd formation when using pasteurized milk.
Step 4: Add the Rennet
Add the diluted double-strength liquid rennet and stir gently using an up-and-down motion.
Cover the pot and allow the milk to coagulate until a clean break forms. Follow the rennet manufacturer’s recommended setting time.
Step 5: Cut and Drain the Curds
Once the curd has set, cut it gently into small cubes using a curd knife.
Allow the curds to rest before carefully transferring them into the prepared square cheese molds.
Let the whey drain naturally, allowing the curds to settle and consolidate.
Step 6: Mold and Flip the Cheese
Allow the cheese to drain in the molds at a controlled room temperature.
Carefully flip the molds periodically during the draining stage to encourage even drainage and create uniform square shapes.
Continue draining until the cheese has developed sufficient structure to hold its shape.
Step 7: Salt the Cheese
Remove the cheese carefully from the molds.
Divide the non-iodized cheese salt between the two squares, applying it evenly over their surfaces.
Allow the salt to absorb while the cheese continues draining.
Step 8: Develop the White Bloomy Rind
Transfer the cheeses to clean draining mats inside a covered aging container.
Maintain the recommended temperature and humidity for the selected cultures. Turn the cheeses regularly and monitor their surfaces as the characteristic white rind develops.
Step 9: Age the Cheese
Continue ripening under controlled refrigeration conditions for approximately 3–4 weeks, following the culture supplier’s recommended schedule.
Once the rind has developed properly and the interior has softened, wrap the cheeses in appropriate cheese-aging paper and refrigerate.
Allow the cheese to finish ripening before serving.
Important food-safety note: Soft-ripened cheese made with pasteurized milk still requires careful sanitation, validated cheesemaking procedures, and controlled aging. Aging for 3–4 weeks alone does not establish safety. Use a tested recipe from a reputable cheesemaking supplier, follow its exact temperature, humidity, acidity, and storage requirements, and discard cheese showing suspicious mold or spoilage.
Description
This homemade double-cream cheese features an elegant square shape, a delicate white bloomy rind, and a rich, buttery interior. The additional cream gives the cheese a luxurious mouthfeel, while the carefully selected cultures contribute its characteristic soft-ripened texture and complex flavor.
When properly ripened, the cheese becomes creamy beneath its white exterior, making it a beautiful addition to a gourmet cheese board.
Serving Suggestions
- Serve at a cool room temperature for a softer texture.
- Pair with crusty bread or toasted baguette slices.
- Add honey and fresh figs for a sweet contrast.
- Serve alongside grapes, pears, or walnuts.
- Include it on a cheese board with crackers and fresh herbs.
Nutritional Information
Approximate values per 1-oz (28 g) serving; actual values depend on the milk and cream used.
| Nutrient | Estimated Amount |
|---|---|
| Calories | 110–130 kcal |
| Protein | 5–6 g |
| Fat | 9–11 g |
| Carbohydrates | 0–1 g |
| Calcium | 100–150 mg |
| Sodium | 150–220 mg |
Conclusion
Homemade Double-Cream Square Soft-Ripened Cheese is a rewarding artisan cheesemaking project that transforms simple dairy ingredients into an elegant specialty cheese. Its creamy consistency, delicate white rind, and rich buttery flavor make it an excellent choice for entertaining, gourmet cheese boards, or homemade culinary gifts.
With proper cultures, careful handling, and controlled ripening conditions, you can enjoy the satisfaction of creating your own artisan-style soft cheese.
Recommendation
Serve this cheese with fresh fruit, toasted baguette, honey, and walnuts. For an elegant presentation, place the square cheese in the center of a wooden serving board and surround it with crackers, grapes, and seasonal fruits.
Embracing Homemade Artisan Cheesemaking
Making cheese at home is a wonderful way to explore traditional food craftsmanship. It encourages patience, precision, and appreciation for the natural processes that create distinctive flavors and textures. By using quality ingredients, maintaining excellent hygiene, and following reliable food-safety guidance, you can develop your cheesemaking skills and enjoy the pleasure of homemade artisan dairy products.