
1. Introduction
Golden Chicken Bone Broth is a rich, deeply flavorful homemade broth prepared by slowly simmering chicken bones, aromatic vegetables, fresh herbs, and seasonings in water.
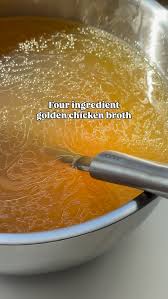
Often described as “liquid gold,” this traditional kitchen staple is appreciated for its beautiful golden color, savory aroma, and naturally gelatinous texture when chilled.
Unlike a quickly prepared chicken stock, bone broth is generally cooked for an extended period to extract flavor, gelatin, and soluble compounds from the bones and connective tissues.
The result is a satisfying broth that can be enjoyed warm on its own or used as a flavorful foundation for soups, stews, sauces, grains, and other homemade dishes.
The key ingredients are high-collagen chicken parts such as backs, necks, wings, and carcasses.
These parts contain connective tissues that release gelatin during prolonged cooking.
When the finished broth is refrigerated, it may develop a soft, jelly-like consistency.
This is a natural result of gelatin formation and is one of the characteristics associated with a well-extracted bone broth.
Onions, carrots, celery, garlic, and optional leek add natural sweetness and savory depth.
Fresh herbs and whole black peppercorns provide aromatic complexity.
A small amount of apple cider vinegar adds acidity, while slow cooking allows the flavors to develop gradually.
For an especially rich golden color, the chicken bones and some vegetables can be roasted before simmering.
This optional step creates browned, caramelized flavors that make the finished broth particularly delicious.
Golden Chicken Bone Broth can be prepared using a traditional stovetop, a slow cooker, or an electric pressure cooker.
Although the cooking process takes several hours, most of the preparation is hands-off.
Once finished, the broth can be strained, cooled, refrigerated, and portioned for future meals.
2. Origin and Cultural Significance
Bone-based broths have been prepared in kitchens around the world for centuries.
Many culinary traditions use animal bones, vegetables, herbs, and water to create flavorful cooking liquids.
These broths provide an economical way to use parts of poultry and other animals that might otherwise be discarded.
In European cooking, chicken stock has long been an important foundation for soups, sauces, and braised dishes.
French culinary traditions use carefully prepared stocks as essential ingredients in classical sauces and soups.
In Chinese cooking, chicken and other meat-based broths are commonly used in soups, noodle dishes, and savory preparations.
Jewish culinary traditions also feature chicken soup as a familiar comfort food, particularly during family gatherings and holidays.
Across many cultures, warm chicken broth is associated with hospitality, nourishment, and home cooking.
The modern term bone broth has become especially popular in wellness-oriented cooking, although the basic technique closely resembles traditional stock preparation.
Bone broth is often distinguished by its extended cooking time and emphasis on collagen-rich bones.
However, there is no universally accepted culinary definition separating bone broth from stock.
Both can contain gelatin, minerals, and savory compounds extracted during cooking.
The golden appearance of chicken bone broth comes primarily from ingredients such as browned chicken bones, roasted vegetables, and onion skins.
Leaving clean onion skins attached can contribute additional color.
The traditional appeal of bone broth lies in its versatility.
It can be sipped warm, incorporated into everyday meals, or used as the foundation for more elaborate recipes.
Today, homemade chicken bone broth remains a practical way to create a flavorful kitchen staple while making use of chicken bones and vegetable ingredients.
3. Ingredients
This recipe combines collagen-rich chicken bones, fresh vegetables, herbs, and water.
A. Chicken Bones
| Ingredient | Amount |
|---|---|
| Chicken carcasses, backs, necks, wings, or a combination | 3–5 lb (approximately 1.4–2.3 kg) |
Using a combination of bones and connective tissue-rich parts can help produce a more gelatinous broth.
B. Vegetables and Aromatics
| Ingredient | Amount |
|---|---|
| Yellow or brown onions, halved | 2 medium |
| Large carrots, chopped | 3–4 |
| Celery stalks, chopped | 2–3 |
| Whole garlic head, halved horizontally | 1 |
| Leek, thoroughly washed, optional | 1 |
The onion skins can be left on after washing to help develop the broth’s golden color.
C. Herbs and Seasonings
| Ingredient | Amount |
|---|---|
| Apple cider vinegar | 2 tablespoons |
| Whole black peppercorns | 1 tablespoon |
| Bay leaves, thyme, and parsley | 1 small bundle |
| Salt | Optional, preferably added when using the broth |
D. Liquid
| Ingredient | Amount |
|---|---|
| Cold filtered water | Approximately 12–16 cups, or enough to cover the ingredients |
The amount of water depends on the size of the cooking vessel and the quantity of bones.
For a concentrated broth, avoid adding significantly more water than necessary.
Equipment
- Large stockpot, slow cooker, or pressure cooker
- Large roasting tray, optional
- Sharp knife
- Cutting board
- Large spoon or skimmer
- Colander
- Fine-mesh sieve
- Cheesecloth, optional
- Heatproof containers
- Ladle
- Refrigerator-safe jars
- Freezer-safe containers
Yield: Approximately 8–12 cups, depending on the amount of water, evaporation, and reduction during cooking.
4. Optional Additions
Golden Chicken Bone Broth can be customized with additional aromatics and vegetables.
Fresh Ginger: Add a few slices for a warm, slightly spicy aroma.
Turmeric: Add a small piece of fresh turmeric for a brighter golden color and earthy flavor.
Parsnips: Include chopped parsnips for additional sweetness.
Mushrooms: Add a few mushrooms for a deeper savory flavor.
Extra Garlic: Increase the garlic for a stronger aromatic broth.
Fresh Rosemary: Add a small sprig for a distinctive herbal note.
Fresh Sage: Include a few leaves for a warm, earthy aroma.
Parsley Stems: Use leftover parsley stems as an economical flavoring ingredient.
Celery Leaves: Add clean celery leaves for additional freshness.
Lemon Peel: Add a small strip of peel for a subtle citrus aroma.
Dried Shiitake Mushrooms: Add a small amount for additional umami flavor.
Chicken Feet: When properly cleaned and prepared, chicken feet can contribute additional gelatin because they contain substantial connective tissue.
Sea Salt: Season the finished broth lightly if serving it as a beverage.
For a classic golden chicken broth, the original combination of chicken bones, onions, carrots, celery, garlic, peppercorns, and herbs is sufficient.
5. Tips for Success
Preparing excellent chicken bone broth requires gentle heat, suitable bones, careful straining, and proper cooling.
Choose Collagen-Rich Bones
Chicken backs, necks, wings, and carcasses are excellent options.
Parts containing cartilage, skin, and connective tissues help contribute gelatin.
Roast for Deeper Flavor
Roasting the bones and vegetables at 400°F (200°C) develops browned flavors.
This is optional but especially useful when preparing a robust golden broth.
Use Clean Onion Skins
Washed onion skins can help create a deeper golden color.
Discard any dirty or damaged outer layers.
Avoid Excess Water
Add enough water to cover the ingredients without unnecessarily diluting the broth.
Use Apple Cider Vinegar Moderately
The vinegar adds mild acidity. Although it is often said to help extract minerals from bones, the nutritional effect of this small amount is not well established.
Skim the Surface
During the initial heating stage, foam may rise to the top.
Removing it can help produce a clearer broth.
Maintain a Gentle Simmer
A gentle simmer is preferable to a vigorous rolling boil.
Excessive boiling can make the broth cloudy and cause unnecessary evaporation.
Keep the Ingredients Submerged
Check the liquid level occasionally during stovetop cooking.
Add a little hot water if needed.
Avoid Overcooking the Vegetables
For very long simmering, vegetables can become excessively soft and lose their fresh flavor.
For a cleaner-tasting broth, they can be added during the final few hours instead of cooking for the entire 12–24 hours.
Use the Correct Pressure Cooker Capacity
Never exceed the maximum fill line of an electric pressure cooker.
A 6-quart cooker generally cannot accommodate the full upper quantities of this recipe with 12–16 cups of water. Reduce the batch to fit the appliance safely.
Strain Thoroughly
Use a fine-mesh sieve to remove small bone fragments and vegetable particles.
Cool Promptly
Do not leave a large pot of broth at room temperature for several hours.
Divide it into shallow containers or use an ice bath to cool it rapidly before refrigeration.
Expect Gelatinization
A broth rich in gelatin may become jelly-like when chilled.
It will return to a liquid consistency when reheated.
However, a broth that remains liquid when cold can still be flavorful and useful.
6. Step-by-Step Instructions
Part A: Preparing the Ingredients
Step 1: Gather the Ingredients
Prepare the chicken bones, onions, carrots, celery, garlic, optional leek, apple cider vinegar, peppercorns, herbs, and water.
Step 2: Prepare the Chicken Bones
Measure approximately 3–5 lb chicken bones and connective tissue-rich parts.
Step 3: Inspect the Bones
Remove any unwanted packaging materials or foreign particles.
Step 4: Prepare the Onions
Cut 2 medium onions in half.
Step 5: Keep the Clean Skins
Leave the clean, dry onion skins attached for additional color.
Step 6: Prepare the Carrots
Wash and roughly chop 3–4 large carrots.
Step 7: Prepare the Celery
Wash and chop 2–3 celery stalks.
Step 8: Prepare the Garlic
Cut 1 whole garlic head horizontally.
Step 9: Prepare the Leek
If using, cut the leek lengthwise and wash thoroughly between the layers.
Step 10: Prepare the Herbs
Gather bay leaves, thyme, and parsley into a small bundle.
Step 11: Measure the Peppercorns
Prepare 1 tablespoon whole black peppercorns.
Step 12: Measure the Vinegar
Prepare 2 tablespoons apple cider vinegar.
Part B: Optional Roasting for Golden Flavor
Step 13: Preheat the Oven
Set the oven to 400°F (200°C).
Step 14: Prepare a Roasting Tray
Place a large roasting tray on the countertop.
Step 15: Arrange the Bones
Spread the chicken bones across the tray.
Step 16: Add the Onions
Place the halved onions around the bones.
Step 17: Add the Carrots
Scatter the chopped carrots across the tray.
Step 18: Spread Evenly
Arrange the ingredients in a relatively even layer.
Step 19: Place in the Oven
Transfer the tray to the preheated oven.
Step 20: Roast for 25–30 Minutes
Allow the bones and vegetables to brown.
Step 21: Check the Color
Look for golden-brown areas on the bones and vegetables.
Step 22: Avoid Burning
Remove the tray before the ingredients become excessively dark.
Step 23: Remove from the Oven
Carefully take out the roasting tray.
Step 24: Set Aside Briefly
Allow the ingredients to cool enough for safe handling.
Part C: Combining the Broth Ingredients
Step 25: Prepare the Cooking Vessel
Choose a large stockpot or slow cooker with sufficient capacity.
Step 26: Transfer the Bones
Place the roasted or fresh chicken bones into the vessel.
Step 27: Add the Onions
Transfer the onion halves into the pot.
Step 28: Add the Carrots
Add the chopped carrots.
Step 29: Add the Celery
Place the celery into the pot.
Step 30: Add the Garlic
Add the halved garlic head.
Step 31: Add the Optional Leek
Place the washed leek into the pot if using.
Step 32: Add the Peppercorns
Sprinkle in 1 tablespoon whole black peppercorns.
Step 33: Add the Herbs
Place the herb bundle into the pot.
Step 34: Pour in the Vinegar
Add 2 tablespoons apple cider vinegar.
Step 35: Add the Water
Pour in enough cold water to cover the ingredients.
Step 36: Check the Liquid Level
Use approximately 12–16 cups, depending on the size of the pot.
Step 37: Avoid Overfilling
Leave adequate space below the rim of the pot.
Step 38: Allow to Rest
Let the mixture stand for approximately 20 minutes before heating, as specified in the recipe.
Part D: Bringing the Broth to a Simmer
Step 39: Place the Pot on the Stove
Set the stockpot over medium-high heat.
Step 40: Begin Heating
Allow the liquid to warm gradually.
Step 41: Watch for Foam
As the broth heats, foam may appear on the surface.
Step 42: Bring Briefly to a Boil
Allow the liquid to reach a boil.
Step 43: Skim the Foam
Use a large spoon or skimmer to remove surface foam.
Step 44: Discard the Foam
Transfer the collected foam into a separate container for disposal.
Step 45: Repeat if Necessary
Continue skimming until most of the foam has been removed.
Step 46: Reduce the Heat
Lower the heat immediately.
Step 47: Establish a Gentle Simmer
Maintain only occasional small bubbles at the surface.
Part E: Slow Stovetop Cooking
Step 48: Position the Lid
Cover the pot with a lid slightly ajar.
Step 49: Maintain Low Heat
Keep the broth at a gentle simmer.
Step 50: Begin the Long Cooking Period
Allow the broth to cook slowly.
Step 51: Simmer for 12–24 Hours
Continue cooking according to your preferred concentration and available time.
Step 52: Check Periodically
Inspect the pot occasionally to ensure the liquid has not reduced excessively.
Step 53: Add Water if Needed
Pour in a small amount of hot water if the bones become exposed.
Step 54: Avoid Vigorous Boiling
Adjust the heat to maintain a gentle simmer.
Step 55: Check the Aroma
The broth should gradually develop a rich, savory chicken fragrance.
Step 56: Observe the Color
The liquid should deepen to a golden or amber shade.
Step 57: Finish Cooking
Turn off the heat once the broth reaches the desired flavor and concentration.
For safety, do not leave a stovetop burner operating unattended or overnight. A suitable slow cooker is generally more convenient for extended cooking.
Alternative A: Slow Cooker Method
Step 58: Prepare the Slow Cooker
Place the chicken bones and aromatics into a sufficiently large slow cooker.
Step 59: Add the Water
Pour in enough water to cover the ingredients without exceeding the fill limit.
Step 60: Add the Vinegar and Seasonings
Include the apple cider vinegar, peppercorns, and herb bundle.
Step 61: Cover
Secure the slow cooker lid.
Step 62: Select LOW
Set the appliance to its LOW cooking setting.
Step 63: Cook for 12–24 Hours
Allow the broth to cook gently until deeply flavored.
Step 64: Check the Liquid
Monitor the liquid level as recommended by the appliance manufacturer.
Step 65: Turn Off the Slow Cooker
Switch off the appliance when cooking is complete.
Alternative B: Electric Pressure Cooker Method
Step 66: Prepare the Pressure Cooker
Use a pressure cooker with adequate capacity.
Step 67: Reduce the Batch if Necessary
For a 6-quart appliance, use a smaller quantity of bones, vegetables, and water.
Step 68: Add the Ingredients
Place the bones, vegetables, vinegar, herbs, and peppercorns into the inner pot.
Step 69: Add Water
Pour in water without exceeding the manufacturer’s maximum fill line.
Step 70: Secure the Lid
Lock the pressure cooker lid according to the manufacturer’s instructions.
Step 71: Select High Pressure
Choose the high-pressure cooking setting.
Step 72: Set the Cooking Time
Cook for approximately 2–3 hours, if supported by the appliance.
Step 73: Allow Natural Pressure Release
Let the pressure decrease naturally after cooking.
Step 74: Open Safely
Open the lid only after the pressure has fully released.
Step 75: Check the Broth
The liquid should be deeply flavored and golden.
Part F: Straining the Broth
Step 76: Allow Brief Cooling
Let the hot broth settle for a few minutes before handling.
Step 77: Prepare a Large Bowl
Place a heatproof bowl or pot beneath a colander.
Step 78: Remove the Large Bones
Use tongs or a slotted spoon to remove the larger bones.
Step 79: Remove the Vegetables
Discard the exhausted vegetables and herbs.
Step 80: Pour Through the Colander
Carefully strain the remaining liquid.
Step 81: Prepare a Fine-Mesh Sieve
Position a fine-mesh sieve over a clean heatproof container.
Step 82: Strain Again
Pour the broth through the sieve to remove smaller particles.
Step 83: Use Cheesecloth if Desired
Line the sieve with cheesecloth for additional filtration.
Step 84: Check the Clarity
The broth should be relatively clear, although some natural cloudiness is normal.
Step 85: Discard the Solids
Dispose of the bones and strained solids safely.
Part G: Cooling and Removing Fat
Step 86: Prepare Storage Containers
Use clean, shallow, heat-safe containers.
Step 87: Divide the Broth
Pour the broth into smaller portions.
Step 88: Cool Rapidly
Place containers in an ice bath if necessary to speed cooling.
Step 89: Refrigerate Promptly
Transfer to the refrigerator without leaving the broth at room temperature for an extended period.
Step 90: Chill Thoroughly
Allow the broth to cool completely, preferably overnight.
Step 91: Check the Surface
A layer of fat may solidify on top.
Step 92: Remove the Fat if Desired
Use a spoon to lift away the hardened fat layer.
Step 93: Check the Texture
The chilled broth may have a jelly-like consistency.
Step 94: Portion for Storage
Divide into airtight refrigerator-safe or freezer-safe containers.
Part H: Serving and Using the Broth
Step 95: Measure a Serving
Pour the desired amount of broth into a saucepan.
Step 96: Heat Gently
Warm over medium-low heat until steaming hot.
Step 97: Season if Desired
Add a small amount of salt or black pepper to taste.
Step 98: Stir
Mix until evenly seasoned.
Step 99: Pour into a Mug or Bowl
Serve as a warm beverage or light savory broth.
Step 100: Use in Cooking
Alternatively, incorporate the broth into soups, sauces, rice, or other recipes.
7. Description
Golden Chicken Bone Broth is a deeply savory cooking liquid made by slowly simmering chicken bones, vegetables, herbs, and water.
Its appearance ranges from light golden yellow to deep amber, depending on the roasting method and ingredients.
Roasted chicken bones and vegetables produce a darker, richer broth.
Fresh bones create a lighter flavor and appearance.
Onions contribute natural sweetness, while carrots add subtle earthy sweetness and color.
Celery provides a mild savory aroma.
Garlic adds depth, and fresh herbs contribute a fragrant herbal background.
Whole black peppercorns provide gentle warmth.
The broth has a smooth, clean texture when hot.
When refrigerated, it may develop a soft gelatinous consistency due to gelatin extracted from connective tissues.
This gelatin melts when the broth is reheated.
The flavor is rich and savory without needing large amounts of added salt.
Golden Chicken Bone Broth can be enjoyed as a warm drink or used as a base for homemade soups, stews, sauces, and grain dishes.
8. Nutritional Information
Approximate nutritional values per 1-cup serving of unsalted homemade chicken bone broth:
| Nutrient | Estimated Amount |
|---|---|
| Calories | 30–90 kcal |
| Protein | 5–12 g |
| Carbohydrates | 0–3 g |
| Total Fat | 0–5 g |
| Saturated Fat | 0–2 g |
| Sodium | Highly variable |
| Collagen-Derived Gelatin | Variable |
| Calcium | Variable |
| Potassium | Variable |
These are broad estimates rather than a laboratory analysis. Actual values depend heavily on the chicken parts used, the water quantity, cooking time, reduction, and amount of fat removed.
A gelatinous texture does not reliably indicate the exact protein or mineral content of the finished broth.
9. Recipe Details
| Category | Details |
|---|---|
| Recipe Name | Golden Chicken Bone Broth |
| Also Known As | Homemade Chicken Bone Broth / Liquid Gold Broth |
| Cuisine | Traditional / International |
| Preparation Time | Approximately 20 Minutes |
| Optional Roasting Time | 25–30 Minutes |
| Stovetop Cooking Time | 12–24 Hours |
| Slow Cooker Cooking Time | 12–24 Hours |
| Pressure Cooker Time | 2–3 Hours, Plus Pressure Release |
| Yield | Approximately 8–12 Cups |
| Difficulty | Easy |
| Main Ingredients | Chicken Bones, Onions, Carrots, Celery, Garlic |
| Cooking Methods | Stovetop, Slow Cooker, Pressure Cooker |
| Course | Broth / Soup Base |
| Flavor Profile | Savory, Rich, Aromatic, Herbal |
| Texture | Liquid When Hot, Potentially Gelatinous When Chilled |
| Best For | Soups, Stews, Sauces, Rice, Warm Beverages |
| Storage | Refrigerate or Freeze |
10. Conclusion
Golden Chicken Bone Broth is a versatile homemade staple that transforms chicken bones, vegetables, herbs, and water into a flavorful, aromatic broth.
The recipe is simple to prepare and can be adapted to different cooking methods.
Roasting the bones and vegetables creates a deeper golden color and more pronounced savory flavor.
Long, gentle simmering allows gelatin and flavor compounds to move into the cooking liquid.
The finished broth can be strained, chilled, and stored in convenient portions.
Its rich flavor makes it useful for soups, stews, sauces, grains, and many other dishes.
It can also be served warm as a comforting beverage.
Preparing broth at home allows you to control the ingredients, adjust the seasonings, and make practical use of chicken bones.
Whether prepared on the stovetop, in a slow cooker, or in a pressure cooker, Golden Chicken Bone Broth is a valuable addition to a home cook’s recipe collection.
11. Serving and Storage Recommendations
Serving Suggestions: Serve warm in a mug or small bowl, seasoned lightly with salt and pepper.
Soup Base: Use as the foundation for chicken noodle soup, vegetable soup, or chicken and wild rice soup.
Rice and Grains: Replace water with broth when cooking rice, quinoa, or other grains.
Sauces: Use to prepare gravies, pan sauces, and savory reductions.
Stews: Add to slow-cooked meat and vegetable stews.
Refrigeration: Store in clean, airtight containers in the refrigerator.
Refrigerator Storage: For conservative food safety, use within 3–4 days.
Freezing: Freeze in suitable containers for up to 4–6 months for best quality.
Portioning: Freeze small portions in silicone trays for convenient use in sauces and recipes.
Headspace: Leave space in freezer-safe jars or containers because liquids expand when frozen.
Cooling: Cool promptly in shallow containers or an ice bath. Refrigerate within 2 hours.
Fat Removal: Remove the solidified fat layer after chilling if a leaner broth is desired.
Reheating: Heat refrigerated broth thoroughly before serving.
Gelatin Texture: A jelly-like consistency when cold is normal and will disappear as the broth warms.
Discarding Spoiled Broth: Discard broth with signs of spoilage or broth that has been stored improperly. Do not rely on smell alone to determine food safety.
Make-Ahead: Collect suitable chicken carcasses and bones in freezer-safe bags until you have enough for a batch.
12. Embracing Healthful Indulgence
Golden Chicken Bone Broth is a flavorful way to incorporate a warm, savory liquid into everyday meals.
Depending on the ingredients and cooking method, homemade bone broth may contain protein, gelatin, and varying amounts of minerals.
Gelatin is produced when collagen from connective tissues breaks down during cooking.
Collagen-derived proteins contain amino acids such as glycine and proline.
However, the amount of collagen-derived protein in homemade broth varies considerably.
Chicken bone broth should not be considered a guaranteed treatment for joint problems, digestive disorders, skin conditions, or other medical concerns.
Although it is frequently promoted for these benefits, strong clinical evidence supporting specific health claims about bone broth is limited.
The broth can still be a useful addition to a balanced diet.
Homemade preparation allows control over the amount of salt added.
Using broth instead of heavily salted packaged cooking liquids may help manage sodium intake, depending on the recipe.
Removing the solidified fat layer after refrigeration can reduce the broth’s fat content.
Adding vegetables and herbs provides flavor without requiring excessive salt.
Bone broth is also versatile.
It can be combined with vegetables, grains, beans, and protein-rich ingredients to create more complete meals.
For people who enjoy warm savory beverages, it offers an alternative to sweet drinks.
Golden Chicken Bone Broth is best appreciated for its rich flavor, culinary usefulness, and comforting warmth.
With its deep golden color, aromatic vegetables, and smooth gelatin-rich texture, this homemade broth is a practical and delicious foundation for countless recipes.