
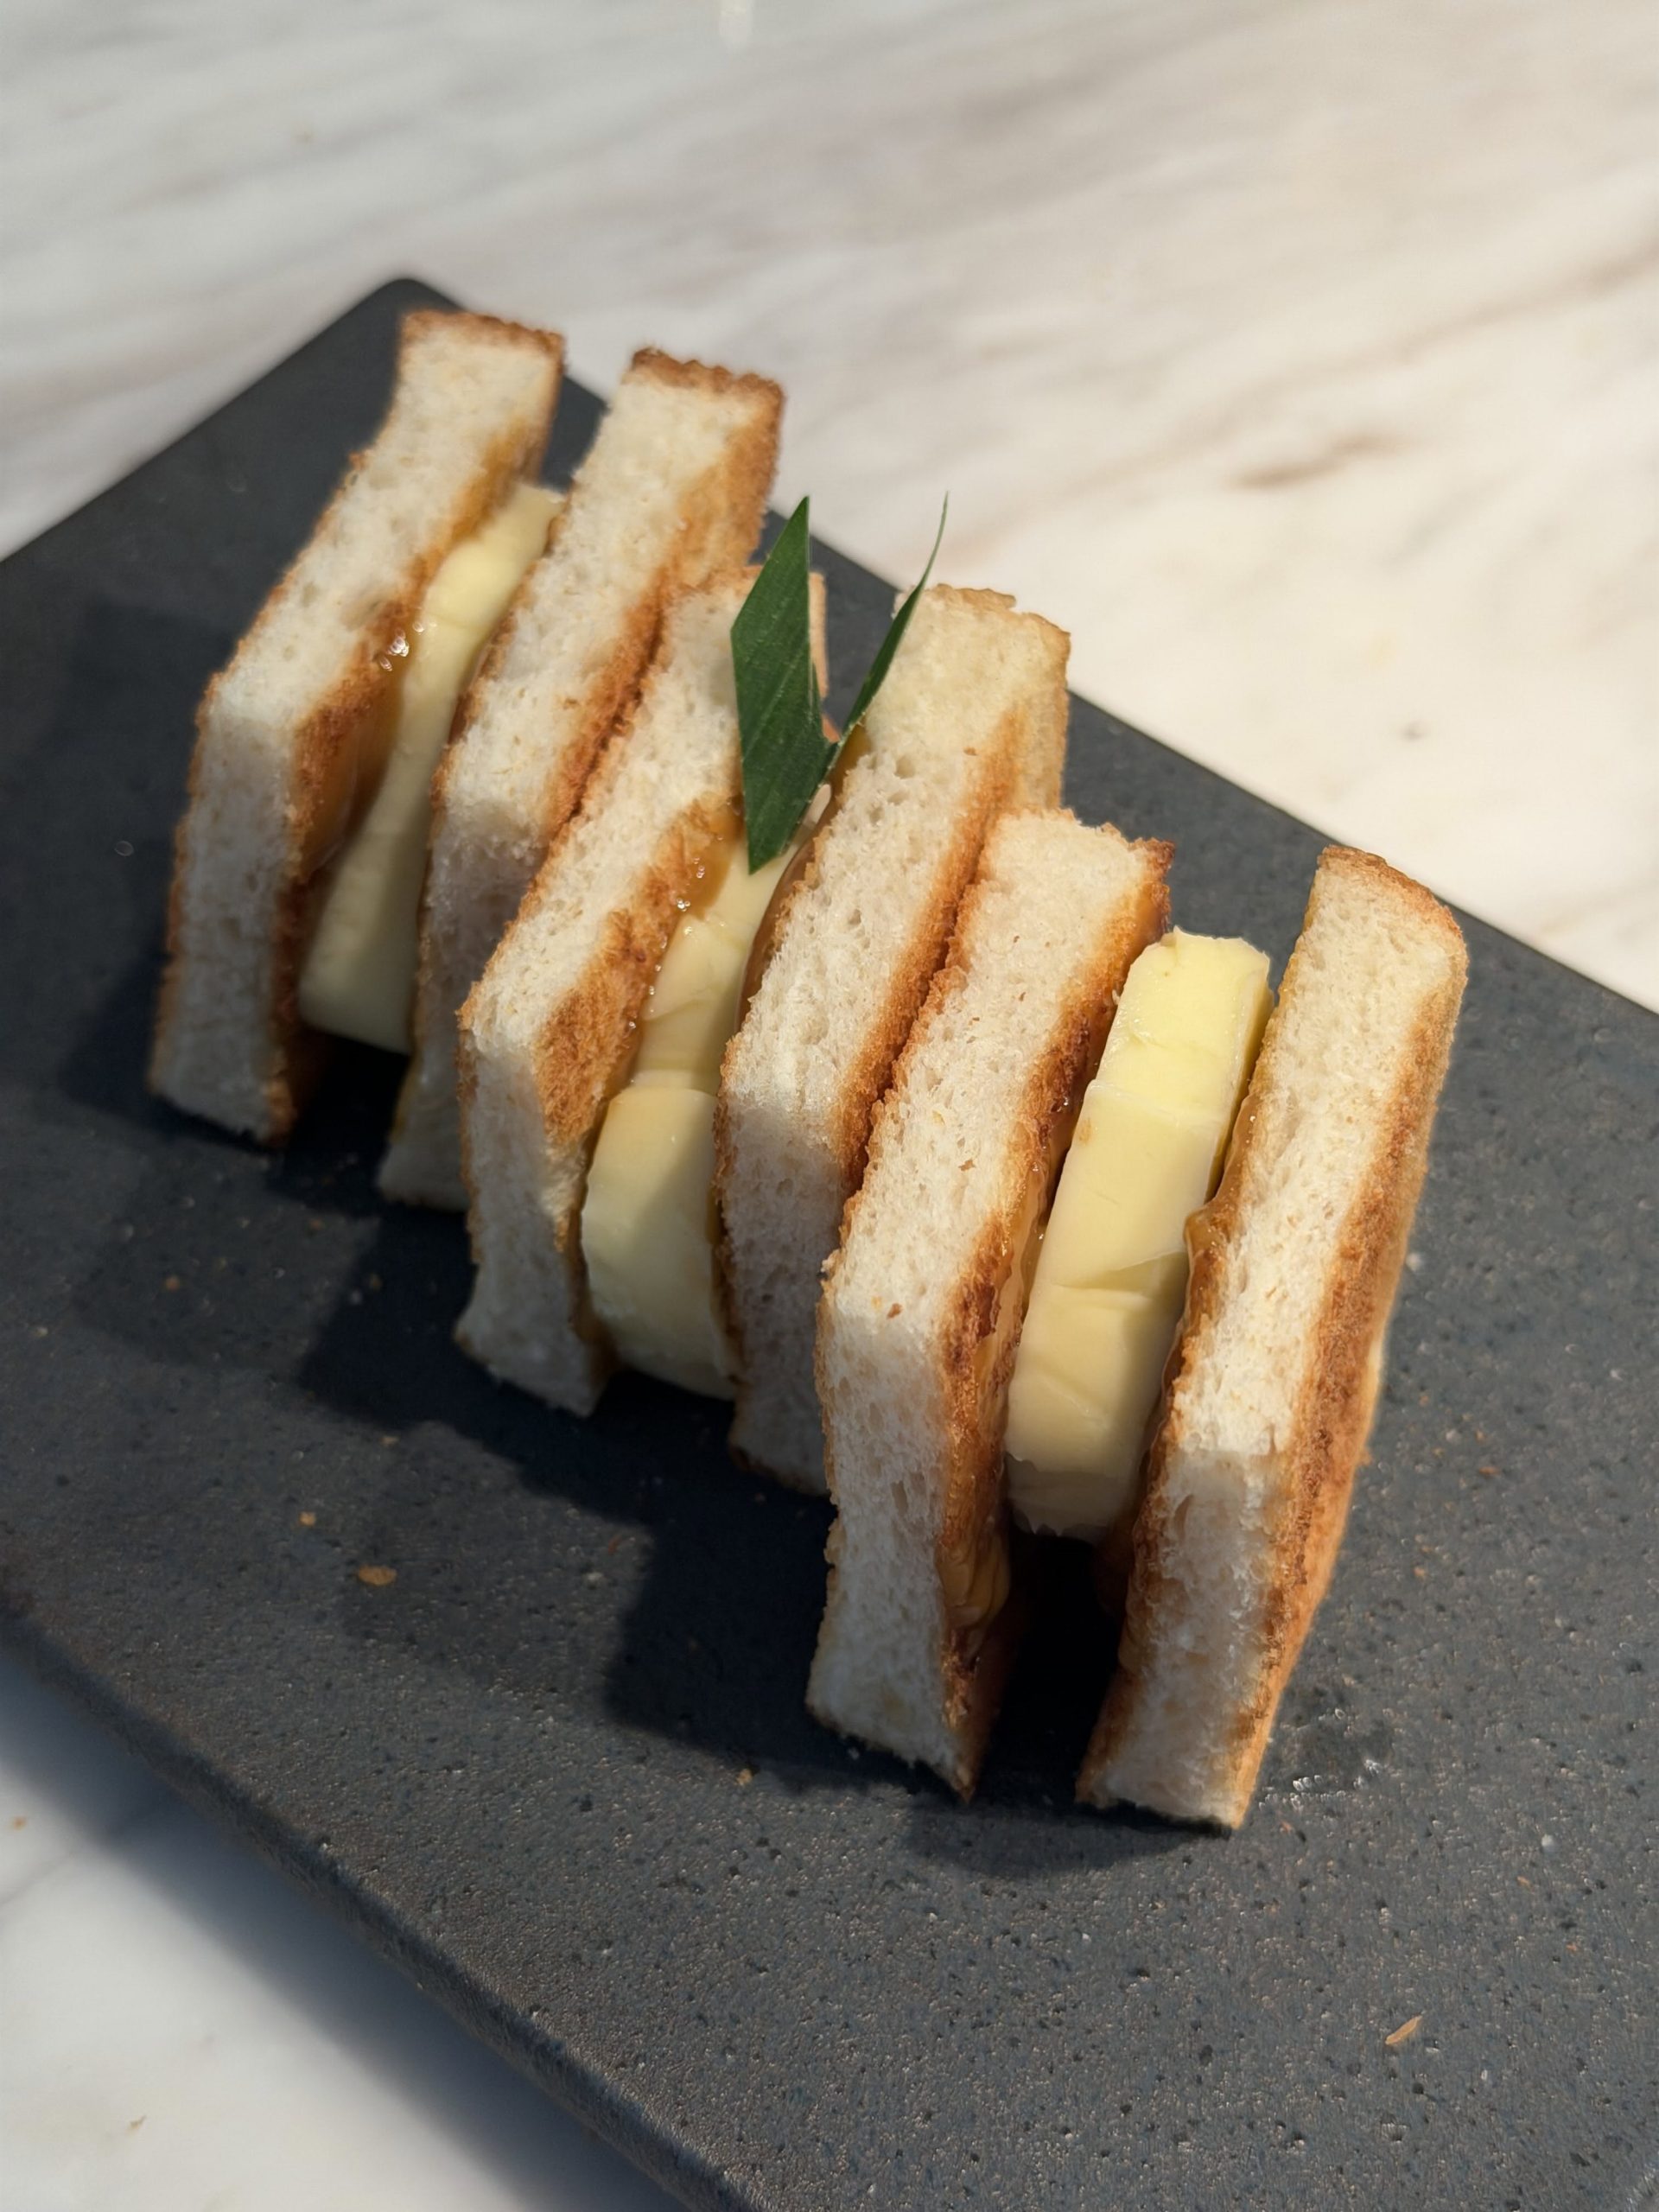
Golden, crispy bread filled with rich coconut jam and thick slices of cold salted butter. Learn how to make this classic Singaporean and Malaysian breakfast, including homemade kaya jam.
Beginner-Friendly
50 Minutes
Serves 2
1. Introduction
Kaya Toast is a beloved breakfast dish that combines crispy toasted bread, sweet coconut jam, and rich salted butter.
Popular throughout Singapore and Malaysia, this simple breakfast sandwich is famous for its wonderful contrast of textures and flavors.
The bread is toasted until beautifully golden and crunchy, then spread with a generous layer of homemade kaya—a smooth coconut-and-egg jam with a delicious caramel-like sweetness.
Cold salted butter is placed between the warm slices, creating a combination of sweet, salty, creamy, and crispy flavors.
What makes Kaya Toast especially delightful is its simplicity. With just a few ingredients, you can recreate a comforting breakfast traditionally enjoyed in Southeast Asian coffee shops.
This recipe includes everything you need to prepare homemade kaya jam and assemble perfectly crispy sandwiches.
2. Origin and Cultural Significance
Kaya Toast is closely associated with the breakfast culture of Singapore and Malaysia.
It is particularly popular in traditional coffee shops known as kopitiams, where customers gather to enjoy simple breakfast dishes alongside freshly brewed coffee or tea.
Kaya is a sweet coconut spread made from coconut milk or cream, eggs, and sugar. Pandan leaves are often added for their distinctive fragrance.
A traditional breakfast commonly combines kaya toast with soft-boiled eggs, soy sauce, white pepper, and a hot beverage. visitsingapore.com
Over time, Kaya Toast has become a recognizable part of Singaporean and Malaysian food culture.
Although modern versions include different breads and fillings, the classic combination of toasted bread, coconut jam, and salted butter remains especially popular.
3. Ingredients
This recipe includes two components: homemade kaya jam and the toasted sandwiches.
Part A: Homemade Kaya Coconut Jam
Yield: Approximately 1 small jar
- 200 ml full-fat coconut milk or coconut cream
- 4 large egg yolks
- 100 g (½ cup) palm sugar (gula melaka) or dark brown sugar
- 2–3 fresh pandan leaves, tied into a knot
- ⅛ teaspoon fine sea salt
Optional: ¼ teaspoon pandan extract if fresh pandan leaves are unavailable.
Part B: Kaya Toast
Makes: 2 sandwiches
- 4 slices white sandwich bread or milk bread
- 4 tablespoons homemade kaya jam
- 30–40 g cold salted butter, cut into thin slabs
Ingredient Notes
Coconut milk: Full-fat coconut milk creates a rich, creamy kaya. Coconut cream produces an even thicker texture.
Egg yolks: Help thicken the jam and create its smooth, custard-like consistency.
Palm sugar: Adds a deeper caramel flavor and darker golden color.
Pandan leaves: Provide the traditional fragrant aroma associated with many Southeast Asian desserts.
Bread: Soft white sandwich bread becomes wonderfully crisp when toasted.
Salted butter: Balances the sweetness of the coconut jam. Using it straight from the refrigerator creates the signature warm-and-cold contrast.
4. Optional Additions
Although traditional Kaya Toast is simple, several variations can make it even more enjoyable.
- Pandan extract: Add a small amount for extra fragrance.
- Brown sugar: Use instead of palm sugar when necessary.
- Unsalted butter: Substitute if preferred, adding a tiny pinch of salt to the sandwich.
- Whole-wheat bread: A heartier alternative to white bread.
- Dairy-free butter: Makes the toast suitable for those avoiding dairy.
- Toasted coconut flakes: Sprinkle a few over the kaya for additional texture.
- Vanilla extract: Add ¼ teaspoon to the jam for a subtle variation.
For a more traditional experience, keep the sandwich simple and serve it with soft-boiled eggs.
5. Tips for Success
1. Use Full-Fat Coconut Milk
Low-fat coconut milk produces a thinner jam with less richness.
Full-fat coconut milk creates a smoother, more satisfying spread.
2. Cook the Kaya Gently
Excessive heat can cause the eggs to scramble.
A double boiler provides gentle, indirect heat that makes controlling the temperature easier.
3. Stir Frequently
Stir the mixture continuously or very frequently as it thickens.
This helps prevent lumps and encourages an even texture.
4. Use a Thermometer
Because kaya contains eggs, bring the mixture to at least 160°F (71°C) while stirring. This is the recommended minimum temperature for egg dishes. FoodSafety.gov
5. Don’t Rush the Jam
Homemade kaya usually requires patient cooking.
The mixture will gradually thicken into a smooth spread.
6. Keep the Butter Cold
Cold butter is essential for the traditional texture.
It should soften slightly against the hot bread without immediately melting into liquid.
7. Toast the Bread Until Crisp
The bread should develop a golden surface and noticeable crunch.
Avoid leaving it soft or lightly warmed.
8. Assemble Immediately Before Serving
Kaya Toast tastes best when the bread is still crisp and the butter remains slightly cool.
6. Step-by-Step Instructions
Part 1: Make the Homemade Kaya Jam
Step 1: Prepare the Ingredients
Measure the coconut milk, sugar, egg yolks, and salt.
If using fresh pandan leaves, wash them thoroughly and tie them into a loose knot.
This makes them easier to remove after cooking.
Step 2: Mix the Egg Yolks and Sugar
In a heatproof mixing bowl, combine the egg yolks, palm sugar, and salt.
Whisk gently until evenly combined.
Avoid incorporating excessive air into the mixture.
Step 3: Add the Coconut Milk
Gradually pour in the coconut milk while stirring.
Continue mixing until the ingredients are well combined.
If the palm sugar is in solid blocks, finely chop or grate it beforehand so it dissolves more easily.
Step 4: Prepare the Double Boiler
Fill a medium saucepan with approximately 1–2 inches of water.
Bring the water to a gentle simmer over medium-low heat.
Place the heatproof bowl over the saucepan.
Make sure the bottom of the bowl does not touch the simmering water.
Step 5: Add the Pandan Leaves
Place the knotted pandan leaves into the coconut mixture.
Stir gently to distribute their aroma throughout the jam.
Step 6: Cook Until Thickened
Cook over gentle heat for approximately 30–40 minutes, stirring frequently and continuously as the mixture thickens.
Keep the water beneath the bowl at a gentle simmer.
The mixture should gradually become:
- Thicker and creamier
- Smooth and spreadable
- Golden brown or caramel-colored
- Fragrant with coconut and pandan
Use a food thermometer to confirm that the mixture reaches at least 160°F (71°C).
If the jam thickens before reaching that temperature, continue heating gently while stirring.
Step 7: Check the Consistency
Dip a spoon into the jam.
The mixture should coat the back of the spoon and leave a visible line when you run a finger through it.
Remember that kaya thickens further as it cools.
Step 8: Remove and Strain
Remove the bowl from the heat.
Discard the pandan leaves.
If the jam contains small lumps, pass it through a fine-mesh sieve while still warm.
This creates a smoother texture.
Step 9: Cool and Refrigerate
Transfer the finished kaya to a clean, heat-safe container.
Allow it to cool briefly, then cover and refrigerate promptly.
For conservative home storage, use within 3–4 days, following general guidance for homemade egg-based custards. FoodSafety.gov
Do not leave the jam at room temperature for extended periods.
Part 2: Assemble the Kaya Toast
Step 1: Prepare the Bread
Trim the crusts from the bread slices if you prefer the traditional neat appearance.
You can leave the crusts on for additional crunch.
Step 2: Toast Until Golden
Toast the bread using a toaster, toaster oven, or dry skillet.
Cook until both sides are golden brown and crisp.
For a traditional coffee-shop-inspired texture, aim for thin, crunchy toast rather than thick, soft bread.
Step 3: Spread the Kaya
While the bread is still warm, spread approximately 1 tablespoon of homemade kaya onto one side of each slice.
Spread evenly, covering the bread from edge to edge.
Step 4: Add the Cold Salted Butter
Remove the salted butter from the refrigerator.
Cut it into thin, flat slabs.
Arrange the butter over the kaya on two of the bread slices.
Distribute the butter evenly so each bite contains a little of the salty richness.
Step 5: Assemble the Sandwiches
Place the remaining slices over the butter-covered bread, with the kaya-covered sides facing inward.
Gently press the sandwiches together.
Avoid pressing too firmly, which can cause the filling to squeeze out.
Step 6: Slice and Serve
Cut each sandwich into halves or three rectangular fingers.
Arrange on a small serving plate.
Serve immediately while the bread remains warm and crispy.
For a complete traditional breakfast, pair the toast with soft-boiled eggs and hot coffee or tea.
7. Description
Kaya Toast offers a wonderful contrast of temperatures, textures, and flavors.
The crisp bread provides a delicate crunch, while the kaya adds a smooth, sweet coconut filling.
Cold salted butter introduces richness and a subtle savory contrast.
| Component | Flavor and Texture |
|---|---|
| Toasted bread | Golden, light, and crispy |
| Kaya jam | Sweet, creamy, and coconut-rich |
| Palm sugar | Deep caramel sweetness |
| Pandan | Delicate, fragrant aroma |
| Salted butter | Rich, creamy, and slightly salty |
| Finished sandwich | Crispy outside with a soft, flavorful filling |
The combination is especially delicious when the toast is freshly prepared and the butter has only begun to soften.
8. Nutritional Information
The following values are approximate estimates for one sandwich, using two bread slices, 2 tablespoons of kaya, and 15–20 g of salted butter.
| Nutrient | Estimated Amount |
|---|---|
| Calories | 350–450 kcal |
| Protein | 6–9 g |
| Carbohydrates | 35–45 g |
| Total Fat | 20–28 g |
| Saturated Fat | 12–18 g |
| Dietary Fiber | 1–3 g |
| Sugars | 15–25 g |
These values vary depending on the bread, coconut milk, sugar, and amount of butter used.
The estimate does not include soft-boiled eggs or beverages served alongside the toast.
9. Recipe Details
| Detail | Information |
|---|---|
| Recipe Name | Homemade Kaya Toast |
| Cuisine | Singaporean and Malaysian |
| Course | Breakfast or Snack |
| Kaya Preparation Time | 10 minutes |
| Kaya Cooking Time | 30–40 minutes |
| Toast Preparation Time | 5 minutes |
| Toast Cooking Time | 5 minutes |
| Total Active Time | Approximately 50–60 minutes |
| Servings | 2 sandwiches |
| Kaya Yield | Approximately 1 small jar |
| Difficulty | Easy to Moderate |
| Cooking Method | Double Boiler and Toasting |
10. Conclusion
Homemade Kaya Toast is a delicious way to experience one of Singapore’s and Malaysia’s most beloved breakfast traditions.
The combination of crispy bread, fragrant coconut jam, and cold salted butter creates a unique balance of sweetness, richness, and crunch.
Although homemade kaya requires some patience, the preparation is straightforward and uses just a few ingredients.
Once the jam is ready, assembling the sandwiches takes only minutes.
Whether served as a quick breakfast, afternoon snack, or comforting homemade treat, Kaya Toast brings a wonderful taste of Southeast Asian coffee-shop culture into your kitchen.
11. Serving and Storage Recommendations
Traditional Serving Suggestions
Kaya Toast is often served as part of a traditional kopitiam breakfast.
Popular accompaniments include:
- Soft-boiled eggs: Season with a little soy sauce and white pepper.
- Hot coffee: Singaporean-style kopi pairs beautifully with the sweet toast.
- Milk tea: A comforting alternative to coffee.
- Fresh fruit: Serve with sliced mango, banana, or papaya.
How to Make Soft-Boiled Eggs
For a simple accompaniment:
- Bring a saucepan of water to a gentle boil.
- Carefully add 2 large eggs.
- Cook for approximately 6–7 minutes, depending on egg size and starting temperature.
- Transfer briefly to cool water.
- Crack into a small bowl and season with soy sauce and white pepper.
Traditional kopitiam eggs are often served with very soft whites and runny yolks. Because undercooked eggs carry a food-safety risk, use pasteurized eggs if preparing them this way, especially for vulnerable diners.
Storing Homemade Kaya
Store homemade kaya in a clean, airtight container in the refrigerator at 40°F (4°C) or below.
For this homemade egg-based version, a conservative recommendation is to consume it within 3–4 days.
Always use a clean spoon to prevent contamination.
Storing Kaya Toast
Assembled Kaya Toast is best eaten immediately.
Refrigerating completed sandwiches causes the bread to soften and lose its crisp texture.
For better results, store the kaya separately and prepare fresh toast whenever needed.
Make-Ahead Tips
Prepare the kaya jam in advance.
When ready to eat:
- Toast the bread.
- Spread the chilled or slightly softened kaya.
- Add cold salted butter.
- Assemble and serve immediately.
This reduces breakfast preparation to approximately 5 minutes.
12. Embracing Healthful Indulgence
Kaya Toast is a sweet, comforting breakfast that can be enjoyed as part of a varied diet.
The coconut milk provides its characteristic richness, while the eggs in the jam contribute protein and help create its creamy texture.
The dish also contains sugar and saturated fat, particularly from the kaya and salted butter.
For a lighter variation, use a thinner layer of jam, reduce the amount of butter, or choose whole-grain bread for additional fiber.
Pairing Kaya Toast with fruit and a protein-rich accompaniment can help create a more substantial breakfast.
Still, the traditional version is best appreciated for what makes it special: the contrast between sweet coconut jam, salty butter, and freshly toasted bread.
Golden, crunchy, creamy, and wonderfully fragrant—homemade Kaya Toast is a delightful breakfast worth savoring!
#KayaToast #SingaporeanFood #MalaysianBreakfast #CoconutJam #HomemadeBreakfast