
1. Introduction
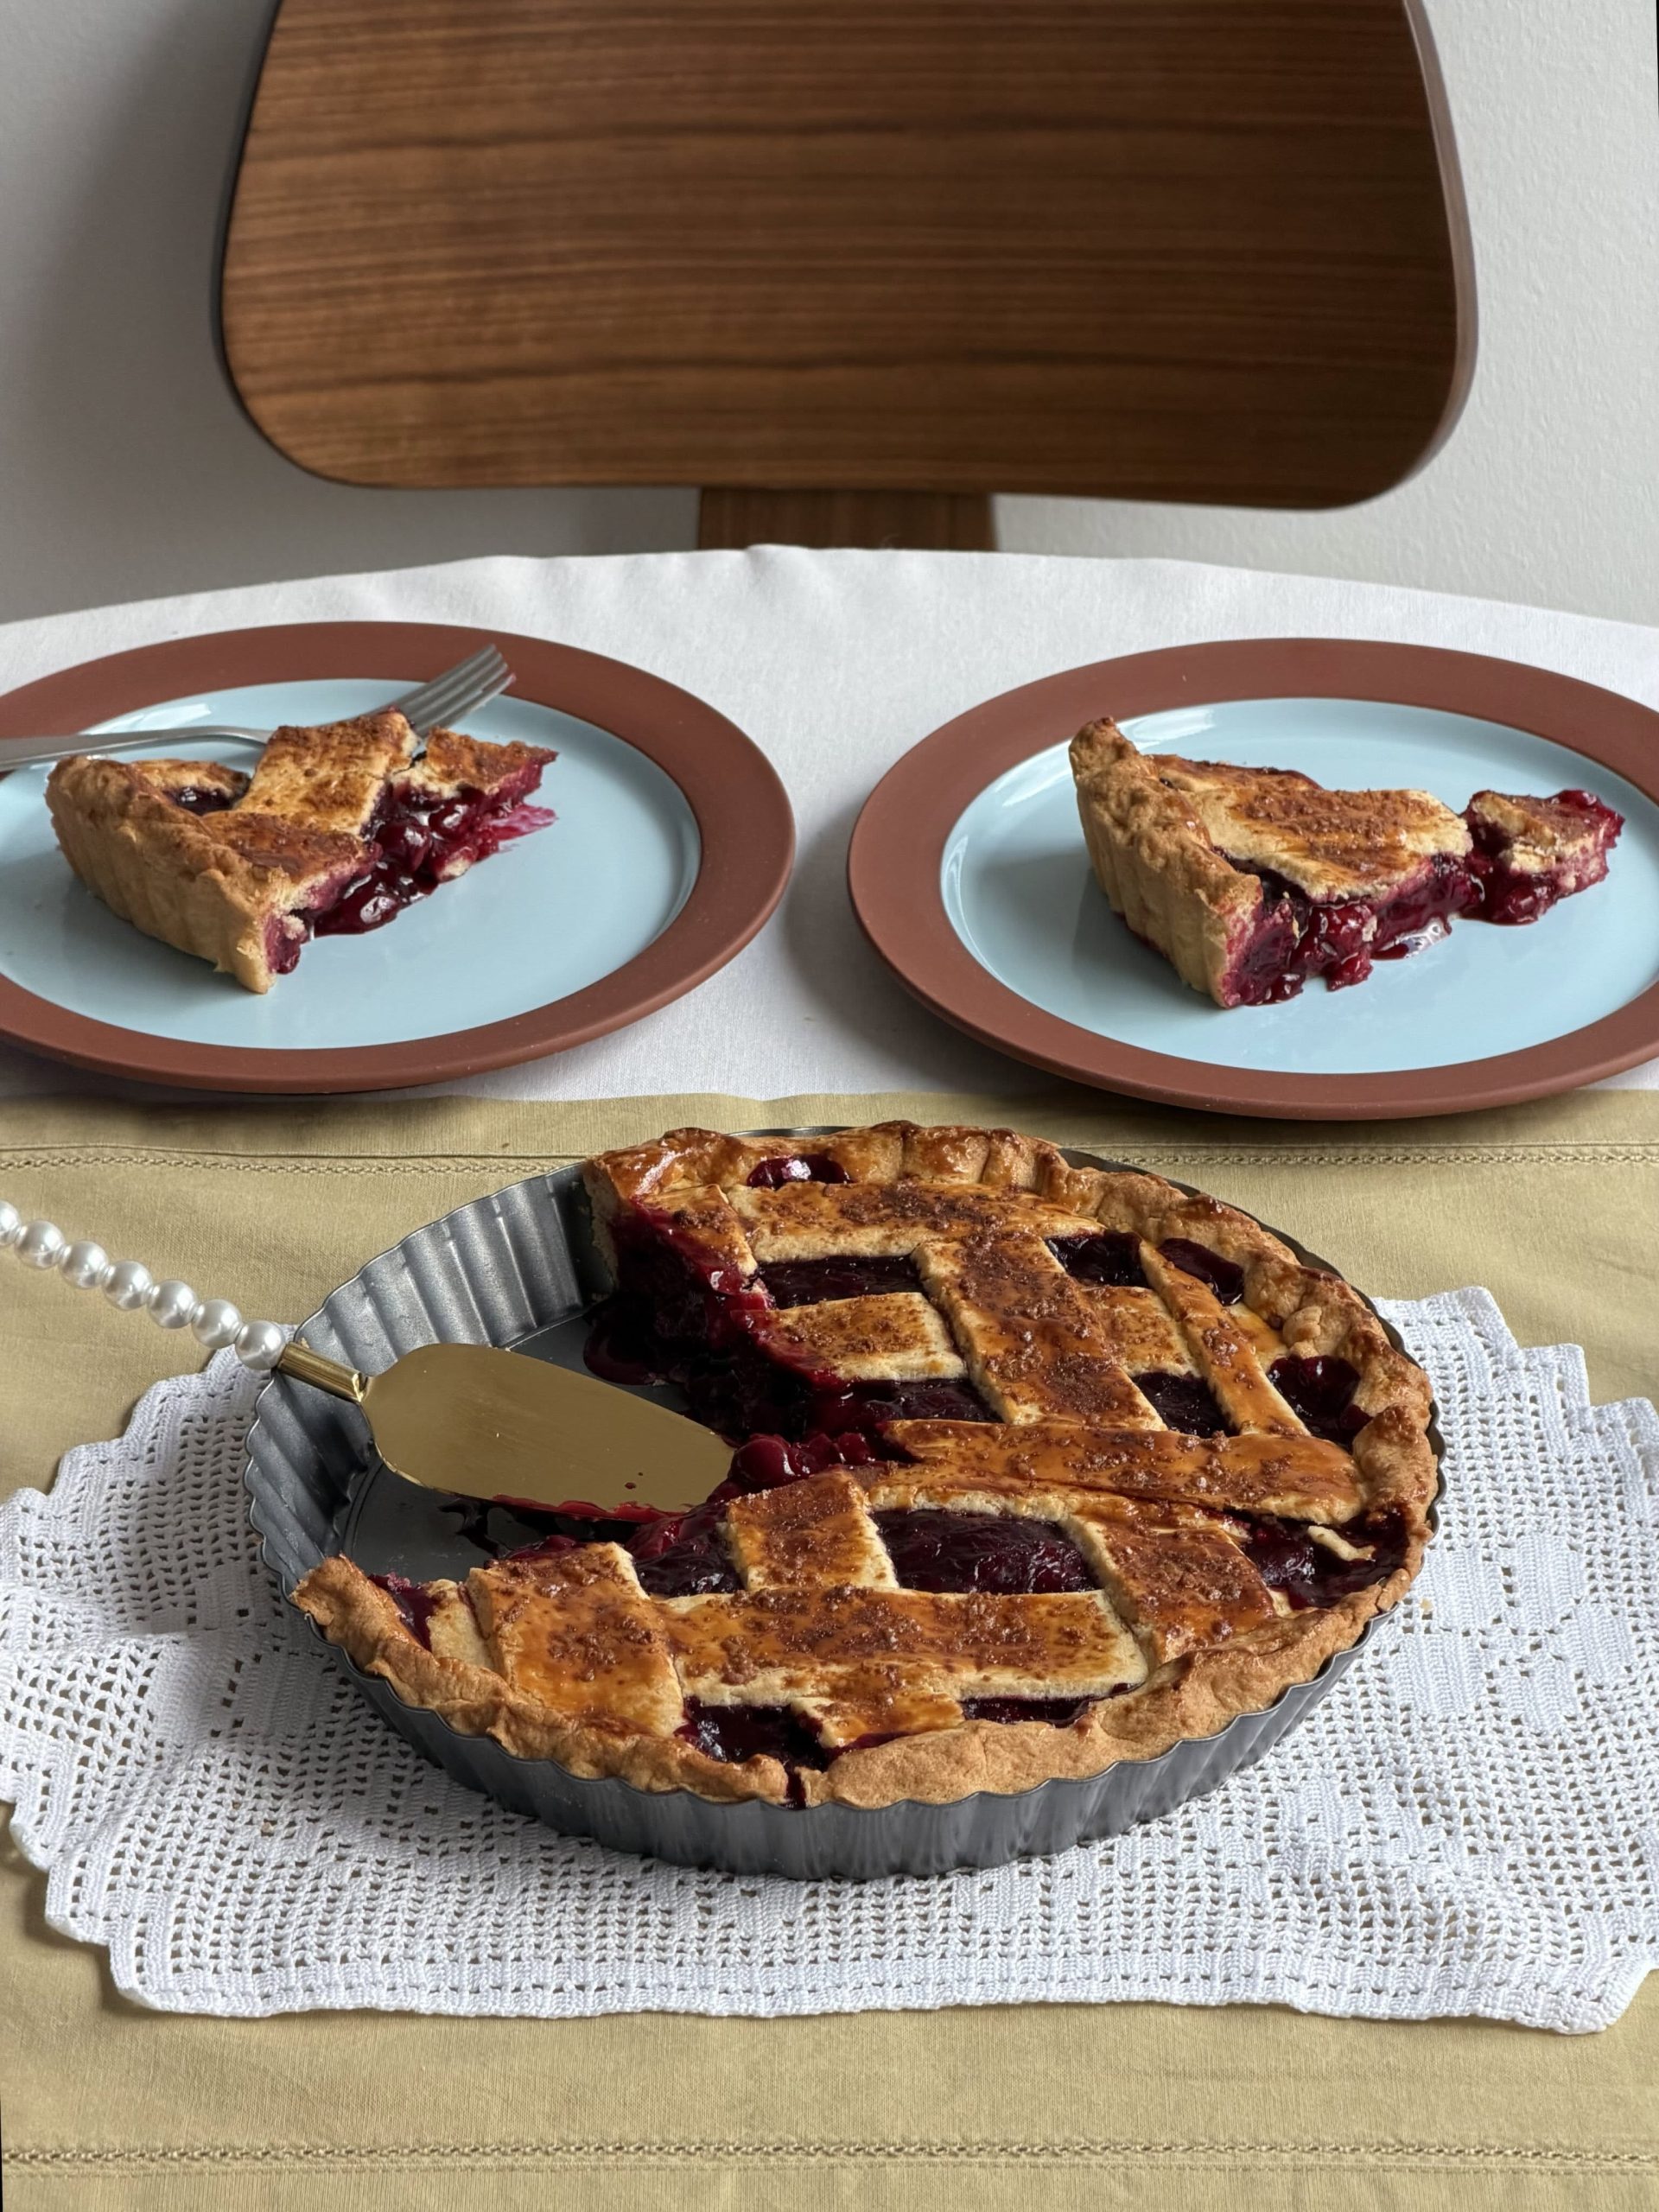
Classic Homemade Tart Cherry Pie is a beautiful, comforting dessert featuring a buttery, flaky pastry crust filled with sweet-tart cherries and topped with an elegant woven lattice.
As the pie bakes, the cherry filling becomes thick, glossy, and jammy, while the golden pastry develops a delicate, crisp texture.
Perfect for summer gatherings, family celebrations, or weekend baking, this homemade cherry pie is delicious served on its own or with vanilla ice cream.
2. Origin and Cultural Significance
Cherry pies have a long history in European and American baking traditions. In the United States, tart cherry pie became especially popular in regions where sour cherries are grown, including Michigan.
The lattice crust is a classic pastry technique that allows steam to escape while showcasing the colorful fruit filling.
Today, homemade cherry pie remains a favorite dessert for holidays, family gatherings, and seasonal celebrations.
3. Ingredients
For the Flaky Pie Crust
- 2½ cups (315 g) all-purpose flour
- 1 cup (226 g) cold unsalted butter, cubed
- 1 tablespoon granulated sugar
- ½ teaspoon salt
- 5–8 tablespoons ice water
For the Tart Cherry Filling
- 5–6 cups (approximately 750–900 g) pitted tart cherries, fresh or frozen
- 1 cup (200 g) granulated sugar
- ¼ cup (32 g) cornstarch, especially for juicy or frozen cherries
- 1 teaspoon fresh lemon juice
- ¼ teaspoon almond extract
- ½ teaspoon vanilla extract
- 1 tablespoon (14 g) unsalted butter
For the Egg Wash
- 1 large egg
- 1 tablespoon water
- 1–2 tablespoons coarse sugar
4. Optional Additions
- Lemon zest: Adds a fresh citrus aroma.
- Cinnamon: A small pinch creates a warmer flavor.
- Orange zest: Complements the cherries beautifully.
- Vanilla bean paste: Adds a deeper vanilla flavor.
- Vanilla ice cream: Creates a delicious hot-and-cold dessert combination.
- Whipped cream: Adds a light, creamy finishing touch.
5. Tips for Success
- Keep the butter and pastry dough cold for a flaky crust.
- Avoid overworking the dough, which can make the pastry tough.
- Use tart cherries for the classic sweet-and-sour flavor.
- If using frozen cherries, thaw and drain them, reserving some juice if needed.
- Use enough cornstarch to thicken the fruit juices.
- Chill the assembled pie briefly before baking to help maintain the lattice shape.
- Bake until the filling bubbles thickly near the center, not just around the edges.
- Cool completely before slicing to allow the filling to set.
6. Instructions
Step 1: Prepare the Pastry Dough
In a large bowl, combine flour, sugar, and salt.
Add the cold butter cubes and work them into the flour using a pastry cutter or fingertips until the mixture resembles coarse crumbs with some pea-sized butter pieces.
Gradually add ice water, one tablespoon at a time, until the dough holds together when pressed.
Step 2: Chill the Dough
Divide the dough into two portions, making one slightly larger for the bottom crust.
Shape into disks, wrap tightly, and refrigerate for at least 30–60 minutes.
Step 3: Prepare the Cherry Filling
In a large bowl, combine the pitted tart cherries, sugar, cornstarch, lemon juice, almond extract, and vanilla extract.
Toss gently until evenly coated.
Let stand for approximately 15 minutes.
Step 4: Prepare the Pie Pan
Preheat the oven to 400°F (205°C).
Roll the larger pastry disk into a circle approximately 12 inches wide.
Carefully transfer it into a 9-inch deep pie plate or a suitably deep fluted tart pan.
Press gently into the bottom and sides without stretching the dough.
Step 5: Add the Cherry Filling
Spoon the cherry mixture into the prepared crust, including its juices.
Spread evenly and dot the filling with small pieces of butter.
Step 6: Create the Lattice Crust
Roll out the remaining dough and cut into strips approximately ¾ inch wide.
Arrange half the strips across the pie in one direction.
Weave the remaining strips over and under to create a lattice pattern.
Trim the excess pastry and press the edges together to seal.
Step 7: Add the Egg Wash
Whisk the egg with one tablespoon of water.
Brush the lattice and exposed pastry edges lightly with egg wash.
Sprinkle with coarse sugar.
For better shape retention, refrigerate the assembled pie for 15 minutes if the pastry has softened.
Step 8: Bake the Pie
Place the pie on a rimmed baking sheet.
Bake at 400°F (205°C) for 20 minutes.
Reduce the temperature to 375°F (190°C) and continue baking for approximately 40–50 minutes.
The crust should be deeply golden, and the cherry filling should bubble visibly through the center of the lattice.
Cover the edges loosely with foil if they brown too quickly.
Step 9: Cool and Serve
Transfer the pie to a wire rack.
Allow it to cool for at least 3–4 hours before slicing.
Serve at room temperature or gently warmed, with vanilla ice cream or whipped cream if desired.
7. Description
This homemade tart cherry pie features a beautifully golden lattice crust with crisp, buttery layers.
Inside, the cherry filling is glossy, vibrant red, and bursting with sweet-tart fruit flavor.
The contrast between flaky pastry and soft, jammy cherries creates a classic dessert that is both rustic and elegant.
8. Nutritional Information
Approximate values per slice, based on 8 servings.
| Nutrient | Estimated Amount |
|---|---|
| Calories | 480–550 kcal |
| Protein | 5–7 g |
| Carbohydrates | 65–75 g |
| Fat | 24–28 g |
| Fiber | 2–4 g |
| Sugars | 35–45 g |
Values vary depending on the cherries, sugar quantity, and serving size.
9. Recipe Details
- Prep Time: 30 minutes
- Dough Chilling: 30–60 minutes
- Bake Time: 60–70 minutes
- Cooling Time: 3–4 hours
- Total Time: Approximately 5–6 hours
- Servings: 8 slices
- Cuisine: American-inspired
- Course: Dessert
- Difficulty: Moderate
- Equipment: 9-inch deep pie plate or deep fluted tart pan, mixing bowls, rolling pin, pastry cutter, and baking sheet
10. Conclusion
Classic Homemade Tart Cherry Pie combines juicy, tangy cherries with a rich, buttery pastry crust for a timeless homemade dessert.
Its golden lattice design and vibrant filling make it a beautiful centerpiece for family gatherings and special occasions.
With a little patience during chilling and cooling, you can achieve a crisp crust and perfectly set cherry filling.
11. Recommendation
Serving: Enjoy with vanilla ice cream, whipped cream, or a light dusting of powdered sugar.
Make-ahead: Prepare the pastry dough up to two days in advance and refrigerate.
Storage: Cover and refrigerate leftover pie for up to 4 days.
Freezing: Freeze the fully cooled pie, tightly wrapped, for up to 3 months for best quality.
Reheating: Warm individual slices in a 300°F (150°C) oven until heated through.
Pan selection: A standard deep pie plate is the most reliable option for this amount of filling. A shallow tart pan may overflow, so reduce the filling or use a deeper pan.
12. Embracing Healthful Indulgence
Tart cherries provide vitamin C, fiber, and naturally occurring plant compounds.
However, this pie also contains added sugar and butter, making it a rich dessert best enjoyed in moderate portions.
For a slightly lighter version, reduce the added sugar according to the natural sweetness of the cherries or serve smaller slices with fresh fruit.
This classic cherry pie is a wonderful way to enjoy seasonal fruit in a comforting homemade dessert.