
Introduction
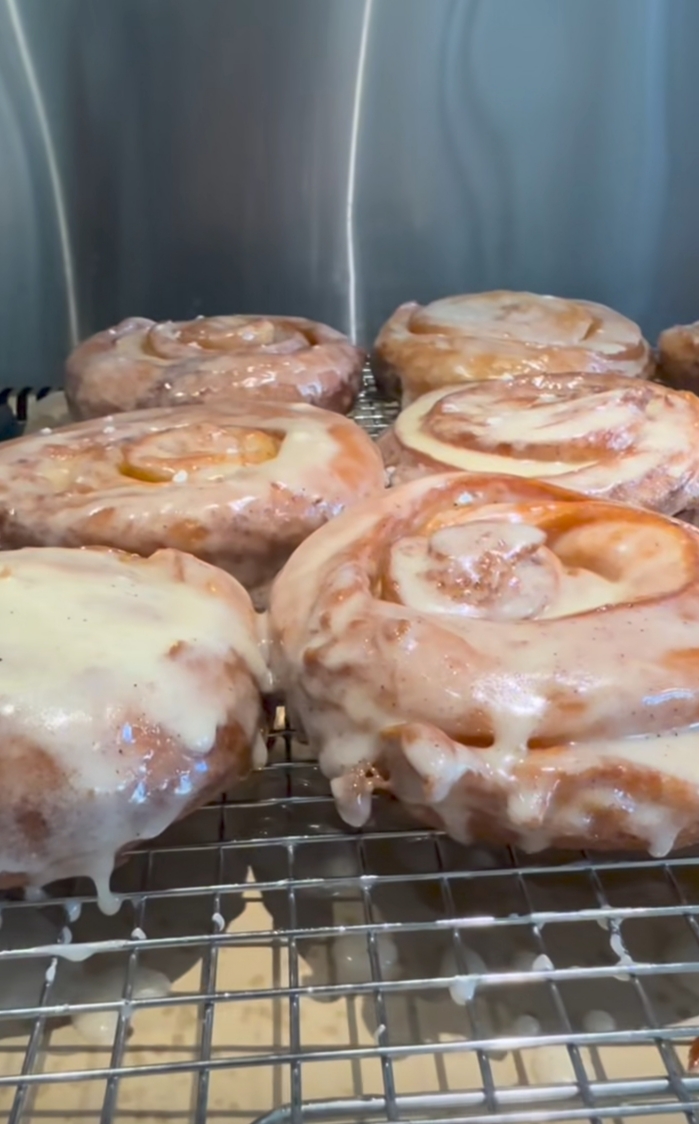
These Homemade Honey Buns are soft, fluffy, sweet, and irresistibly sticky, making them the perfect treat for breakfast, brunch, or an afternoon snack. Combining the comforting flavors of cinnamon rolls with the sweet, bakery-style appeal of glazed honey buns, this recipe delivers tender dough, a buttery cinnamon-sugar filling, and a smooth honey glaze in every bite.
The yeast dough rises into a light, pillowy texture, while honey adds a delicate sweetness and helps create a beautifully golden finish. Once baked, the buns are coated with a sweet glaze that settles into the swirls and gives each bun its signature sticky coating.
Whether you serve them fresh from the oven on a relaxed weekend morning or prepare them for a family gathering, these homemade honey buns are a delicious way to bring warmth and sweetness to your kitchen.
Origin of Homemade Honey Buns
Honey buns have become a familiar sweet pastry in American bakeries and grocery stores. Commercial honey buns are typically soft, sweet pastries coated with a honey-flavored glaze, while homemade versions often draw inspiration from cinnamon rolls, enriched yeast breads, and glazed doughnuts.
The exact history of honey buns varies depending on the style being discussed. However, their appeal comes from a combination of familiar baking traditions: yeast-raised dough, sweet fillings, and sugary coatings.
This homemade version takes inspiration from those flavors and textures, using a cinnamon-brown sugar filling and honey glaze to create a soft, swirled pastry that can be enjoyed fresh from the oven.
Cultural Significance
Sweet rolls and glazed pastries are enjoyed in many cultures, often appearing at breakfast tables, bakeries, holiday gatherings, and family celebrations.
In American baking, cinnamon rolls are especially popular for weekend breakfasts and special occasions. Honey buns offer a similar combination of soft dough and sweetness, but their sticky glaze gives them a distinctive character.
Making honey buns at home adds a personal touch to this tradition. The dough can be prepared in advance, the filling adjusted to taste, and the glaze customized for a thinner or thicker coating. The result is a comforting pastry that is easy to share with family and friends.
Ingredients Quantity
For the Dough
- ¾ cup warm milk: Provides moisture and helps create a soft dough. It should be warm, not hot.
- ⅓ cup warm water: Helps activate the yeast and brings the dough together.
- 1 package active dry yeast (2¼ teaspoons): Makes the dough rise and creates its light texture.
- ¼ cup granulated sugar: Feeds the yeast and adds sweetness.
- ¼ cup honey: Adds sweetness and a subtle honey flavor.
- 1 large egg: Provides richness, structure, and tenderness.
- ¼ cup (60 g) melted butter: Adds flavor and helps keep the dough soft.
- 4 cups all-purpose flour, plus extra for rolling: Provides the structure for the buns.
- 1 teaspoon salt: Balances the sweetness and improves the flavor.
For the Filling
- ¼ cup unsalted butter, softened: Helps the cinnamon-sugar mixture spread evenly.
- ½ cup brown sugar: Creates a rich, caramel-like sweetness.
- 1 tablespoon ground cinnamon: Adds warmth and classic cinnamon-roll flavor.
For the Honey Glaze
- 1½ cups powdered sugar: Creates a smooth, sweet glaze.
- 2 tablespoons honey: Adds the signature honey flavor.
- 2 tablespoons melted butter: Gives the glaze richness.
- 2–3 tablespoons warm milk: Adjusts the consistency.
- ½ teaspoon vanilla extract: Adds a pleasant aroma and flavor.
Optional Additions
Vanilla cinnamon filling: Add ½ teaspoon vanilla extract to the softened butter before spreading it over the dough.
Chopped pecans or walnuts: Sprinkle a small amount over the cinnamon-sugar filling for extra crunch.
Nutmeg: Add a pinch of ground nutmeg to complement the cinnamon.
Extra honey: Drizzle a little honey over the warm buns before glazing for a stronger honey flavor.
Cream cheese glaze: Replace the honey glaze with a mixture of softened cream cheese, powdered sugar, vanilla, and a little milk for a tangy finish.
Orange zest: Add a small amount of finely grated orange zest to the glaze for a fresh citrus note.
Maple glaze: Replace some of the honey with maple syrup for a different sweet flavor.
Tips for Success
Use warm, not hot, liquids. Milk and water should feel comfortably warm to the touch, ideally around 105–110°F (40–43°C). Liquids that are too hot can damage the yeast.
Check the yeast. If using active dry yeast, allow it to dissolve and become foamy before proceeding. If it does not foam after about 5–10 minutes, the yeast may be inactive.
Add flour gradually if needed. Flour absorbs moisture differently depending on the brand and environment. The dough should be soft and slightly tacky, not dry or stiff.
Knead until smooth. Proper kneading develops gluten, helping the buns rise and hold their shape. The dough should become elastic and relatively smooth.
Allow enough rising time. Dough rises at different speeds depending on room temperature. Look for the dough to roughly double in size rather than relying only on the clock.
Avoid overfilling. Spread the cinnamon filling in an even layer, leaving a small border around the edges. Too much filling can leak out during baking.
Roll the dough evenly. Keeping the dough at a consistent thickness helps the buns bake evenly.
Do not overbake. The buns should be lightly golden and soft in the center. Overbaking can make them dry.
Glaze while warm, not piping hot. Allow the buns to cool for about 5–10 minutes before glazing. This helps the glaze cling to the surface without melting away completely.
Instructions
Step 1: Activate the Yeast
In a small bowl, combine the warm water, warm milk, and active dry yeast. Add a small pinch of the measured sugar if desired.
Stir gently and allow the mixture to stand for 5–10 minutes, until foamy.
If the mixture does not foam, check the yeast’s freshness and the temperature of the liquids before continuing.
Step 2: Mix the Dough
In a large mixing bowl, combine the yeast mixture with the remaining granulated sugar, honey, egg, and melted butter.
Add the salt and most of the flour, reserving a little to adjust the dough’s consistency.
Mix with a wooden spoon or stand mixer fitted with a dough hook until a rough dough forms.
Step 3: Knead the Dough
Transfer the dough to a lightly floured surface and knead for approximately 8–10 minutes by hand, or 5–7 minutes with a stand mixer on low to medium speed.
Add a small amount of the reserved flour only if the dough is excessively sticky.
Continue kneading until the dough becomes smooth, elastic, and slightly tacky.
Step 4: Let the Dough Rise
Place the dough in a lightly greased bowl and turn it once to coat the surface.
Cover with a clean kitchen towel or plastic wrap and leave it in a warm place for approximately 1–1½ hours, or until doubled in size.
The exact time will depend on the temperature of your kitchen.
Step 5: Prepare the Cinnamon Filling
While the dough rises, combine the softened butter, brown sugar, and ground cinnamon in a small bowl.
Mix until the ingredients form a spreadable paste.
Set aside until the dough is ready.
Step 6: Roll Out the Dough
Gently punch down the risen dough to release excess air.
Transfer it to a lightly floured surface and roll it into a large rectangle approximately ¼ inch thick.
Aim for an even thickness so the buns bake uniformly.
Step 7: Add the Filling
Spread the cinnamon-butter mixture evenly over the dough, leaving a small border around the edges.
Starting from one long side, roll the dough into a tight log.
Pinch the seam gently to seal it.
Step 8: Cut and Arrange the Buns
Using a sharp knife or unflavored dental floss, cut the log into 10–12 equal pieces.
Arrange the buns in a lightly greased baking dish or on a parchment-lined baking sheet, leaving a little space between them.
Cover loosely and allow them to rise for another 30–45 minutes, or until noticeably puffy.
Step 9: Bake the Honey Buns
Preheat the oven to 350°F (175°C).
Bake the buns for approximately 20–25 minutes, or until lightly golden and cooked through in the center.
If the tops brown too quickly, cover them loosely with foil for the remaining baking time.
Remove the buns from the oven and let them cool for 5–10 minutes before glazing.
Step 10: Prepare the Honey Glaze
In a medium bowl, whisk together the powdered sugar, honey, melted butter, vanilla extract, and two tablespoons of warm milk.
Continue whisking until the glaze is smooth.
If it is too thick, add the remaining milk a little at a time. If it becomes too thin, add a little more powdered sugar.
The glaze should be thick enough to coat the buns while still flowing easily over the surface.
Step 11: Glaze the Buns
Spoon the glaze over the warm honey buns, spreading it gently to cover the tops.
Allow the glaze to settle into the cinnamon swirls and run slightly down the sides.
For a thicker coating, wait a few minutes and apply a second light layer.
Step 12: Serve and Enjoy
Let the glaze set for several minutes before serving.
Enjoy the honey buns while they are fresh and soft, paired with coffee, tea, or a glass of milk.
Description
Homemade Honey Buns are soft, fluffy yeast pastries filled with buttery cinnamon sugar and finished with a sweet honey glaze.
Each bun features tender layers of enriched dough wrapped around a warm cinnamon filling. The glaze adds a delicate honey flavor and a sticky finish that makes these pastries especially satisfying.
This recipe combines the familiar flavors of cinnamon rolls with the sweetness of glazed bakery buns, creating a homemade treat suitable for breakfast, brunch, dessert, or an afternoon snack.
The buns are best enjoyed fresh, when the dough is soft and the glaze is slightly sticky. Their inviting aroma and comforting flavor make them an excellent addition to a weekend baking routine.
Nutritional Information
The following values are estimates per bun, assuming the recipe makes 12 buns and includes the full cinnamon filling and honey glaze.
- Calories: Approximately 300–380
- Protein: 4–6 g
- Carbohydrates: 45–58 g
- Fat: 10–15 g
- Saturated Fat: 5–8 g
- Fiber: 1–2 g
- Sugar: 20–30 g
- Sodium: 200–320 mg
Actual values depend on the size of each bun, the amount of flour absorbed, and how much glaze is used.
Conclusion
Homemade Honey Buns are a delicious way to bring bakery-style sweetness into your kitchen. Their soft yeast dough, buttery cinnamon filling, and smooth honey glaze create a comforting combination that is hard to resist.
Although the recipe requires time for the dough to rise, the preparation itself is straightforward. With careful kneading, adequate rising time, and a simple glaze, you can make soft, flavorful buns that are perfect for sharing.
Serve them for breakfast, prepare them for a family gathering, or enjoy one as a sweet afternoon treat. Once you experience the flavor and texture of freshly baked honey buns, they may become a favorite in your homemade pastry collection.
Recommendation
For the best flavor, serve the buns slightly warm on the day they are baked. A cup of coffee or tea complements the cinnamon and honey beautifully.
If you want to prepare them ahead, assemble the buns in the baking dish, cover them tightly, and refrigerate overnight before the second rise. The following day, let them sit at room temperature until puffy before baking. Rising times may vary because the dough starts cold.
Store leftover buns in an airtight container at room temperature for up to 2 days. Reheat individual buns briefly in the microwave to soften the dough before serving.
You can also freeze baked buns without the glaze for up to 2–3 months. Thaw them, warm them gently, and prepare fresh glaze before serving.
Embracing Healthful Indulgence
Homemade honey buns are a sweet treat best enjoyed as part of a varied eating pattern. Preparing them at home allows you to control the size of each bun and adjust the amount of glaze to your taste.
For smaller portions, divide the dough into more pieces and use a light coating of glaze. You can also reduce the glaze slightly if you prefer the cinnamon filling and honey flavor to stand out without as much sweetness.
Pairing a bun with plain yogurt or fresh fruit can add variety to a breakfast or snack. Most importantly, enjoy these soft, sweet pastries mindfully and share them with family and friends as a comforting homemade treat.