
Introduction
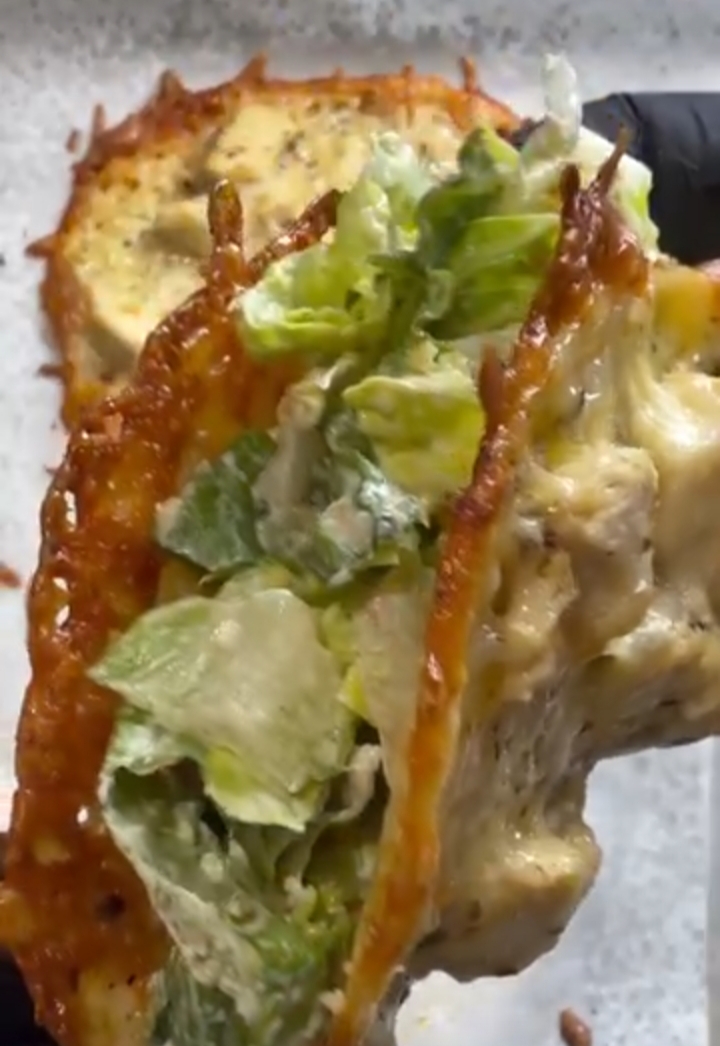
Taco Chicken Caesar Salad with Crispy Cheese Shells is a delicious twist on the classic Caesar salad that combines bold flavors, crunchy textures, and plenty of cheesy goodness. Instead of using traditional flour tortillas, this recipe features golden, oven-baked mozzarella and Parmesan shells seasoned with garlic, onion, and Italian herbs.
Inside each crispy shell, you’ll find tender grilled or crispy chicken, fresh romaine lettuce, creamy Caesar dressing, and extra shaved Parmesan. The result is a satisfying handheld meal that brings together the familiar flavors of chicken Caesar salad with the fun shape and crunch of a taco.
This recipe is perfect for a quick lunch, an easy dinner, or a creative appetizer when you want something different from an ordinary salad. The cheese shells are simple to prepare, and the filling can be customized to suit your taste.
If you love cheesy recipes, crispy chicken, and fresh salads, these Chicken Caesar Salad Tacos are an exciting way to enjoy several favorites in one dish.
Origin
The Caesar salad originated in the early twentieth century and is commonly associated with Italian-American restaurateur Caesar Cardini, who operated restaurants in Mexico and the United States. The original salad became famous for its combination of romaine lettuce, Parmesan cheese, dressing, and crunchy elements.
Chicken Caesar salad developed as a heartier variation, adding grilled chicken to make the dish more substantial. Over time, the flavors of Caesar salad have appeared in wraps, sandwiches, bowls, and other convenient meal formats.
The taco-inspired version takes that familiar combination one step further by replacing the tortilla with a baked cheese shell. Although cheese crisps and cheese-based shells have become popular in modern low-carbohydrate cooking, this particular combination is a contemporary recipe variation rather than a traditional Mexican or Italian dish.
Its appeal comes from the contrast between the crisp, savory shell and the cool, creamy salad filling.
Cultural Significance
Caesar salad is a familiar menu item in restaurants around the world, appreciated for its combination of crisp lettuce, savory cheese, and creamy dressing. Adding chicken has made it an especially popular option for people looking for a more filling salad.
Tacos, meanwhile, are widely loved for their versatility and handheld format. Modern home cooks frequently combine flavors from different dishes to create new meals that are easy to serve and customize.
These crispy cheese-shell tacos reflect that creative approach to everyday cooking. They turn a classic salad into a fun finger-food-style meal while highlighting the flavor of melted, seasoned cheese.
Whether served for lunch, dinner, or a casual gathering, they offer a playful alternative to traditional salad bowls and tortilla tacos.
Ingredients Quantity
This recipe makes approximately 4 small cheese-shell tacos, depending on the size of each shell.
For the Crispy Cheese Shells
- 1 cup shredded mozzarella cheese
- ½ cup grated Parmesan cheese
- ½ teaspoon garlic powder
- ½ teaspoon onion powder
- 1 teaspoon Italian seasoning
- A pinch of red pepper flakes or taco seasoning, optional
For the Filling
- 1 cup pre-cooked grilled or crispy chicken breast, finely diced
- 2 cups romaine lettuce, finely chopped
- ¼ cup creamy Caesar dressing
- Extra shaved Parmesan, to taste
- Freshly cracked black pepper, to taste
Ingredient Notes
Mozzarella cheese: Mozzarella melts well and helps bind the shells together. Finely shredded cheese usually melts more evenly than large shreds.
Parmesan cheese: Parmesan adds a salty, nutty flavor and helps the shells develop a crisp texture. Finely grated Parmesan works particularly well.
Chicken: Grilled chicken provides a lighter, savory filling, while crispy chicken adds extra crunch. Make sure the chicken is fully cooked before assembling the tacos.
Romaine lettuce: Romaine has a crisp texture that holds up well against the creamy dressing and rich cheese shells.
Caesar dressing: Use your favorite creamy Caesar dressing. Start with the listed amount, then add a little more only if needed to coat the lettuce without making the filling watery.
Optional Additions
You can easily customize these cheese-shell tacos with additional ingredients.
- Cherry tomatoes: Add halved tomatoes for freshness and a juicy contrast.
- Avocado: Sliced or diced avocado creates a creamy texture that complements the crunchy cheese.
- Bacon: Add a small amount of cooked, crumbled bacon for a smoky flavor.
- Extra Parmesan: Sprinkle additional shaved Parmesan over the filling just before serving.
- Fresh parsley: Add chopped parsley for a fresh herbal note.
- Lemon juice: A small squeeze of fresh lemon brightens the dressing and balances the richness of the cheese.
- Chili flakes: Increase the red pepper flakes for extra heat.
- Taco seasoning: Use a pinch of taco seasoning instead of Italian seasoning for a more pronounced taco-inspired flavor.
- Crouton crumbs: Sprinkle a few finely crushed croutons over the salad for a traditional Caesar-inspired crunch.
For the best texture, avoid adding too many wet ingredients, as excess moisture can soften the cheese shells.
Tips for Success
1. Use Finely Shredded Cheese
Finely shredded mozzarella and Parmesan melt more evenly and make it easier to create cohesive shells. If possible, use freshly grated Parmesan for a stronger flavor.
2. Make Even Cheese Circles
Divide the cheese mixture into evenly sized portions and spread each into a thin circle on a parchment-lined baking sheet. Keep the circles thick enough to hold together but thin enough to crisp.
3. Leave Space Between the Shells
The cheese will spread as it melts. Leave several inches between each circle to prevent the shells from merging together.
4. Watch the Cheese Closely
Bake until the cheese has melted, the edges are deeply golden, and the centers appear set. The exact timing will depend on your oven and the thickness of the cheese circles.
If the shells are removed too early, they may remain soft and bend without holding their shape. If they become too dark, they can taste bitter.
5. Shape the Shells While Warm
This is the most important step. Once the cheese circles are baked, allow them to rest briefly until they are firm enough to lift but still flexible.
Drape each circle over the side of a wooden spoon handle or place it between the bars of an inverted muffin tin to form a taco shape. Let the shells cool completely so they become crisp.
6. Keep the Filling Dry
Wash and thoroughly dry the romaine lettuce before chopping it. Excess water can dilute the dressing and soften the shells.
7. Dress the Salad Just Before Serving
Mix the lettuce and Caesar dressing shortly before assembling the tacos. This helps preserve the lettuce’s crunch and prevents the filling from releasing too much moisture.
8. Assemble at the Last Minute
Cheese shells are crispest shortly after they cool. Fill them just before serving to help maintain their texture.
Instructions
Step 1: Preheat the Oven
Preheat your oven to 400°F (200°C).
Line a large baking sheet with parchment paper. Make sure the parchment is suitable for oven use and lies flat on the tray.
Step 2: Prepare the Cheese Mixture
In a medium bowl, combine the shredded mozzarella, grated Parmesan, garlic powder, onion powder, Italian seasoning, and optional red pepper flakes or taco seasoning.
Mix thoroughly so the seasonings are distributed evenly throughout the cheese.
Step 3: Form the Cheese Circles
Divide the mixture into approximately four portions.
Place each portion on the prepared baking sheet and spread it into a thin, even circle about 4–5 inches wide. Leave plenty of space between the circles.
For more uniform shells, use the back of a spoon to smooth the edges and keep the thickness consistent.
Step 4: Bake the Cheese Shells
Bake for approximately 6–10 minutes, watching closely as the cheese melts and begins to bubble.
The shells are ready when the centers are set and the edges are golden brown. Some ovens may require slightly more or less time, so use the color and texture as your main guide.
Remove the baking sheet from the oven and let the cheese circles rest for approximately 30–60 seconds.
Step 5: Shape the Shells
While the cheese is still warm and pliable, carefully lift each circle using a thin spatula.
Drape it over the handle of a wooden spoon or position it between the raised bars of an inverted muffin tin to create a taco shape.
Allow the shells to cool completely until firm and crisp. Handle them gently, as they can crack once fully cooled.
Step 6: Prepare the Chicken
If using freshly cooked chicken, grill or pan-cook the chicken breast until it reaches an internal temperature of 165°F (74°C).
Allow it to rest briefly, then dice it into small, bite-sized pieces.
If using pre-cooked chicken, make sure it has been stored safely and is heated thoroughly if you prefer to serve it warm. For crispy chicken, cut it into small pieces after cooking.
Step 7: Prepare the Caesar Salad Filling
Place the chopped romaine lettuce in a large bowl.
Add the Caesar dressing and toss until the leaves are lightly coated. Stir in the diced chicken, then season with freshly cracked black pepper.
Add a little extra dressing only if necessary. The filling should be creamy but not excessively wet.
Step 8: Assemble the Tacos
Arrange the cooled cheese shells on a serving plate.
Spoon the chicken Caesar mixture into each shell, dividing it evenly among the portions.
Finish with shaved Parmesan and another light crack of black pepper.
Step 9: Serve Immediately
Serve the tacos as soon as they are assembled for the best contrast between the crunchy cheese shells and the fresh, creamy filling.
If desired, garnish with a little chopped parsley or a small squeeze of lemon juice.
Description
Taco Chicken Caesar Salad with Crispy Cheese Shells is a savory, crunchy, and creamy dish that transforms a familiar salad into a fun handheld meal.
The shells are made from mozzarella and Parmesan seasoned with garlic, onion, and Italian herbs. Once baked and cooled, the cheese becomes golden and crisp, creating a flavorful alternative to traditional tortillas.
Inside, tender chicken and fresh romaine lettuce are coated in creamy Caesar dressing and finished with extra Parmesan and freshly cracked black pepper.
The combination of crisp cheese, cool lettuce, savory chicken, and tangy dressing makes each bite satisfying. These tacos are best served immediately after assembly to preserve the contrast between the crunchy shells and creamy filling.
Nutritional Information
The following nutritional values are estimates for one taco, assuming the recipe makes four tacos and uses grilled chicken with standard Caesar dressing. Actual values will vary depending on the cheese brands, chicken preparation, dressing, and portion sizes.
Estimated nutrition per taco:
- Calories: 220–320
- Protein: 17–25 g
- Carbohydrates: 2–6 g
- Fat: 15–23 g
- Saturated Fat: 7–12 g
- Fiber: 0.5–1.5 g
- Sugar: 1–3 g
- Sodium: 450–800 mg
The cheese and chicken contribute most of the protein, while the cheese and dressing provide much of the fat and sodium. Using grilled chicken instead of crispy chicken may reduce the overall calorie and fat content.
These estimates are provided for general information and are not a substitute for calculating nutrition from the exact ingredients used.
Conclusion
Taco Chicken Caesar Salad with Crispy Cheese Shells is a creative way to enjoy the familiar flavors of chicken Caesar salad in a crunchy, handheld format. The seasoned cheese shells provide a golden, savory exterior, while the chicken, romaine lettuce, and creamy dressing create a fresh and satisfying filling.
The recipe requires only a few ingredients and comes together quickly once the chicken is ready. Although shaping the cheese shells takes a little care, the result is an eye-catching dish that is perfect for lunch, dinner, or casual entertaining.
For the best experience, allow the cheese shells to cool completely before filling them, dress the lettuce shortly before serving, and assemble the tacos at the last minute.
Recommendation
For a balanced flavor and texture, use grilled chicken, crisp romaine lettuce, and a moderate amount of Caesar dressing. If you prefer extra crunch, choose crispy chicken and add a small sprinkle of crushed croutons.
Prepare the cheese shells first and let them cool completely before adding the filling. If you are serving a group, keep the salad mixture in a separate bowl and allow everyone to assemble their own tacos just before eating.
Store any leftover chicken and salad components separately in the refrigerator. Cheese shells are best enjoyed fresh because refrigeration can make them lose their crisp texture.
Embracing Healthful Indulgence
These crispy cheese-shell tacos offer a flavorful way to enjoy chicken and fresh vegetables, but their cheese-based shells and creamy dressing also make them relatively rich in fat and sodium.
For a lighter variation, use grilled chicken, add extra romaine lettuce, and choose a dressing with a nutritional profile that fits your needs. You can also serve the filling over a larger bed of greens instead of placing all of it inside cheese shells.
There is no need to give up bold flavors to build balanced meals. By adjusting the portions and ingredients to suit your preferences, you can enjoy the satisfying combination of crunchy cheese, savory chicken, and fresh salad as part of a varied eating pattern.