
1. Introduction
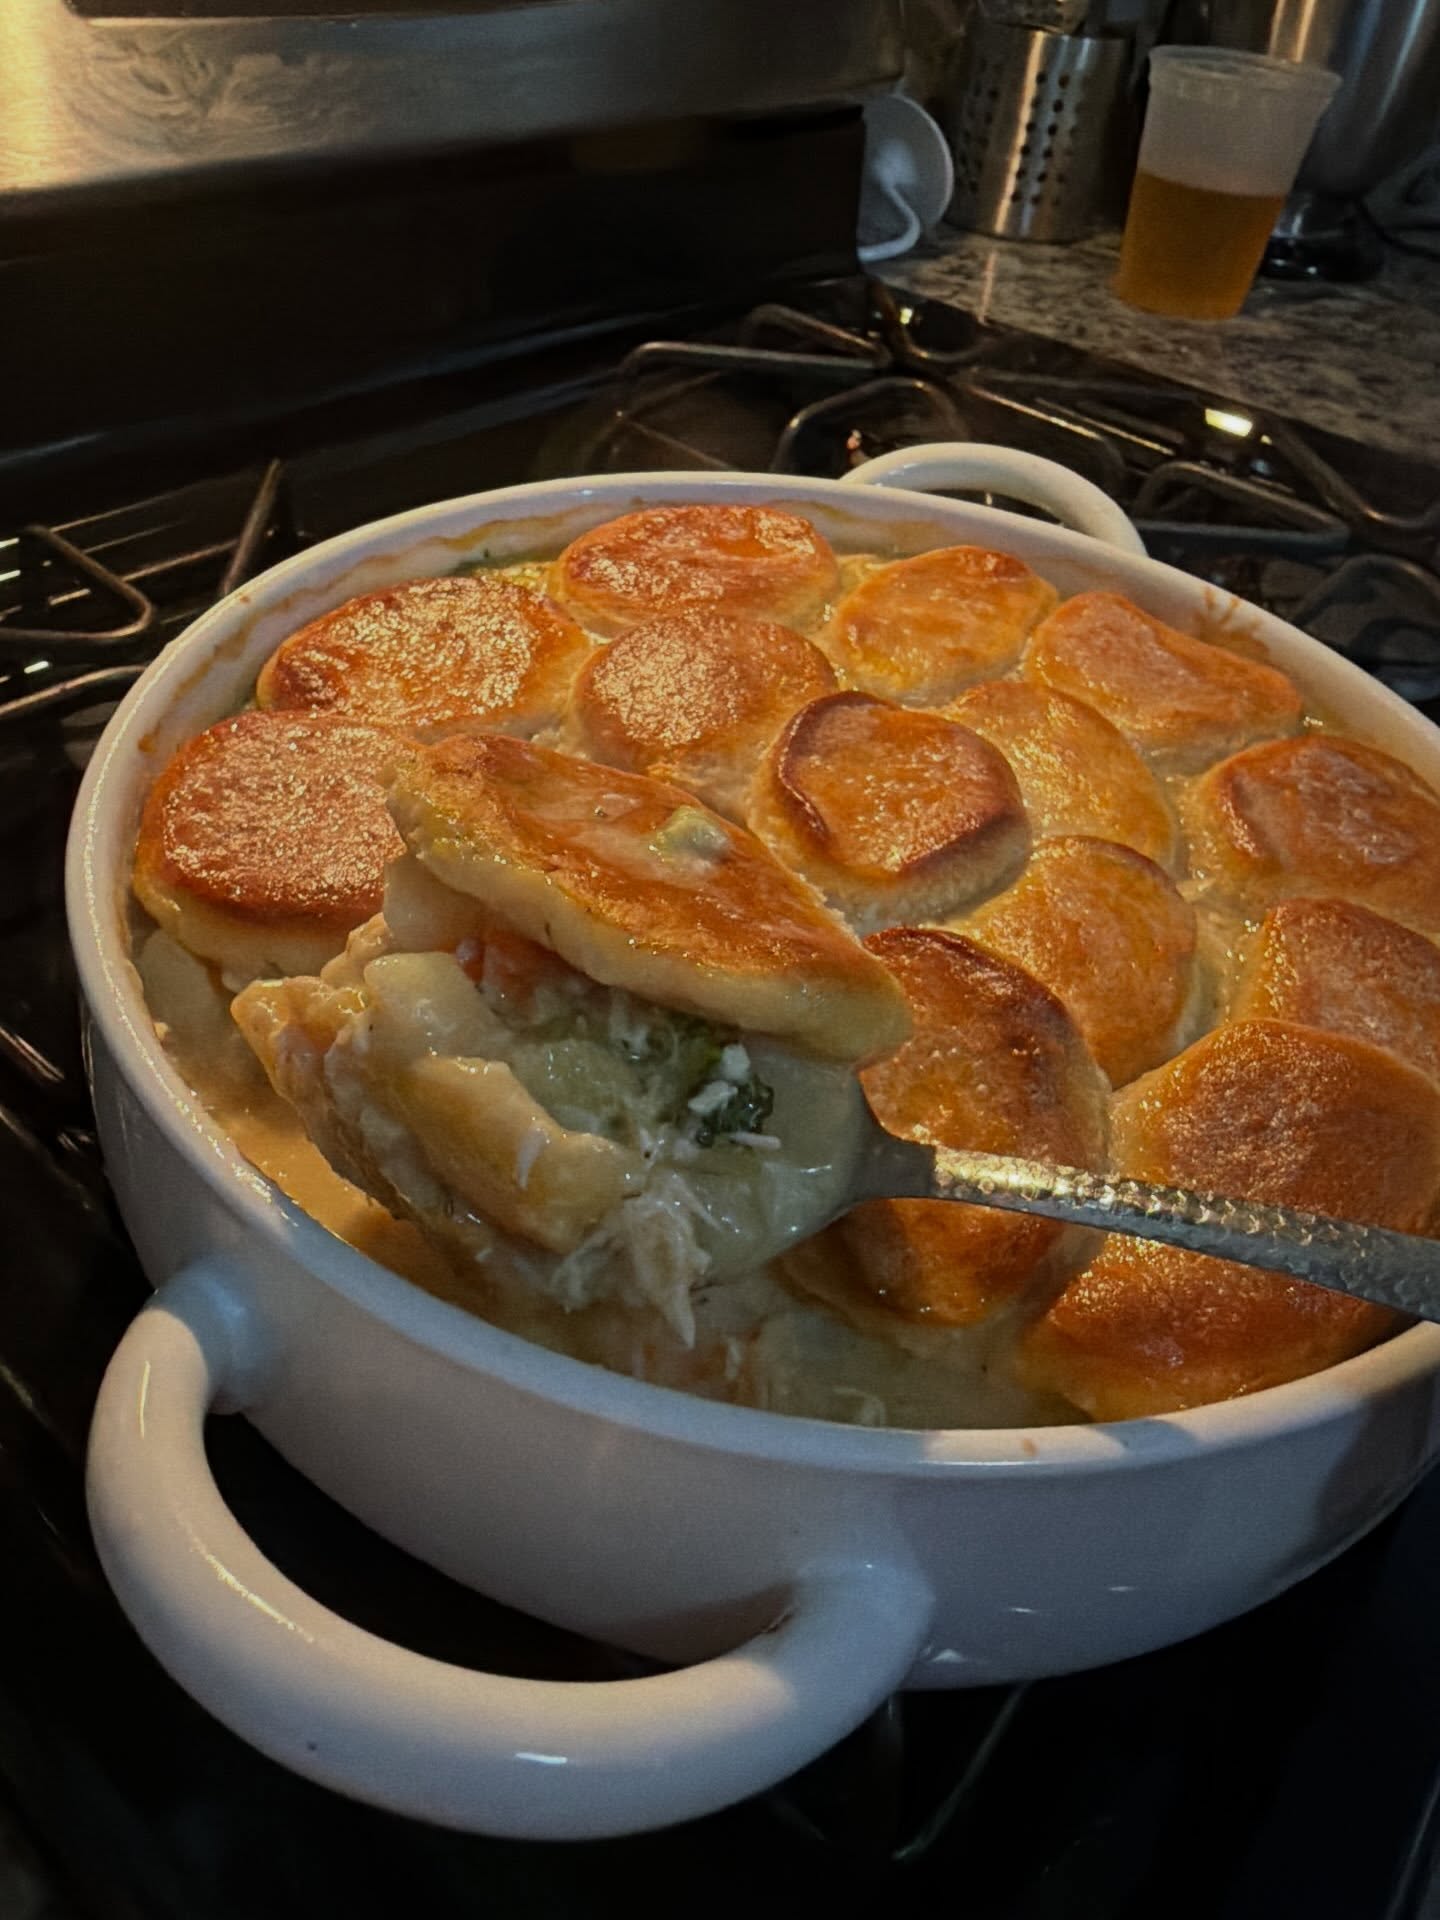
Biscuit-Topped Chicken Pot Pie is the ultimate comfort food, featuring tender shredded chicken, colorful vegetables, and a rich, creamy gravy baked beneath a layer of golden, buttery biscuits.
Unlike traditional chicken pot pie, which uses a pastry crust, this version features fluffy, flaky buttermilk biscuits that soak up the delicious chicken gravy while remaining golden on top.
Perfect for family dinners, cozy evenings, or weekend gatherings, this hearty homemade dish combines simple ingredients with satisfying flavors in approximately one hour.
2. Origin and Cultural Significance
Chicken pot pie has a long history in European and American cooking, evolving from savory meat pies filled with vegetables and gravy.
In the United States, chicken pot pie became a popular comfort food, especially in home kitchens where leftover roasted chicken could be transformed into a hearty family meal.
The biscuit-topped variation reflects Southern American cooking traditions, where buttermilk biscuits are frequently served alongside savory dishes.
Replacing the traditional pastry crust with biscuits creates a rustic, comforting casserole that is both convenient and delicious.
3. Ingredients
Serves 6
For the Creamy Chicken and Vegetable Filling
- 3 cups (approximately 420 g) cooked chicken, shredded or cubed
- ¼ cup (56 g) unsalted butter
- 1 medium yellow onion, finely diced
- 3 medium carrots, peeled and sliced
- 3 celery stalks, sliced
- 2 garlic cloves, minced
- ⅓ cup (40 g) all-purpose flour
- 2 cups (480 ml) low-sodium chicken broth
- ½ cup (120 ml) heavy cream or whole milk
- 1 cup (140 g) frozen peas or peas-and-corn mixture
- ½ teaspoon dried thyme
- Salt and freshly ground black pepper, to taste
For the Flaky Biscuit Topping
- 1 can (16.3 oz / 462 g) refrigerated flaky-style biscuits, usually 8 biscuits
- 2 tablespoons (28 g) unsalted butter, melted
Optional Garnish
- 1 tablespoon chopped fresh parsley
- Freshly cracked black pepper
- A small pinch of dried thyme
4. Optional Additions
- Mushrooms: Add sliced mushrooms while sautéing the vegetables for extra savory flavor.
- Sweet corn: Replace half the peas with corn for added sweetness.
- Fresh rosemary: Add a small amount for a more aromatic filling.
- Parmesan cheese: Stir 2 tablespoons into the gravy for extra richness.
- Potatoes: Add small cubes of cooked potato for a heartier casserole.
- Homemade biscuits: Replace refrigerated biscuits with your favorite buttermilk drop biscuit dough.
5. Tips for Success
- Use cooked rotisserie chicken to save preparation time.
- Cut the carrots and celery into evenly sized pieces for consistent cooking.
- Cook the flour with the vegetables before adding liquid to prevent a raw flour taste.
- Pour in the broth gradually while stirring to create a smooth gravy.
- Keep the filling slightly saucy because it thickens further during baking.
- Arrange biscuits with small spaces between them so hot air can circulate.
- For thick refrigerated biscuits, consider cutting them horizontally into thinner rounds to help the centers bake completely.
- Check the underside of the biscuits before serving to ensure they are not doughy.
- Let the finished pot pie rest briefly before serving.
6. Instructions
Step 1: Preheat the Oven
Preheat your oven to 400°F (205°C).
Lightly grease a 9×13-inch baking dish with butter or cooking spray.
Alternatively, use a large oven-safe skillet that can hold the entire filling and biscuit topping.
Step 2: Prepare the Vegetables
Peel and slice the carrots into small, even pieces.
Dice the onion, slice the celery, and mince the garlic.
Measure the frozen peas and set them aside.
Step 3: Sauté the Aromatics
Melt ¼ cup butter in a large skillet or Dutch oven over medium heat.
Add the diced onion, carrots, and celery.
Cook for approximately 6–8 minutes, stirring occasionally, until the vegetables begin to soften.
Add the minced garlic and cook for another 30–60 seconds until fragrant.
Step 4: Make the Gravy Base
Sprinkle the flour evenly over the sautéed vegetables.
Stir continuously for approximately 1–2 minutes to coat the vegetables and cook out the raw flour flavor.
The mixture should become slightly thick and pasty.
Step 5: Add the Chicken Broth
Slowly pour in the chicken broth while stirring or whisking continuously.
Scrape the bottom of the skillet to incorporate any flavorful browned bits.
Continue stirring until the mixture becomes smooth and begins to thicken.
Step 6: Add the Cream
Pour in the heavy cream or whole milk.
Stir gently and bring the mixture to a light simmer.
Cook for approximately 4–5 minutes until the gravy becomes creamy and thick enough to coat a spoon.
Step 7: Add the Chicken and Vegetables
Stir in the cooked shredded chicken, frozen peas, dried thyme, salt, and black pepper.
Mix until the ingredients are evenly distributed throughout the gravy.
Simmer for another 2–3 minutes until the filling is heated through.
Taste and adjust the seasoning if necessary.
Step 8: Transfer the Filling
Pour the hot chicken and vegetable mixture into the prepared baking dish.
Spread evenly using a spatula.
If using an oven-safe skillet, leave the filling directly in the skillet.
Step 9: Arrange the Biscuit Topping
Open the refrigerated biscuit package.
Arrange the biscuits evenly over the hot filling, leaving small spaces between them.
If the biscuits are especially thick, split them into thinner rounds to encourage more even baking.
Brush the tops with melted butter.
Step 10: Bake Until Golden
Transfer the dish to the preheated oven.
Bake uncovered for approximately 20–30 minutes, or until the filling bubbles around the edges and the biscuits are puffed and golden brown.
The exact baking time depends on biscuit thickness and the type of baking dish.
Check that the biscuits are fully baked in the center and underneath. If the tops brown too quickly, loosely cover with aluminum foil and continue baking.
The center of the casserole should reach at least 165°F (74°C).
Step 11: Rest Before Serving
Remove the baking dish from the oven.
Allow the chicken pot pie to rest for approximately 5–10 minutes.
This helps the gravy settle slightly and makes serving easier.
Step 12: Garnish and Serve
Sprinkle freshly chopped parsley over the golden biscuits.
Add a little freshly cracked black pepper if desired.
Spoon generous portions of creamy chicken filling into serving bowls, making sure each portion includes a fluffy biscuit.
Serve warm.
7. Description
This Biscuit-Topped Chicken Pot Pie features a rich, velvety filling packed with tender chicken, sweet carrots, celery, peas, and aromatic herbs.
The gravy is buttery, creamy, and deeply savory, providing the perfect contrast to the golden biscuit topping.
Each biscuit develops a lightly crisp, flaky surface while the underside absorbs some of the flavorful chicken gravy.
The combination creates a warm, satisfying dish with comforting homemade flavor.
8. Nutritional Information
Approximate values per serving, assuming six servings and refrigerated biscuits.
| Nutrient | Estimated Amount |
|---|---|
| Calories | 600–750 kcal |
| Protein | 28–36 g |
| Carbohydrates | 45–60 g |
| Fat | 32–45 g |
| Fiber | 3–5 g |
| Sugars | 5–8 g |
Nutritional values vary depending on the chicken, biscuit brand, cream, and serving size.
9. Recipe Details
- Prep Time: 20 minutes
- Cooking Time: 35–40 minutes
- Total Time: Approximately 1 hour
- Servings: 6
- Cuisine: American, Southern-inspired
- Course: Main course
- Difficulty: Easy
- Cooking Methods: Stovetop and oven baking
- Equipment: Large skillet or Dutch oven, 9×13-inch baking dish, whisk, wooden spoon, spatula, and measuring cups
10. Conclusion
Biscuit-Topped Chicken Pot Pie is a comforting family dinner that combines creamy chicken and vegetables with buttery, golden biscuits.
The rich gravy, tender filling, and flaky topping create a delicious balance of flavors and textures.
With straightforward ingredients and simple preparation, this recipe is perfect for busy evenings, family gatherings, or whenever you’re craving a warm, homemade meal.
11. Recommendation
Serving: Pair with a fresh green salad, roasted green beans, or steamed broccoli to balance the richness.
Make-ahead: Prepare the chicken and vegetable filling up to 2 days in advance and refrigerate. Reheat the filling until hot before adding the biscuit topping and baking.
Storage: Refrigerate leftovers promptly in an airtight container for up to 3–4 days.
Freezing: For best results, freeze the prepared chicken filling without the biscuits for up to 2–3 months. Thaw in the refrigerator, reheat, and add fresh biscuits before baking.
Reheating: Warm leftovers in a 350°F (175°C) oven, loosely covered with foil, until heated through to 165°F (74°C). Uncover during the final minutes to help restore the biscuit texture.
Variation: Substitute leftover roasted turkey for chicken, or use homemade buttermilk biscuits for a more traditional homemade topping.
12. Embracing Healthful Indulgence
Biscuit-Topped Chicken Pot Pie provides protein from chicken and essential nutrients from vegetables such as carrots, celery, and peas.
The filling also contributes vitamins, minerals, and dietary fiber, while the biscuits provide carbohydrates for energy.
Because butter, cream, and refrigerated biscuits can increase saturated fat and sodium, ingredient choices and portion sizes can help create a more balanced meal.
For a lighter version, use whole milk instead of heavy cream, increase the vegetable portions, and choose lean cooked chicken breast.
Served with a fresh salad or additional vegetables, this comforting chicken pot pie can be enjoyed as part of a varied, balanced eating pattern.