
Introduction
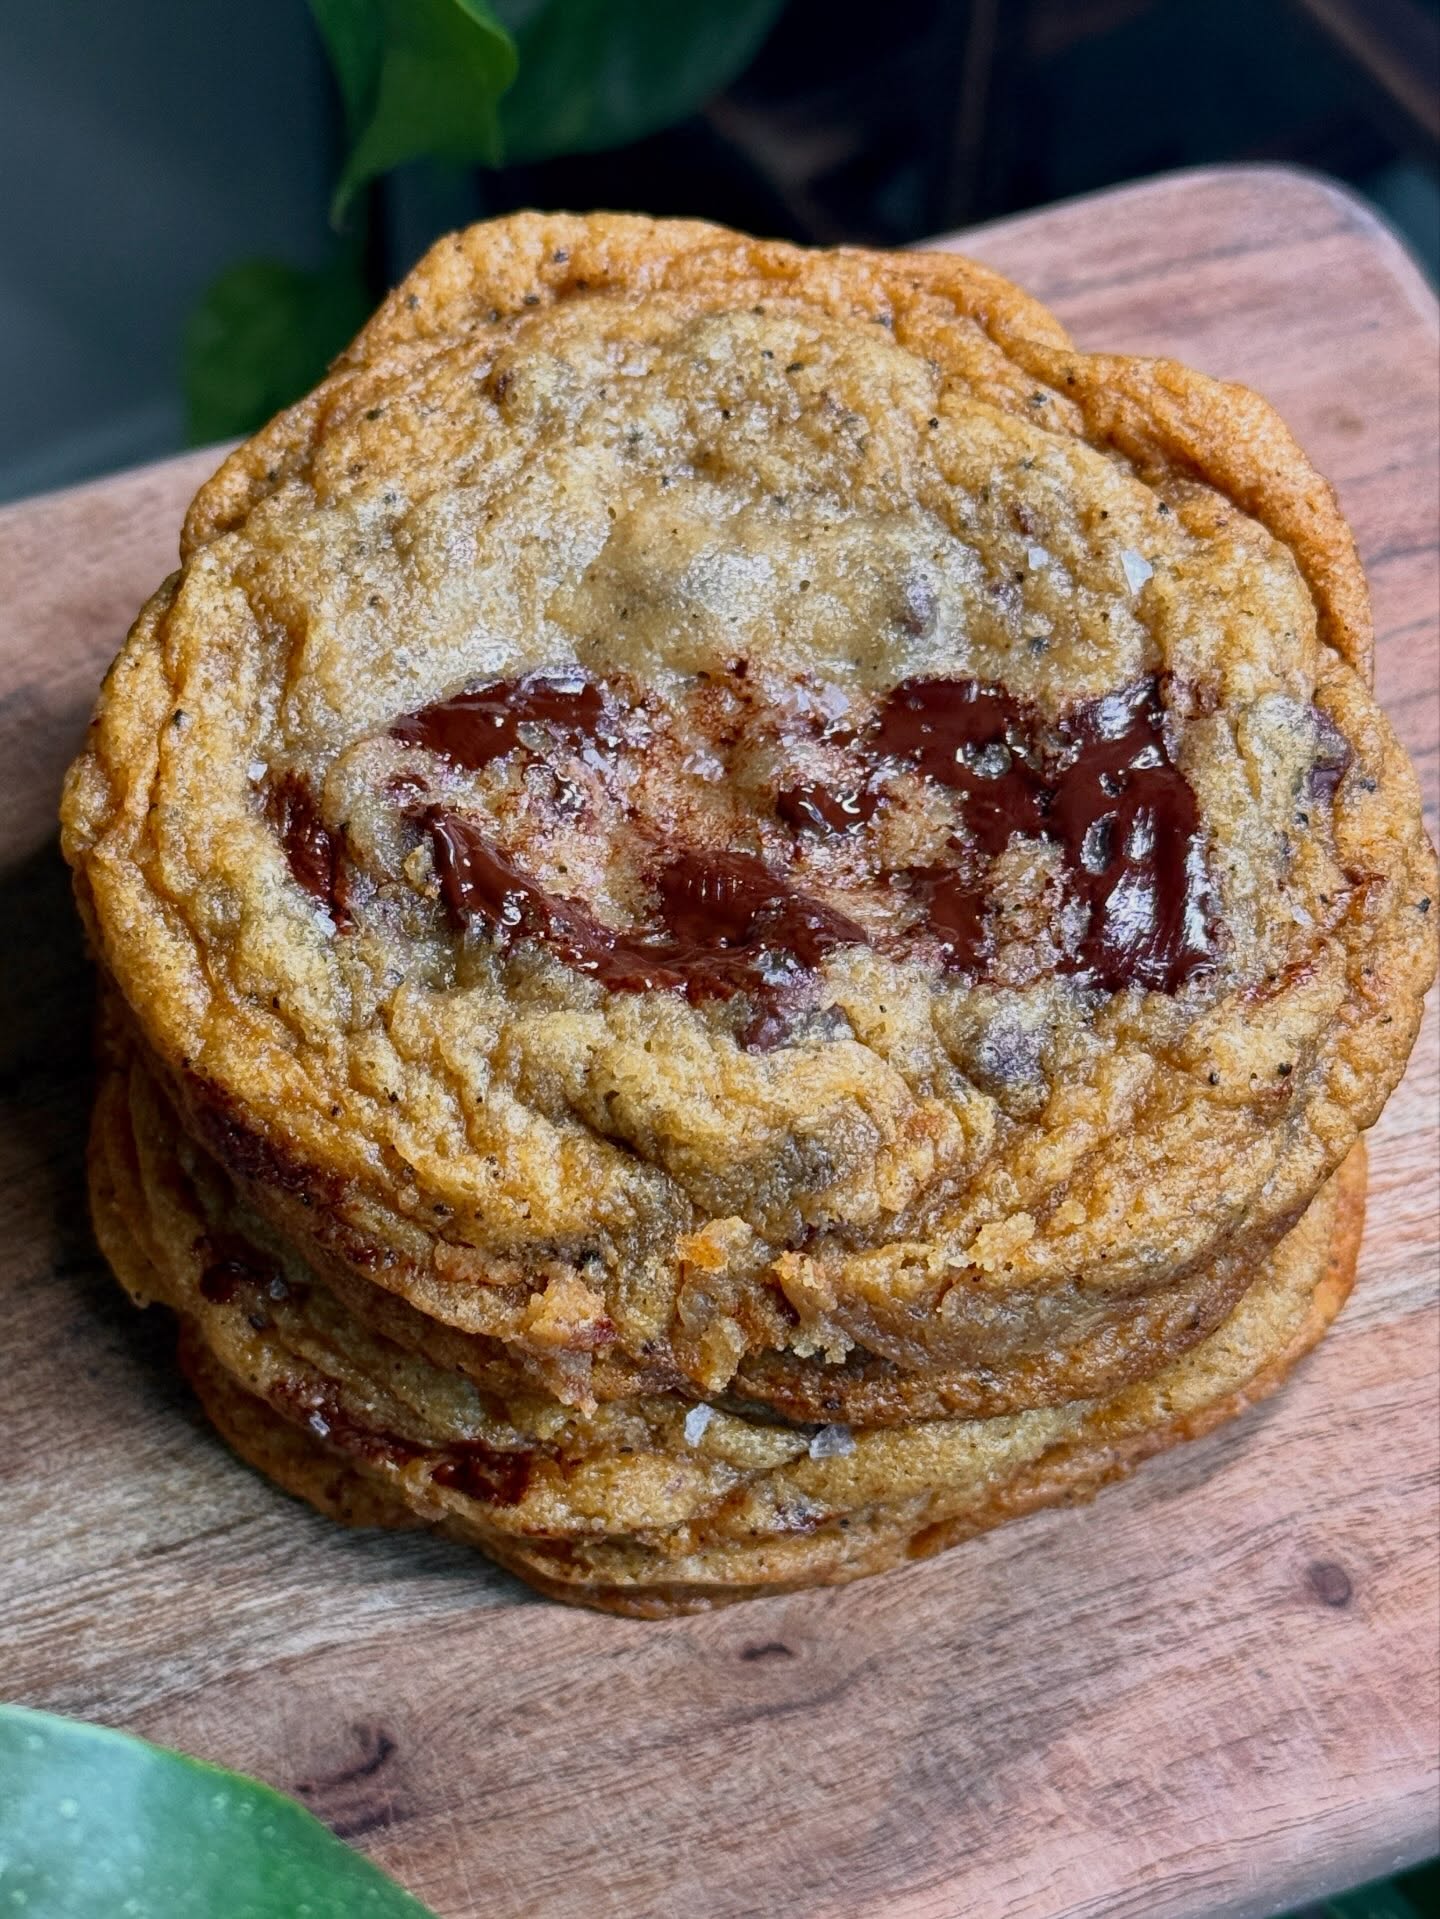
There is something irresistible about a freshly baked chocolate chip cookie with golden, crispy edges, a soft and chewy center, and generous pools of melted chocolate.
These Bakery-Style Brown Butter Chocolate Chip Cookies take the classic homemade cookie to another level with rich, nutty brown butter, dark brown sugar, chopped chocolate, and a delicate sprinkle of flaky sea salt.
The secret lies in browning the butter before mixing the dough. This simple technique creates deep caramel-like notes and a toasted, nutty aroma that makes the cookies taste exceptionally rich.
Chopped chocolate bars create glossy melted chocolate pockets, while chilling the dough helps control spreading and develop a satisfying texture.
A gentle pan-tapping technique after baking encourages the cookies to settle into beautiful, slightly rippled edges while maintaining soft centers.
Perfect for dessert, afternoon coffee, holiday baking, or sharing with family and friends, these cookies deliver a delicious bakery-style experience at home.
Origin and Cultural Significance
Chocolate chip cookies are one of America’s most recognizable baked desserts.
Their origins are commonly traced to Ruth Wakefield, who developed the famous Toll House chocolate chip cookie in Massachusetts during the 1930s.
Over time, chocolate chip cookies evolved into countless variations, including thick bakery-style cookies, thin crispy cookies, soft-centered cookies, and versions made with brown butter.
Brown butter, also known as beurre noisette in French cooking, is made by gently heating butter until its milk solids become golden brown and develop a nutty aroma.
Using brown butter in chocolate chip cookies creates deeper flavor without requiring complicated ingredients.
Modern bakery-style versions often feature chopped chocolate, chewy centers, flaky sea salt, and dramatic rippled edges.
These cookies combine those popular techniques into one rich, comforting dessert.
Ingredients
For the Brown Butter Cookie Dough
- ½ cup (115 g) unsalted butter
- ½ cup (100 g) packed dark brown sugar
- ⅓ cup (65–70 g) granulated sugar
- 1 large egg, at room temperature
- 1 tablespoon pure vanilla extract or vanilla bean paste
- 1 tablespoon milk, optional, to replace some moisture lost while browning the butter
For the Dry Ingredients
- 1¼ cups (160 g) all-purpose flour
- ½ teaspoon baking soda
- ½ teaspoon fine sea salt
For the Chocolate and Finishing
- 6–8 oz (170–225 g) semisweet or dark chocolate baking bars, roughly chopped
- Flaky sea salt, such as Maldon, for finishing
Optional Additions
- Espresso powder: Add ½ teaspoon to intensify the chocolate flavor.
- Toasted pecans: Fold in ¼ cup for additional crunch.
- Chopped walnuts: Add for a classic nutty variation.
- Milk chocolate: Replace a portion of the dark chocolate for a sweeter cookie.
- Chocolate chunks: Combine different chocolate sizes for varied texture.
- Cinnamon: Add a small pinch for subtle warmth.
- Caramel pieces: Fold in a few small pieces for a sweet, gooey variation.
Tips for Success
- Use a light-colored saucepan: It makes it easier to see the butter changing from golden to brown.
- Watch the butter carefully: Brown butter can quickly turn from toasted to burnt.
- Keep the browned milk solids: These contain much of the butter’s rich, nutty flavor.
- Cool the butter before adding the egg: Hot butter can partially cook the egg.
- Measure the flour accurately: Too much flour produces dense cookies.
- Use chopped chocolate bars: They melt into irregular pools more readily than many standard chocolate chips.
- Avoid overmixing: Mix the dough only until the flour disappears.
- Chill the dough: Refrigeration helps reduce excessive spreading.
- Leave enough space: Large cookies need room to spread during baking.
- Do not overbake: The centers should still appear slightly soft when removed from the oven.
- Tap the baking sheet carefully: Gentle tapping helps create rippled edges without breaking the cookies.
- Finish with flaky salt: A small amount balances the sweetness and enhances the chocolate flavor.
Instructions
Step 1: Brown the Butter
Place the unsalted butter in a light-colored saucepan over medium heat.
Allow it to melt completely, stirring or swirling the pan frequently.
As the butter heats, it will begin to foam and crackle as moisture evaporates.
Continue cooking for approximately 5–8 minutes, watching closely.
Small golden-brown specks will begin forming at the bottom of the saucepan.
Once the butter develops a rich, nutty aroma and turns amber-golden, immediately remove it from the heat.
Pour the browned butter into a heatproof mixing bowl, including the toasted milk solids.
Allow it to cool for approximately 10–15 minutes until warm but no longer hot.
Step 2: Combine the Butter and Sugars
Add the dark brown sugar and granulated sugar to the cooled brown butter.
Whisk vigorously for approximately 1 minute until evenly combined.
The mixture should appear glossy and caramel-colored.
Because brown butter is liquid, the sugar may remain slightly grainy at this stage.
Step 3: Add the Egg and Vanilla
Add the room-temperature egg and vanilla extract.
Whisk for approximately 1–2 minutes until the mixture becomes thicker, smoother, and slightly lighter in color.
If using the optional tablespoon of milk, add it now.
This helps replace some of the moisture lost during browning and can improve the dough’s consistency.
Step 4: Prepare the Dry Ingredients
In a separate bowl, combine the all-purpose flour, baking soda, and fine sea salt.
Whisk until evenly distributed.
This ensures that the baking soda and salt are incorporated throughout the cookie dough.
Step 5: Combine the Wet and Dry Mixtures
Add the dry ingredients to the butter mixture.
Using a flexible spatula, fold gently until most of the flour is incorporated.
Stop mixing as soon as the dough begins to come together.
Avoid excessive mixing, which can make the cookies tougher.
Step 6: Add the Chopped Chocolate
Reserve approximately one-quarter of the chopped chocolate for topping.
Fold the remaining chocolate into the cookie dough.
Mix just until evenly distributed.
The dough should be soft, slightly sticky, and filled with chocolate pieces.
Step 7: Shape the Cookie Dough
Line a baking sheet or tray with parchment paper.
Divide the dough into approximately 12 portions, roughly 45–55 g each, depending on the amount of chocolate used.
Roll each portion gently into a ball.
Press a few reserved chocolate pieces into the tops.
These pieces will melt during baking and create attractive chocolate pools.
Step 8: Chill the Dough
Cover the shaped cookie dough and refrigerate for at least 30–60 minutes.
For a more developed flavor, the dough may be refrigerated overnight.
If chilled for several hours, allow it to stand briefly at room temperature if it becomes too firm to bake evenly.
Chilling helps the dough firm up and reduces excessive spreading.
Step 9: Preheat the Oven
Preheat the oven to 350°F (175°C).
Line a large baking sheet with parchment paper.
Arrange the chilled dough balls at least 2–3 inches apart.
Bake in batches if necessary.
Step 10: Bake the Cookies
Place the baking sheet on the center oven rack.
Bake for approximately 10–13 minutes, depending on cookie size and oven performance.
The edges should become golden brown and set, while the centers remain slightly soft.
Avoid waiting until the entire cookie looks firm.
The cookies will continue setting as they cool.
Step 11: Create the Rippled Edges
Carefully remove the baking sheet from the oven.
While wearing oven mitts, gently lift the baking sheet about 1 inch above a stable, heat-safe surface and let it tap down.
Repeat once or twice if desired.
This encourages the cookies to settle, creating slightly rippled edges and denser, chewy centers.
For more pronounced ripples, gently tap the pan once during the final few minutes of baking, then return it to the oven to finish.
Avoid excessive force, which can break the cookies or cause hot chocolate to splash.
Step 12: Add Flaky Sea Salt
While the cookies are still warm, sprinkle a small amount of flaky sea salt over each one.
The salt enhances the caramelized butter flavor and balances the richness of the chocolate.
Step 13: Cool and Serve
Allow the cookies to rest on the baking sheet for approximately 5–10 minutes.
Transfer carefully to a wire rack.
Serve slightly warm for soft centers and glossy melted chocolate.
For a firmer, chewier texture, allow them to cool completely before serving.
Description
These Bakery-Style Brown Butter Chocolate Chip Cookies feature beautifully golden edges, soft and chewy centers, and generous pools of melted chocolate.
Brown butter adds a toasted, caramel-like flavor, while dark brown sugar contributes moisture and chewiness.
Chopped chocolate creates irregular melted pockets throughout the cookies, and a light sprinkle of flaky sea salt adds a delicious contrast to the sweetness.
The finished cookies are rich, fragrant, and satisfyingly chewy, with lightly crisp edges and a bakery-inspired appearance.
Nutritional Information
Approximate values per cookie, based on 12 cookies:
- Calories: 300–350 kcal
- Protein: 3–5 g
- Carbohydrates: 35–42 g
- Fat: 17–21 g
- Saturated Fat: 10–13 g
- Fiber: 2–3 g
- Sugar: 22–28 g
- Sodium: 130–190 mg
Nutritional values vary depending on the chocolate percentage, amount of chocolate used, and cookie size.
Recipe Details
- Prep Time: 20 minutes
- Chill Time: 30–60 minutes
- Bake Time: 10–13 minutes per batch
- Cooling Time: 10 minutes
- Total Time: Approximately 1 hour 10 minutes to 1 hour 45 minutes
- Yield: Approximately 12 cookies
- Cuisine: American bakery-style
- Course: Dessert, snack
- Cooking Methods: Browning butter, mixing, chilling, and baking
- Difficulty: Easy to moderate
Conclusion
Bakery-Style Brown Butter Chocolate Chip Cookies combine the familiar comfort of classic chocolate chip cookies with deeper caramelized flavor, rich melted chocolate, and an irresistible chewy texture.
Browning the butter creates a distinctive nutty aroma, while chopped chocolate bars produce beautiful glossy pools.
The combination of chilled dough, careful baking, and gentle pan tapping creates cookies with lightly crisp, rippled edges and soft centers.
Finished with flaky sea salt, these cookies are a delicious treat for chocolate lovers and home bakers alike.
Recommendation
For the best flavor, use high-quality butter and chopped semisweet or dark chocolate.
Chill the dough for at least 30 minutes before baking.
Avoid overbaking, as the cookies will continue firming up on the hot baking sheet.
Store completely cooled cookies in an airtight container at room temperature for approximately 3–4 days.
For longer storage, freeze baked cookies for up to 2–3 months for best quality.
Unbaked cookie dough balls can also be frozen in an airtight container.
Bake directly from frozen, adding approximately 2–3 minutes to the baking time as needed.
For a freshly baked texture, warm an individual cookie briefly in the microwave for approximately 8–12 seconds.
Serve with cold milk, coffee, espresso, or vanilla ice cream.
Embracing Healthful Indulgence
Brown Butter Chocolate Chip Cookies are a rich dessert best enjoyed as an occasional treat.
The chocolate contributes cocoa flavor and small amounts of minerals, while butter and sugar create the cookies’ characteristic texture and sweetness.
For smaller portions, divide the dough into 16–18 cookies instead of 12 and reduce the baking time accordingly.
Using darker chocolate can create a more intense cocoa flavor and balance the sweetness.
Enjoying one cookie alongside fresh fruit or a favorite beverage can make a satisfying dessert experience.
These homemade cookies celebrate the pleasure of baking from scratch, combining simple ingredients with techniques that create exceptional flavor and texture.