
1. Introduction
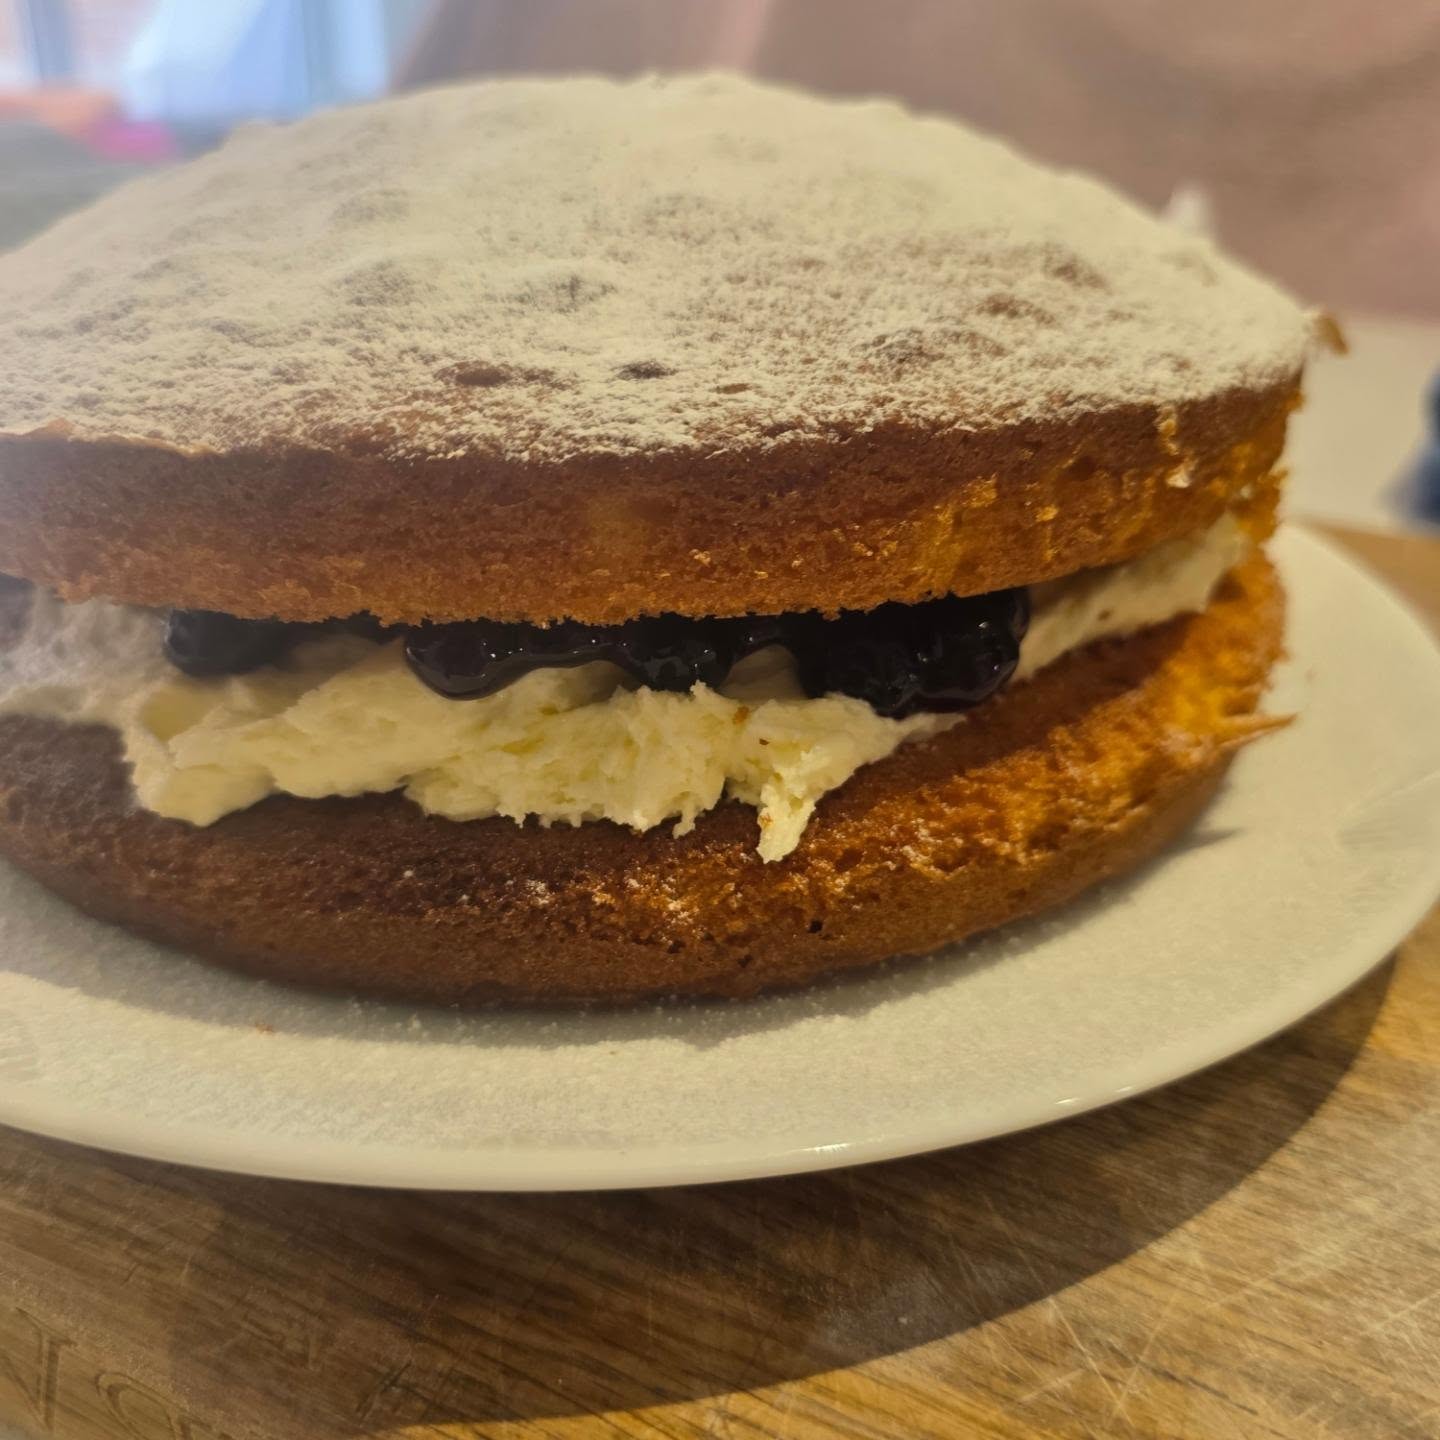
Classic Victoria Sponge Cake with Fresh Whipped Cream and Strawberry Jam is one of Britain’s most beloved desserts, featuring two soft, golden sponge layers filled with sweet fruit jam and light, freshly whipped cream.
Also known as a Victoria Sandwich, this elegant cake is celebrated for its simplicity, delicate texture, and timeless appearance. A traditional Victoria sponge relies on a balanced combination of butter, sugar, eggs, and flour to create a tender cake with a beautifully light crumb.
The secret to achieving the perfect sponge lies in thoroughly creaming the butter and sugar, incorporating the eggs gradually, and gently folding in the flour. These techniques help produce a soft, airy cake without requiring complicated ingredients or equipment.
Once baked and cooled, the sponge layers are sandwiched together with a generous spread of raspberry or strawberry jam and a cloud-like layer of whipped cream.
A delicate dusting of icing sugar completes the cake, creating its signature understated appearance.
Perfect for afternoon tea, birthday celebrations, family gatherings, or a relaxing weekend baking project, this classic British dessert delivers an irresistible combination of buttery sponge, fruity sweetness, and creamy filling.
With approximately 45 minutes of preparation and baking, plus cooling time, you can create a beautiful homemade Victoria Sponge Cake that is both elegant and delicious.
2. Origin and Cultural Significance
Victoria Sponge Cake is closely associated with British afternoon tea traditions and takes its name from Queen Victoria, who reigned from 1837 to 1901.
During the Victorian era, afternoon tea became an increasingly popular social occasion, particularly among wealthier households.
Simple sponge cakes filled with jam became a familiar accompaniment to tea, and the Victoria Sandwich developed into one of the best-known examples.
Early versions of the cake were commonly filled with jam alone, while modern variations often include whipped cream or buttercream.
The development of chemical raising agents during the nineteenth century helped make lighter sponge cakes more accessible to home bakers.
The cake eventually became a staple of British baking culture and remains closely associated with village fêtes, afternoon tea, home baking, and traditional cake competitions.
Its popularity also reflects the British appreciation for uncomplicated desserts made with familiar ingredients.
Today, Victoria Sponge Cake is enjoyed throughout the United Kingdom and beyond, with countless variations featuring different jams, creams, and decorative finishes.
Despite these adaptations, the classic combination of two golden sponge layers, fruit jam, and a simple sugar-dusted top remains its defining characteristic.
3. Ingredients
For the Victoria Sponge Layers
- 200 g (approximately 7 oz) unsalted butter, softened to room temperature
- 200 g (1 cup) caster sugar or superfine sugar
- 4 large eggs, at room temperature
- 200 g (approximately 1⅔ cups) self-raising flour, measured by weight for accuracy
- 1 teaspoon baking powder
- 1 teaspoon vanilla extract
- 1–2 tablespoons (15–30 ml) milk, only if needed
For the Strawberry or Raspberry Jam Filling
- 150 g (approximately ½ cup) good-quality strawberry or raspberry jam
For the Whipped Cream Filling
- 150 ml (approximately ⅔ cup) chilled double cream or heavy whipping cream
- 1 tablespoon (8 g) icing sugar or powdered sugar
For the Topping
- 1–2 tablespoons icing sugar, for dusting
Optional Garnish
- Fresh strawberries or raspberries
- Fresh mint leaves
- A small amount of additional whipped cream
Ingredient note: The traditional equal-weight method uses approximately equal weights of butter, sugar, eggs, and flour. Four large eggs without their shells may weigh slightly more than 200 g, but the listed quantities are suitable for this recipe.
4. Optional Additions
- Raspberry jam: Use instead of strawberry jam for a slightly tangier filling.
- Vanilla bean paste: Replace vanilla extract with vanilla bean paste for a richer vanilla flavor.
- Lemon zest: Add 1 teaspoon of finely grated lemon zest to the batter for a fresh citrus aroma.
- Fresh strawberries: Add a thin layer of sliced strawberries between the jam and cream.
- Fresh raspberries: Arrange a few berries over the whipped cream before adding the top sponge.
- Vanilla buttercream: Replace the whipped cream with a traditional buttercream for a more stable filling.
- Almond extract: Add a few drops to the batter for a subtle almond flavor.
- Lightly sweetened mascarpone: Fold a small amount into the whipped cream for a thicker filling.
- Seedless jam: Choose seedless raspberry or strawberry jam for a smoother texture.
5. Tips for Success
- Use room-temperature butter: Softened butter creams more effectively with sugar, helping create a lighter sponge.
- Bring the eggs to room temperature: This helps them incorporate smoothly into the butter mixture.
- Weigh the ingredients: Accurate measurements are especially important for sponge cakes.
- Cream the butter and sugar thoroughly: Beating for 4–5 minutes helps incorporate air into the batter.
- Add eggs gradually: Adding them slowly reduces the risk of the mixture separating.
- Avoid overmixing after adding flour: Excessive mixing can produce a dense or tough sponge.
- Use the correct cake tins: Two 20 cm (8-inch) round tins help achieve the intended cake thickness.
- Preheat the oven fully: A properly heated oven encourages even rising.
- Avoid opening the oven too early: Sudden temperature changes can cause the sponge to sink.
- Check for doneness: The cakes should be golden, spring back lightly when touched, and pass the skewer test.
- Cool the cakes completely: Warm sponge can melt the whipped cream and cause the filling to slide.
- Whip cream carefully: Stop when it holds soft-to-medium peaks to avoid a grainy texture.
- Use jam that spreads easily: Stir thick jam before spreading to avoid tearing the sponge.
- Dust with icing sugar just before serving: This preserves the cake’s elegant finish.
6. Instructions
Step 1: Preheat the Oven
Preheat the oven to 180°C (350°F) for a conventional oven or 160°C (320°F) for a fan-assisted oven.
Position the oven rack in the center.
Allow the oven to heat completely before placing the cakes inside.
Step 2: Prepare the Cake Tins
Grease two 20 cm (8-inch) round cake tins with a little softened butter.
Line the bases with baking parchment.
Lightly grease the parchment if desired.
This helps prevent the sponge layers from sticking during removal.
Step 3: Prepare the Ingredients
Measure the butter, sugar, flour, and remaining ingredients.
Make sure the butter is softened but not melted.
Remove the eggs from the refrigerator ahead of time so they can reach room temperature.
If necessary, place the eggs in a bowl of lukewarm water for approximately 5–10 minutes.
Step 4: Cream the Butter and Sugar
Place the softened butter in a large mixing bowl.
Add the caster sugar.
Using an electric hand mixer or stand mixer, beat on medium-high speed for approximately 4–5 minutes.
The mixture should become pale, fluffy, and noticeably lighter in texture.
Scrape down the sides of the bowl occasionally to ensure even mixing.
Step 5: Beat the Eggs
Crack the eggs into a separate small bowl.
Beat lightly with a fork or whisk.
This makes it easier to incorporate the eggs gradually into the creamed butter mixture.
Step 6: Add the Eggs Gradually
Add a small amount of beaten egg to the butter and sugar mixture.
Beat until incorporated.
Continue adding the eggs in several additions, mixing after each one.
Avoid pouring all the eggs into the bowl at once.
If the mixture begins to look curdled, add approximately 1 tablespoon of the measured flour and mix briefly.
Step 7: Add the Vanilla Extract
Pour the vanilla extract into the batter.
Mix gently until evenly distributed.
The vanilla adds a delicate sweetness and aroma that complements the buttery sponge.
Step 8: Combine the Flour and Baking Powder
Place the self-raising flour and baking powder in a separate bowl.
Whisk briefly to distribute the baking powder evenly.
Sift the mixture to remove any lumps.
Step 9: Fold the Flour into the Batter
Add the sifted flour mixture to the butter and egg mixture.
Using a large metal spoon or silicone spatula, gently fold the flour into the batter.
Use slow, sweeping motions, turning the mixture from the bottom of the bowl toward the top.
Continue only until no dry flour remains.
Avoid vigorous stirring, which can reduce the air incorporated during creaming.
Step 10: Check the Batter Consistency
Lift a spoonful of batter above the bowl.
The batter should fall slowly and easily from the spoon.
If it is too thick, add 1 tablespoon of milk and fold gently.
Add another tablespoon only if necessary.
The batter should remain thick, soft, and spoonable rather than runny.
Step 11: Divide the Batter
Spoon the batter evenly into the two prepared cake tins.
For the most consistent results, weigh the filled tins to ensure each contains approximately the same amount of batter.
Use a spatula to spread the mixture gently toward the edges.
Smooth the surfaces without pressing down heavily.
Step 12: Bake the Sponge Layers
Place both cake tins on the center rack of the preheated oven.
Bake for approximately 20–25 minutes.
The cakes should rise evenly and develop a light golden-brown color.
Avoid opening the oven during the first 18–20 minutes unless necessary.
Step 13: Check for Doneness
After approximately 20 minutes, check the cakes.
The surfaces should appear golden and slightly springy.
Insert a wooden skewer into the center of each sponge.
If the skewer comes out clean or with a few dry crumbs, the cakes are ready.
If wet batter remains, bake for another 2–3 minutes and check again.
Step 14: Cool in the Tins
Remove the cake tins from the oven.
Place them on a heatproof surface.
Allow the cakes to rest in their tins for approximately 5–10 minutes.
This brief cooling period helps the sponge layers firm up before removal.
Step 15: Transfer to a Wire Rack
Carefully run a thin knife around the edges of each cake if necessary.
Turn the sponge layers out onto a wire cooling rack.
Remove the baking parchment.
Allow both cakes to cool completely.
This may take approximately 45–60 minutes, depending on room temperature.
Do not add the whipped cream while the cakes are warm.
Step 16: Prepare the Whipped Cream
Pour the chilled double cream or heavy whipping cream into a clean mixing bowl.
Add 1 tablespoon of icing sugar.
Using an electric mixer or whisk, beat until the cream begins to thicken.
Continue whipping until soft-to-medium peaks form.
The cream should hold its shape while remaining smooth and spreadable.
Avoid overwhipping.
Step 17: Prepare the Jam
Spoon the strawberry or raspberry jam into a small bowl.
Stir gently to loosen it.
If the jam is particularly thick, allow it to stand at room temperature briefly.
The jam should spread easily without requiring excessive pressure on the delicate sponge.
Step 18: Position the Bottom Sponge
Place one completely cooled sponge layer on a serving plate or cake stand.
For a neat presentation, position the layer with its flatter side facing upward.
This creates an even surface for the filling.
Step 19: Spread the Jam
Spoon the prepared jam onto the bottom sponge.
Using an offset spatula or the back of a spoon, spread it evenly across the surface.
Leave a small border around the edge to reduce the chance of the filling spilling out.
Step 20: Add the Whipped Cream
Spoon the freshly whipped cream over the jam.
Spread gently into an even layer.
Alternatively, transfer the cream to a piping bag and pipe a decorative layer.
Avoid pressing too firmly, as this can disturb the jam underneath.
Step 21: Add the Top Sponge
Carefully lift the second sponge layer.
Position it over the cream filling with its golden, rounded side facing upward.
Lower it gently into place.
Press only very lightly to settle the layers.
The cream and jam should remain visible between the two sponges without overflowing excessively.
Step 22: Dust with Icing Sugar
Place the remaining icing sugar in a fine-mesh sieve.
Hold the sieve above the cake.
Gently tap to create a delicate, even dusting over the top sponge.
The icing sugar should form a light white layer without completely hiding the golden cake surface.
Step 23: Add Optional Garnishes
For a more decorative presentation, add a few fresh strawberries or raspberries.
A small mint leaf can provide additional color.
Traditional Victoria Sponge Cake is usually finished simply with icing sugar, so keep any extra decorations minimal.
Step 24: Slice the Cake
Using a sharp serrated knife, cut the cake into even slices.
Use a gentle sawing motion to avoid compressing the sponge.
Wipe the knife between cuts if necessary to maintain neat layers.
Step 25: Serve and Enjoy
Serve the Victoria Sponge Cake with freshly brewed tea, coffee, or another favorite beverage.
For the best texture, enjoy it when the sponge is soft and the cream is fresh.
If the cake has been refrigerated, allow individual slices to stand at room temperature for approximately 10–15 minutes before serving, without leaving the cream-filled cake unrefrigerated for an extended period.
7. Description
Classic Victoria Sponge Cake with Fresh Whipped Cream and Strawberry Jam is an elegant British dessert featuring two soft, golden sponge layers with a delicate buttery flavor.
The sponge has a light, tender crumb created by creaming butter and sugar and carefully incorporating the remaining ingredients.
A generous layer of fruity strawberry or raspberry jam adds sweetness and a pleasant tanginess.
Freshly whipped cream provides a smooth, airy filling that balances the richness of the sponge and the sweetness of the jam.
The top is finished with a simple dusting of icing sugar, creating the cake’s familiar traditional appearance.
Each slice reveals a beautiful contrast between the golden sponge, vibrant fruit jam, and white cream filling.
The combination of soft cake, smooth cream, and sweet fruit makes Victoria Sponge Cake a timeless dessert suitable for both everyday enjoyment and special occasions.
8. Nutritional Information
Approximate values per serving, based on 10 slices and the listed ingredients.
| Nutrient | Estimated Amount |
|---|---|
| Calories | 390–450 kcal |
| Protein | 5–7 g |
| Carbohydrates | 45–55 g |
| Fat | 21–26 g |
| Fiber | Less than 1 g |
| Sugars | 30–38 g |
| Sodium | Varies by self-raising flour and baking powder |
Nutritional values will vary depending on the cream used, type of jam, exact portion sizes, and any additional toppings.
9. Recipe Details
- Prep Time: 20 minutes
- Bake Time: 20–25 minutes
- Cooling Time: Approximately 45–60 minutes
- Assembly Time: 10–15 minutes
- Total Time: Approximately 1 hour 35 minutes to 2 hours
- Servings: 10 slices
- Yield: One 20 cm (8-inch) two-layer cake
- Cuisine: British
- Course: Dessert, afternoon tea, or celebration cake
- Cooking Method: Oven baking
- Difficulty: Easy to moderate
- Equipment: Two 20 cm round cake tins, electric mixer, mixing bowls, spatula, sieve, and wire cooling rack
10. Conclusion
Classic Victoria Sponge Cake with Fresh Whipped Cream and Strawberry Jam is a timeless British dessert that proves simple ingredients can create something truly special.
The soft, buttery sponge layers, sweet fruit jam, and light whipped cream combine to produce a cake that is elegant without being overly complicated.
Its delicate texture and traditional appearance make it a wonderful choice for afternoon tea, family celebrations, birthdays, and weekend baking.
By carefully creaming the butter and sugar, incorporating the eggs gradually, and avoiding overmixing, home bakers can achieve a light and tender sponge with reliable results.
The addition of fresh whipped cream creates a particularly delicate filling, while strawberry or raspberry jam adds the familiar fruity sweetness associated with this classic cake.
Whether served with tea or enjoyed as a special dessert, Victoria Sponge Cake remains a beloved example of traditional British home baking.
11. Recommendation
Serving: Serve with freshly brewed English breakfast tea, Earl Grey tea, or coffee. Fresh strawberries or raspberries can be offered alongside the cake.
Make-ahead preparation: Bake the sponge layers one day in advance. Once completely cooled, wrap them individually and store in an airtight container at cool room temperature. Assemble with fresh cream closer to serving time.
Storage: Because the cake contains fresh whipped cream, store the assembled cake in an airtight container in the refrigerator at 40°F (4°C) or below. For the best texture and freshness, enjoy within 1–2 days.
Room-temperature serving: Remove the cake from the refrigerator shortly before serving to allow the sponge to soften slightly. Do not leave a cream-filled cake at room temperature for more than two hours.
Freezing: Unfilled sponge layers freeze well for approximately 2–3 months when wrapped tightly. Thaw completely before adding the jam and whipped cream. Freezing the fully assembled cake is not recommended because the cream may separate and lose its texture.
Alternative filling: For a cake that is easier to transport and decorate, use vanilla buttercream instead of fresh whipped cream. Storage requirements will depend on the exact buttercream ingredients and surrounding temperature.
Food safety: Use pasteurized whipping cream, keep the filling chilled until needed, and refrigerate the assembled cake promptly.
12. Embracing Healthful Indulgence
Classic Victoria Sponge Cake with Fresh Whipped Cream and Strawberry Jam is a traditional dessert designed to be enjoyed as an occasional sweet treat.
The eggs contribute protein and several essential nutrients, while milk and cream provide calcium and richness.
Fruit jam adds flavor and sweetness, although its nutritional contribution depends on the fruit content and amount of added sugar.
The cake also contains butter, refined flour, and sugar, making it relatively rich in calories and saturated fat.
For a slightly lighter variation, use a thinner layer of whipped cream, reduce the amount of jam, or serve smaller slices with fresh berries.
Fresh strawberries and raspberries can add fiber, vitamin C, and natural fruit flavor.
However, major reductions in the butter, sugar, or eggs may change the cake’s characteristic texture and rise, so adjustments should be made carefully.
The traditional recipe is best appreciated for its delicate sponge, balanced filling, and simple elegance.
With its soft golden layers, fruity jam, and airy cream, Victoria Sponge Cake offers a wonderful way to celebrate the pleasure of homemade baking and enjoy a classic British teatime tradition.