
Introduction
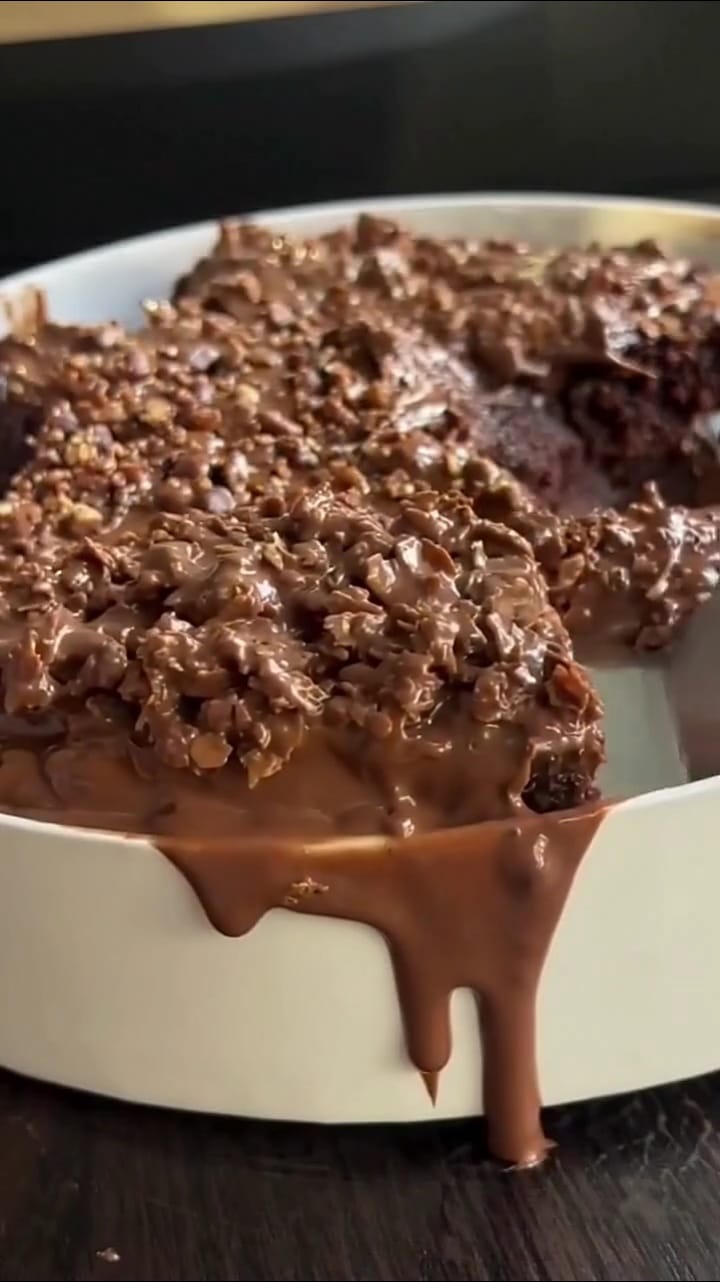
Dreamy Crunchy Chocolate Cake is a spectacular dessert featuring ultra-moist chocolate cake layers, silky chocolate frosting, a crisp crunchy filling, and a glossy melted chocolate finish. Every bite combines soft, tender cake with satisfying crunch and deep chocolate flavor, creating an unforgettable dessert that looks as impressive as it tastes.
Perfect for birthdays, celebrations, holidays, or any occasion where only an extraordinary chocolate cake will do.
Origin
Modern bakery-style crunch cakes became popular by combining moist chocolate sponge with crispy wafer or chocolate crunch layers to add contrast in texture. This version delivers the perfect harmony of creamy, crunchy, and chocolatey goodness.
Cultural Significance
Chocolate celebration cakes symbolize joy, generosity, and togetherness. Cakes with crunchy fillings have become increasingly popular in artisan bakeries and social media baking trends thanks to their beautiful layers and irresistible texture.
Ingredients Quantity
Yield: 14–16 servings
For the Chocolate Cake
- 1¼ cups (300 ml) whole milk, boiling
- 3 tablespoons apple cider vinegar
- 1 teaspoon instant coffee
- ½ cup (50 g) unsweetened cocoa powder (10–12% fat)
- 1 cup + 2 tablespoons sunflower oil (or another neutral vegetable oil)
- 4 medium eggs, room temperature
- 2 cups (400 g) granulated sugar
- 2½ cups (315 g) all-purpose flour
- 2 teaspoons baking powder
- 1 teaspoon baking soda
- ½ teaspoon salt
- 2 teaspoons vanilla extract
For the Chocolate Frosting
- 1 cup (225 g) unsalted butter, softened
- 4 cups powdered sugar
- ¾ cup unsweetened cocoa powder
- ½ cup heavy cream
- 1 teaspoon vanilla extract
- Pinch of salt
For the Crunch Layer
- 2 cups crispy chocolate cereal or crushed chocolate wafer cookies
- ½ cup melted milk or dark chocolate
- 2 tablespoons melted butter
For the Chocolate Glaze
- 200 g semi-sweet chocolate, chopped
- 200 ml heavy cream
For Decoration
- Chocolate curls
- Chocolate shards
- Chocolate pearls
- Crispy chocolate pieces
- Cocoa powder
Optional Additions
Customize your cake with
- Toasted hazelnuts
- Salted caramel
- Chocolate mousse filling
- Espresso powder
- Crushed chocolate sandwich cookies
- White chocolate drizzle
- Toffee bits
- Roasted almonds
Tips for Success
Allow the boiling milk to bloom the cocoa powder for a deeper chocolate flavor.
Use room-temperature eggs for a smoother batter.
Do not overmix the batter once the flour is added.
Allow the cake to cool completely before assembling to maintain clean layers.
Instructions
Step 1 Prepare the Oven
Preheat the oven to 350°F (175°C).
Grease and line two 8-inch (20 cm) round cake pans with parchment paper.
Step 2 Prepare the Chocolate Batter
Combine the boiling milk, instant coffee, and cocoa powder. Stir until smooth.
Add the apple cider vinegar and allow the mixture to cool slightly.
In a large bowl, whisk together the eggs, sugar, sunflower oil, and vanilla extract.
In another bowl, whisk together the flour, baking powder, baking soda, and salt.
Alternate adding the dry ingredients and cocoa mixture to the egg mixture until a smooth batter forms.
Divide evenly between the prepared pans.
Step 3 Bake
Bake for 30–35 minutes, or until a toothpick inserted into the center comes out clean.
Cool in the pans for 10 minutes, then transfer to a wire rack to cool completely.
Step 4 Prepare the Chocolate Frosting
Beat the softened butter until creamy.
Gradually add the powdered sugar and cocoa powder.
Mix in the heavy cream, vanilla extract, and salt until smooth and fluffy.
Step 5 Prepare the Crunch Layer
Mix the crispy chocolate cereal (or crushed chocolate wafer cookies) with the melted chocolate and melted butter until evenly coated.
Allow the mixture to cool slightly so it remains crisp.
Step 6 Assemble the Cake
Place one cake layer on a serving plate.
Spread a layer of chocolate frosting.
Evenly distribute the crunchy chocolate mixture over the frosting.
Add another thin layer of frosting to hold the crunch in place.
Top with the second cake layer.
Frost the top and sides of the cake.
Step 7 Prepare the Chocolate Glaze
Heat the heavy cream until just simmering.
Pour over the chopped chocolate.
Let stand for 2 minutes, then stir until smooth.
Pour the glaze over the cake, allowing it to drip naturally down the sides.
Step 8 Decorate
Finish with chocolate curls, crispy chocolate pieces, chocolate pearls, or a dusting of cocoa powder.
Slice and serve.
Description
Dreamy Crunchy Chocolate Cake combines incredibly moist chocolate sponge with creamy frosting, a crispy chocolate crunch layer, and a glossy chocolate glaze. Every slice delivers a luxurious contrast of soft cake, creamy filling, and irresistible crunch.
Nutritional Information
Estimated Per Serving
- Calories: 690 kcal
- Protein: 7 g
- Carbohydrates: 73 g
- Fat: 42 g
- Saturated Fat: 18 g
- Fiber: 4 g
- Sugar: 54 g
- Sodium: 280 mg
Nutrition values are estimates and may vary depending on ingredient brands and serving sizes.
Conclusion
Dreamy Crunchy Chocolate Cake is an elegant dessert that combines bakery-quality presentation with unforgettable flavor and texture. Rich chocolate, moist cake, and a satisfying crunch make it a perfect centerpiece for celebrations and special occasions.
Recommendation
Serve at room temperature with freshly brewed coffee, espresso, cappuccino, or a cold glass of milk. Fresh raspberries or strawberries provide a refreshing contrast to the rich chocolate flavors.
Store covered in the refrigerator for up to 5 days. Remove from the refrigerator 20–30 minutes before serving for the softest texture. Unfrosted cake layers can be frozen for up to 2 months.
Embracing Healthful Indulgence
Homemade baking brings together quality ingredients, creativity, and meaningful moments with loved ones. This Dreamy Crunchy Chocolate Cake celebrates the joy of sharing an indulgent dessert, encouraging mindful enjoyment as part of a balanced lifestyle.