
Introduction
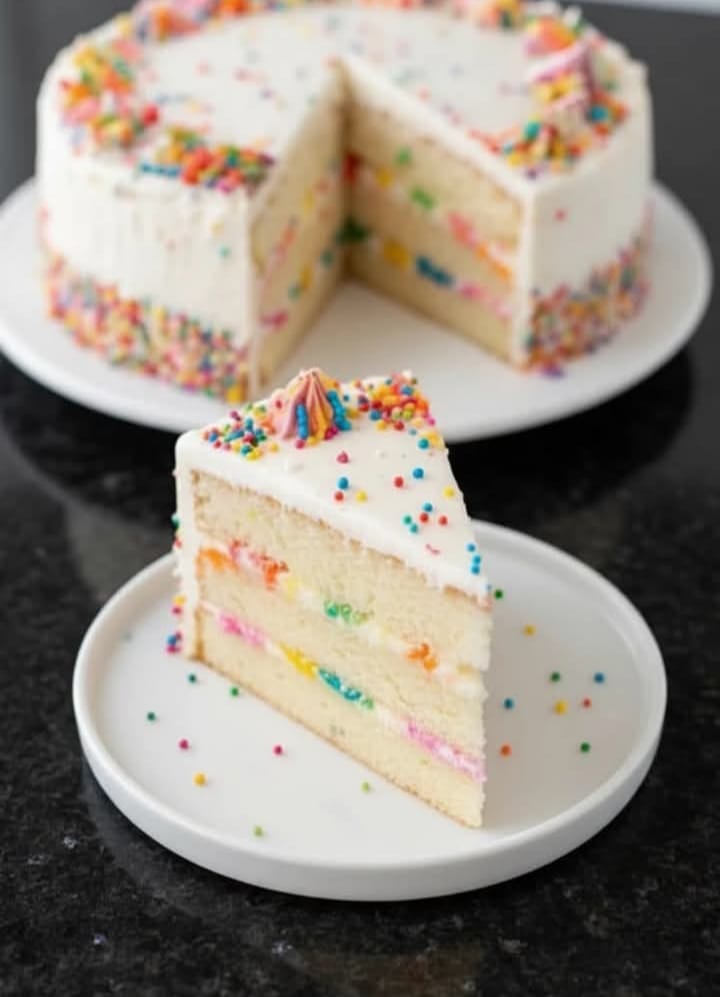
Funfetti Layer Cake is a joyful, colorful dessert featuring moist vanilla cake layers filled with vibrant rainbow sprinkles and frosted with a smooth, creamy vanilla buttercream. Every slice reveals cheerful bursts of color, making this cake a favorite for birthdays, celebrations, baby showers, graduations, and any occasion worth celebrating. With its soft texture and classic vanilla flavor, Funfetti Cake is a timeless dessert that brings smiles to both children and adults.
Origin
Funfetti cake became popular in the United States during the late 1980s when colorful sprinkle-filled cake mixes were introduced to home bakers. Inspired by classic vanilla layer cakes, Funfetti quickly evolved into a celebration staple thanks to its festive appearance and nostalgic flavor. Today, homemade versions have become increasingly popular, offering richer flavor and a more tender crumb than boxed mixes.
Cultural Significance
Funfetti Cake has become synonymous with birthdays, celebrations, and joyful milestones. Its colorful appearance symbolizes happiness, excitement, and togetherness, making it a centerpiece at children’s parties, weddings, anniversaries, graduations, and holiday gatherings. For many families, Funfetti Cake represents cherished memories and traditions shared across generations.
Ingredients
For the Cake
- 2¼ cups (280 g) all-purpose flour
- 2 teaspoons baking powder
- ½ teaspoon salt
- 1 cup (230 g) unsalted butter, softened
- 1½ cups (300 g) granulated sugar
- 3 large eggs, room temperature
- 1 tablespoon vanilla extract
- 1 cup (240 ml) whole milk, room temperature
- ½ cup (80 g) rainbow jimmies (long sprinkles)
For the Vanilla Buttercream Frosting
- 1½ cups (340 g) unsalted butter, softened
- 4 cups (480 g) powdered sugar, sifted
- 2–3 tablespoons heavy cream or whole milk
- 2 teaspoons vanilla extract
- Pinch of salt
Optional Additions
- White chocolate chips
- Vanilla bean paste
- Almond extract
- Cream cheese frosting
- Strawberry buttercream
- Chocolate ganache drip
- Fresh berries
- Edible glitter
- Extra rainbow sprinkles for decoration
- Colorful candy toppings
Tips for Success
- Use room-temperature butter, eggs, and milk for a smooth batter.
- Measure the flour accurately to prevent a dense cake.
- Use rainbow jimmies rather than nonpareils, as they hold their color better during baking.
- Fold the sprinkles into the batter gently at the very end to avoid color bleeding.
- Do not overmix once the flour has been added.
- Divide the batter evenly between the cake pans for uniform layers.
- Allow the cakes to cool completely before frosting.
- Apply a thin crumb coat before adding the final layer of frosting.
- Refrigerate the cake for 20–30 minutes after the crumb coat for a cleaner finish.
- Decorate with additional sprinkles immediately after frosting so they adhere well.
Instructions
Step 1: Prepare the Cake
- Preheat the oven to 350°F (175°C).
- Grease and line two 8-inch or three 6-inch round cake pans with parchment paper.
- In a medium bowl, whisk together the flour, baking powder, and salt.
- In a large bowl, beat the butter and sugar until light and fluffy, about 3–4 minutes.
- Add the eggs one at a time, mixing well after each addition.
- Stir in the vanilla extract.
- Alternate adding the flour mixture and milk, beginning and ending with the dry ingredients.
- Mix just until combined.
- Gently fold in the rainbow sprinkles.
- Divide the batter evenly among the prepared pans.
- Bake for 28–32 minutes, or until a toothpick inserted into the center comes out clean.
- Cool in the pans for 10 minutes, then transfer to wire racks to cool completely.
Step 2: Prepare the Buttercream
- Beat the softened butter until smooth and creamy.
- Gradually add the powdered sugar.
- Add the vanilla extract, salt, and heavy cream.
- Beat until light, fluffy, and spreadable.
Step 3: Assemble the Cake
- Place one cake layer on a serving plate.
- Spread an even layer of buttercream over the top.
- Add the remaining cake layers, repeating with frosting.
- Apply a thin crumb coat and chill for 20 minutes.
- Frost the cake completely with the remaining buttercream.
- Decorate generously with additional rainbow sprinkles.
Description
Funfetti Layer Cake features soft, buttery vanilla cake packed with colorful sprinkles and layered with silky vanilla buttercream. Its tender crumb, festive appearance, and rich homemade flavor make it the ultimate celebration cake for birthdays and special occasions.
Nutritional Information
Approximate per serving (based on 12 servings):
| Nutrient | Amount |
|---|---|
| Calories | 640 kcal |
| Protein | 5 g |
| Carbohydrates | 74 g |
| Fat | 36 g |
| Saturated Fat | 22 g |
| Cholesterol | 120 mg |
| Sodium | 210 mg |
| Fiber | 1 g |
| Sugar | 56 g |
Nutrition values are estimates and may vary depending on the ingredients used.
Conclusion
Funfetti Layer Cake is more than just a dessert—it’s a celebration in every slice. Its colorful sprinkles, moist vanilla cake, and creamy buttercream create a cheerful centerpiece that’s perfect for birthdays, holidays, and life’s happiest moments. Easy to customize and always crowd-pleasing, it’s a recipe you’ll return to again and again.
Recommendation
Serve Funfetti Layer Cake with vanilla ice cream, fresh berries, or a cold glass of milk for the ultimate dessert experience. It’s best enjoyed at room temperature, allowing the buttercream to become perfectly soft and creamy. This cake can also be baked a day in advance and frosted before serving, making it ideal for parties and celebrations.
Embracing Healthful Indulgence
Celebration cakes remind us that food is about more than nourishment—they’re also about creating joyful memories with the people we love. Baking Funfetti Layer Cake from scratch allows you to use fresh, high-quality ingredients while enjoying the creativity of homemade baking. By savoring a moderate slice as part of a balanced lifestyle, you can celebrate life’s special occasions while embracing the simple pleasure of sharing homemade treats.