
Introduction
Artisan Sourdough Bread is a rustic, naturally leavened loaf known for its crisp, golden-brown crust, chewy interior, and distinctive tangy flavor. Made with just four basic ingredients—bread flour, water, active sourdough starter, and salt—this homemade bread develops its beautiful texture through fermentation, gentle dough handling, and high-temperature baking.
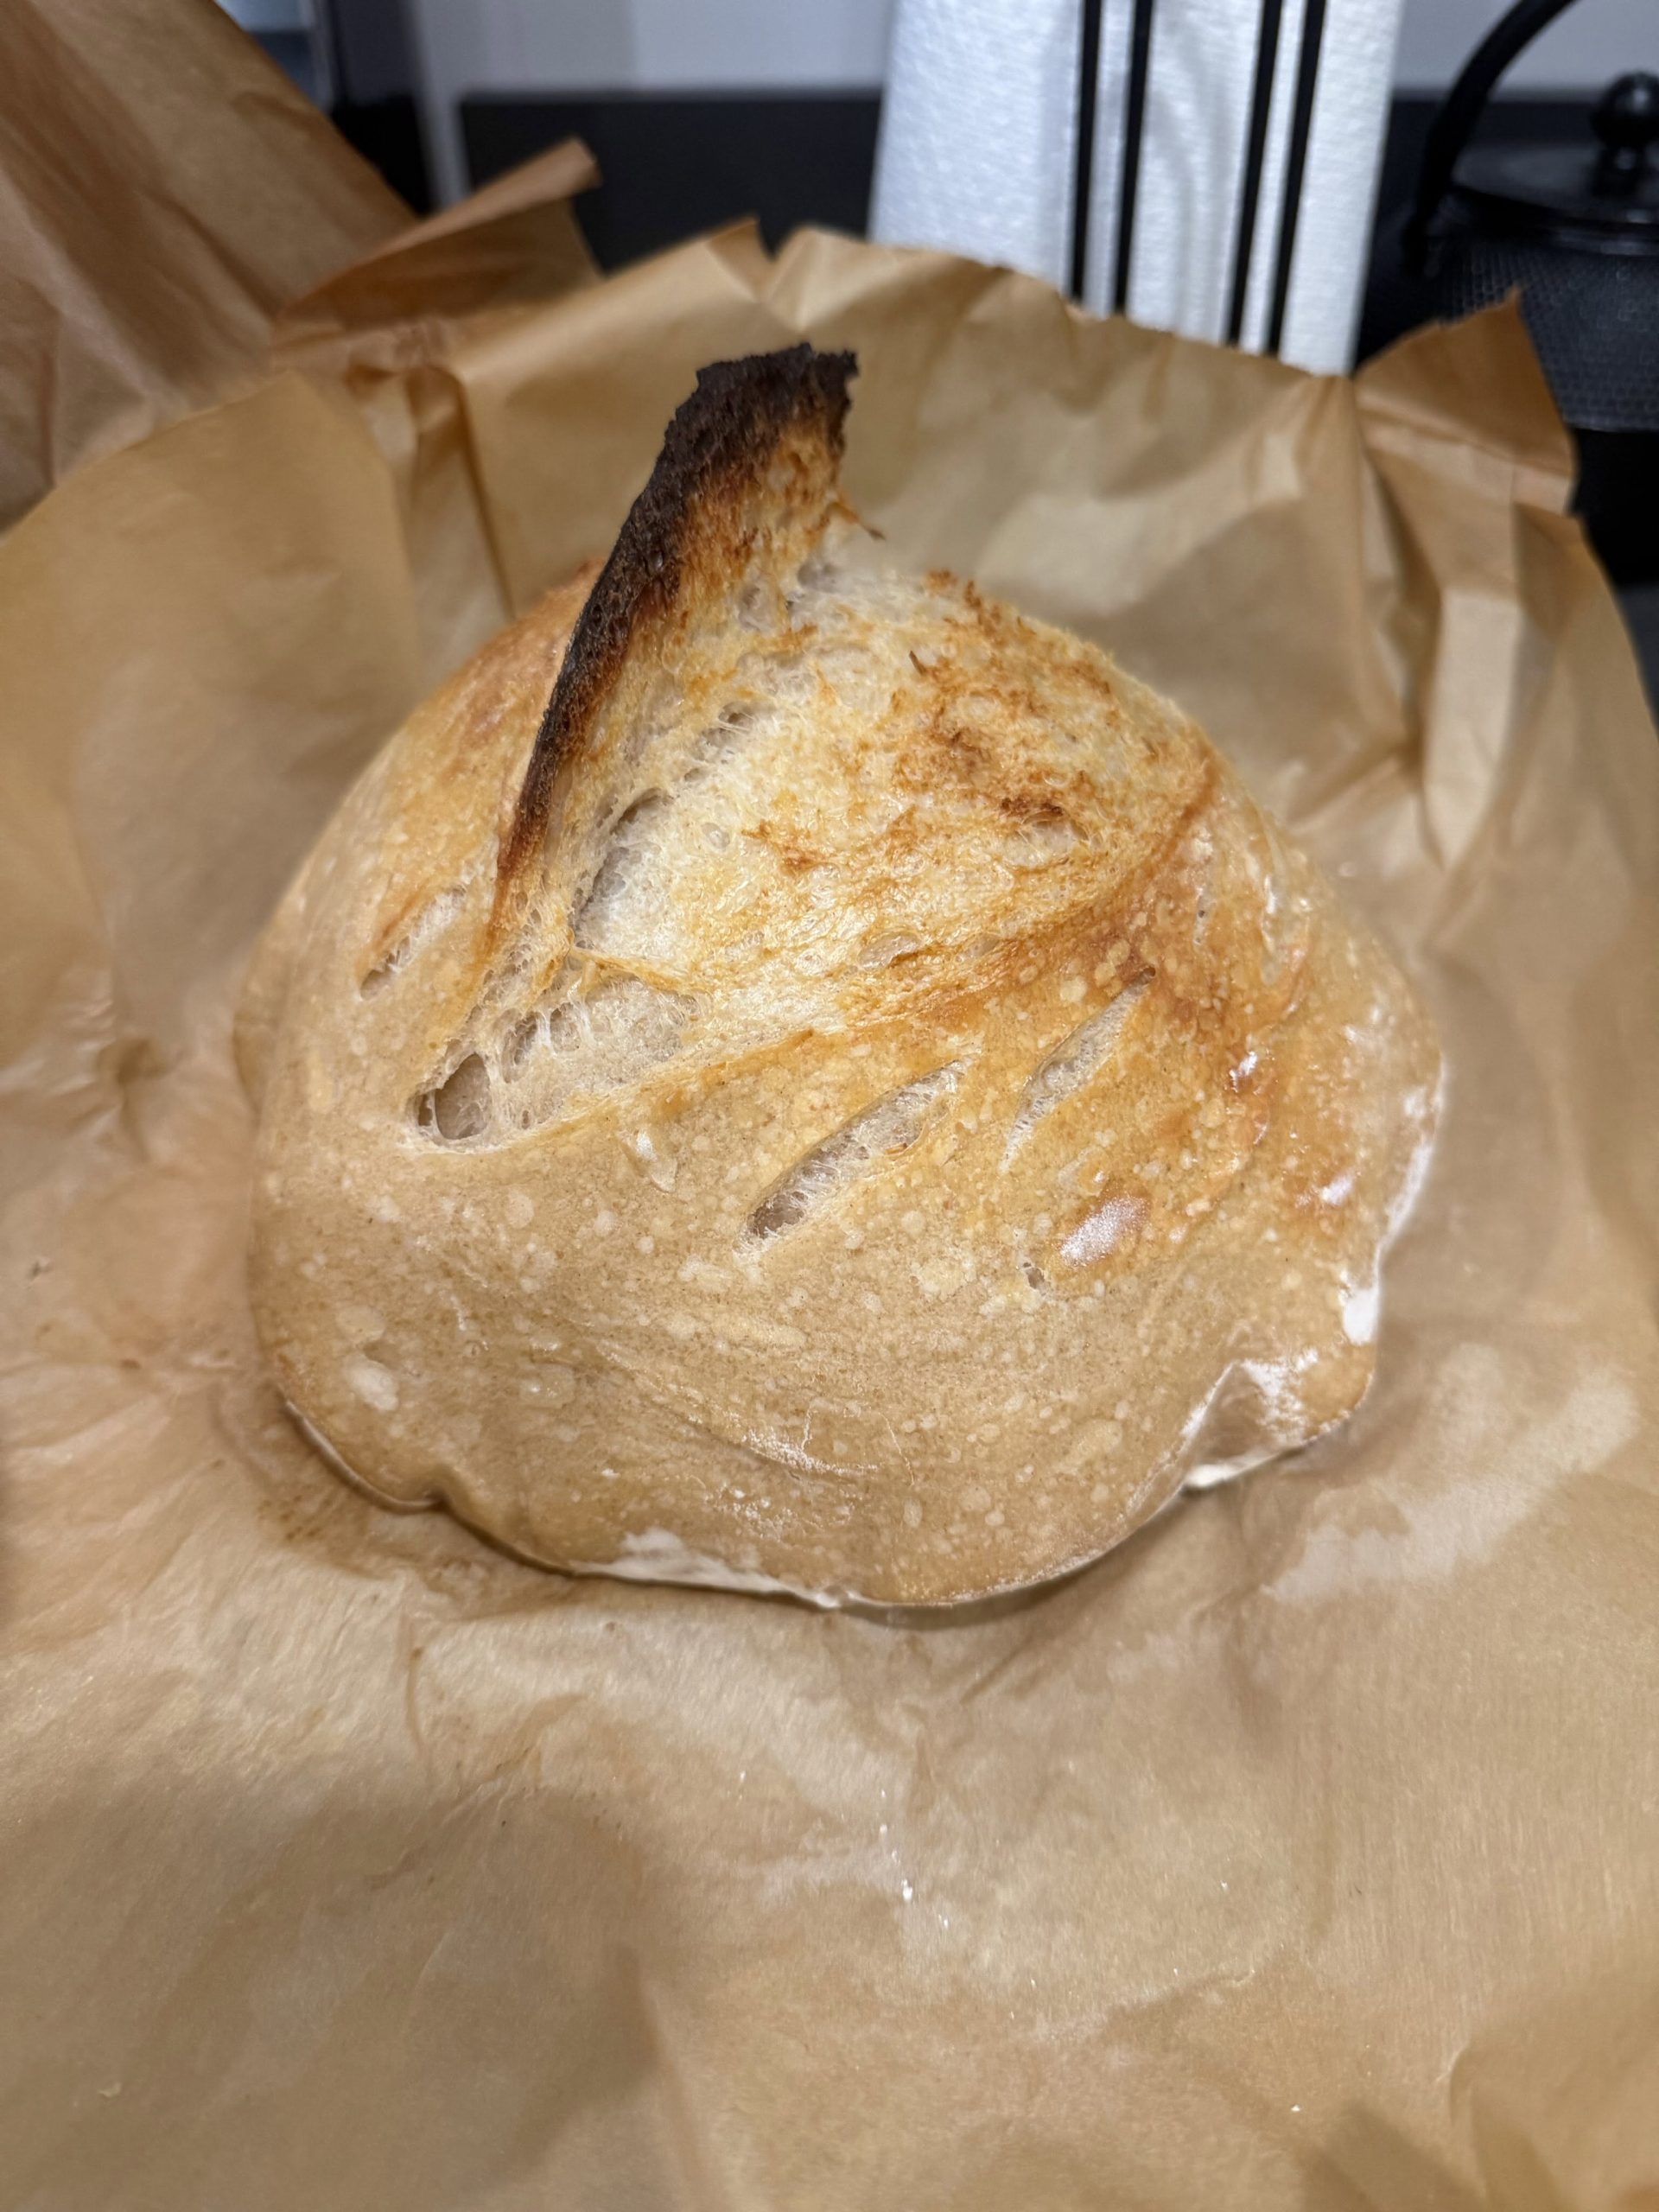
The finished loaf features an open crumb, a deeply caramelized crust, and a dramatic scored ear that rises during baking. Although sourdough requires patience, the process is straightforward once you understand the timing of fermentation, shaping, and cold proofing.
Whether served with butter, paired with soup, or used for sandwiches, this artisan loaf brings the flavor and character of traditional bakery bread to your kitchen.
Origin and Cultural Significance
Sourdough is one of the oldest forms of leavened bread, relying on a culture of wild yeasts and beneficial bacteria rather than commercial baker’s yeast alone. Before modern packaged yeast became widely available, naturally fermented dough was an important way to make bread rise.
Artisan sourdough baking continues this tradition by allowing time and fermentation to develop flavor, texture, and structure. Modern bakers often use a cold overnight proof to improve flavor and make the dough easier to score before baking.
The rustic boule, or round loaf, is a popular artisan shape. Its crisp crust and chewy interior make it versatile enough for everyday meals, breakfast toast, and special occasions.
Ingredients
For the Sourdough Dough
- 500 g bread flour, or high-quality unbleached all-purpose flour
- 350 g lukewarm water
- 100 g active, bubbly sourdough starter
- 10 g fine sea salt
For Shaping and Baking
- A small amount of flour for dusting the work surface and proofing basket
- Parchment paper, suitable for the baking temperature
Optional Additions
- Whole-wheat flour: Replace up to 10–20% of the bread flour for a nuttier flavor and slightly denser crumb.
- Seeds: Add sunflower, sesame, or pumpkin seeds for extra texture.
- Fresh rosemary: Incorporate finely chopped rosemary for an aromatic variation.
- Roasted garlic: Fold in cooled roasted garlic during dough development for a savory loaf.
- Olives: Add drained, chopped olives for a Mediterranean-inspired version.
These additions can affect dough hydration and structure, so introduce them gradually and avoid overloading the dough.
Tips for Success
- Use an active starter: Your starter should be bubbly, expanded, and recently fed. A weak starter can lead to a dense loaf.
- Measure by weight: A digital kitchen scale provides more consistent results than measuring flour and water by volume.
- Monitor the dough, not just the clock: Fermentation speed depends on starter strength and room temperature. Look for visible expansion, bubbles, and a lighter, airier texture.
- Keep your hands damp during folds: This helps prevent sticking without adding excessive flour.
- Build surface tension when shaping: A taut outer surface helps the loaf hold its shape and encourages a strong rise in the oven.
- Use rice flour for the proofing basket: Rice flour is less prone to absorbing moisture and can help prevent the dough from sticking.
- Preheat the Dutch oven thoroughly: A fully heated pot helps the loaf rise rapidly and develop a crisp crust.
- Score with a sharp blade: A clean, angled cut encourages the crust to open in a controlled way, creating the characteristic ear.
- Use oven-safe parchment: Check the manufacturer’s temperature rating before placing it in a hot Dutch oven.
- Cool completely before slicing: Cutting too early can compress the crumb and make the bread appear gummy.
Instructions
Step 1: Mix the Dough
In a large mixing bowl, combine the lukewarm water and active sourdough starter. Stir until the starter is mostly dissolved and the water looks cloudy.
Add the bread flour and salt. Mix with a sturdy spoon or your hands until all the flour is hydrated and no dry patches remain. The dough will look rough and sticky at this stage.
Cover the bowl and let the dough rest for 30 minutes. This rest allows the flour to absorb the water and begins gluten development.
Step 2: Develop the Gluten with Stretch and Folds
With slightly damp hands, grab one edge of the dough, stretch it gently upward without tearing, and fold it over the center.
Rotate the bowl approximately 90 degrees and repeat. Continue until you have folded all four sides.
Complete four sets of stretch and folds over approximately two hours, resting the covered dough for 30 minutes between sets.
As the dough rests and is folded, it should become smoother, more elastic, and better able to hold its shape.
Step 3: Bulk Fermentation
After the final set of folds, cover the bowl and leave the dough at room temperature to ferment.
Allow approximately 6–10 hours, depending on the temperature of your kitchen and the activity of your starter. In warmer conditions, fermentation may finish sooner; in cooler conditions, it may take longer.
The dough is ready when it has expanded noticeably—often by around 50–75% or more, depending on conditions—looks airy, has bubbles along the sides, and jiggles slightly when the bowl is moved. It does not always need to double completely.
Avoid relying exclusively on the clock. Over-fermentation can weaken the dough and make shaping more difficult.
Step 4: Shape the Boule
Lightly flour your work surface and gently turn the dough out of the bowl.
Fold the outer edges toward the center to create a rough round shape. Flip the dough so the seam is underneath.
Cup your hands around the dough and gently pull it toward yourself across the work surface. Rotate and repeat as necessary until the outer surface becomes taut and the dough forms a smooth, round boule.
Use just enough flour to prevent sticking while allowing the dough to grip the work surface slightly. Excess flour can make it harder to build surface tension.
Step 5: Cold Proof Overnight
Lightly dust a proofing basket, or a bowl lined with a clean kitchen towel, with flour. Rice flour is particularly useful for preventing sticking.
Place the shaped dough into the basket seam-side up. Cover it well and refrigerate for 12–16 hours.
Cold proofing slows fermentation, helps develop flavor, and firms the dough so it is easier to score before baking.
Step 6: Preheat the Oven and Prepare the Loaf
The next day, place a heavy cast-iron Dutch oven with its lid inside the oven. Preheat to 450°F (232°C) for at least 45–60 minutes, following the cookware manufacturer’s instructions.
Carefully turn the cold dough out onto a piece of oven-safe parchment paper, positioning it smooth-side up.
Using a bread lame or very sharp blade, make one decisive, slightly curved slash along one side of the loaf. For a pronounced ear, cut approximately ½ inch deep at an angle of about 30–45 degrees to the surface.
Work carefully and keep your hands away from the blade.
Step 7: Bake Covered
Using suitable oven mitts, carefully remove the hot Dutch oven and take off the lid.
Lift the dough by the parchment edges and lower it into the pot. Replace the lid immediately to trap steam.
Return the Dutch oven to the oven and bake covered at 450°F (232°C) for 25–30 minutes.
The trapped steam delays crust formation, allowing the loaf to expand and the scored area to open.
Step 8: Finish Baking Uncovered
Remove the lid carefully, keeping your face and hands away from the escaping steam.
Continue baking uncovered for another 15–20 minutes, or until the crust is a deep golden brown to dark amber, according to your preference.
For a more reliable doneness check, the center of the loaf should generally reach approximately 205–210°F (96–99°C). The crust should feel firm, and the loaf should sound hollow when tapped on the bottom.
Step 9: Cool Before Slicing
Carefully remove the loaf from the Dutch oven and transfer it to a wire cooling rack.
Allow it to cool for at least 1–2 hours before slicing. During this time, moisture redistributes and the crumb finishes setting.
Cutting into the loaf while it is still very hot can compress the interior and produce a sticky or gummy texture.
Description
This artisan sourdough boule has a crisp, deeply browned crust and a chewy, flavorful interior. Natural fermentation creates subtle tanginess, while the long cold proof helps develop a more complex flavor.
The signature scored ear gives the loaf a rustic bakery appearance, and the contrast between the crunchy crust and tender crumb makes each slice satisfying. With its simple ingredients and traditional fermentation process, this bread is an excellent foundation for everyday meals or more elaborate serving ideas.
Nutritional Information
Approximate values per serving, assuming 12 servings per loaf:
- Calories: 170–190
- Protein: 5–7 g
- Carbohydrates: 33–38 g
- Fat: 0.5–2 g
- Saturated fat: Less than 0.5 g
- Fiber: 1–2 g
- Sugar: Less than 1 g
- Sodium: 300–350 mg
These estimates assume the sourdough starter contains equal weights of flour and water and that the loaf is divided into 12 similar portions. Actual values depend on the flour used, starter composition, and slice size.
Recipe Details
- Prep time: Approximately 30 minutes of active preparation
- Bulk fermentation: Approximately 6–10 hours
- Cold proof: 12–16 hours
- Bake time: 40–50 minutes
- Cooling time: 1–2 hours
- Total elapsed time: Approximately 20–30 hours, depending on fermentation
- Yield: 1 large round loaf
- Servings: Approximately 12 slices
- Cuisine: Artisan baking
- Course: Bread
- Cooking method: Fermentation and oven baking
- Difficulty: Moderate
Conclusion
Artisan Sourdough Bread rewards patience with a crisp crust, chewy crumb, and naturally developed flavor. Although the process takes time, most of that time is spent allowing the dough to ferment and rest rather than actively working with it.
By using an active starter, monitoring fermentation carefully, building surface tension during shaping, and baking in a thoroughly preheated Dutch oven, you can produce a beautiful rustic loaf at home.
Recommendation
Enjoy the bread slightly warm or at room temperature with butter, olive oil, cheese, or your favorite spread. It also pairs beautifully with soups, stews, roasted vegetables, and hearty sandwiches.
Store the cooled loaf cut-side down on a cutting board for short-term use, or keep it in a breathable bread bag at room temperature for approximately 2–3 days. Avoid refrigerating it, as refrigeration can make bread stale more quickly.
For longer storage, slice the fully cooled loaf and freeze the slices in a sealed freezer-safe bag for up to about 3 months. Toast frozen slices directly or allow them to thaw before serving.
Embracing Healthful Indulgence
Sourdough bread can be a satisfying part of a balanced diet. It provides carbohydrates for energy and some protein, while fermentation contributes its distinctive flavor and texture. Although sourdough fermentation may improve certain aspects of digestibility for some people, it does not make the bread gluten-free.
For additional fiber, replace a portion of the bread flour with whole-wheat flour, recognizing that this may produce a denser crumb and require slight adjustments to hydration. Pairing a slice with eggs, beans, vegetables, or another protein source can create a more balanced meal while allowing you to enjoy the flavor of homemade bread.