
1. Introduction
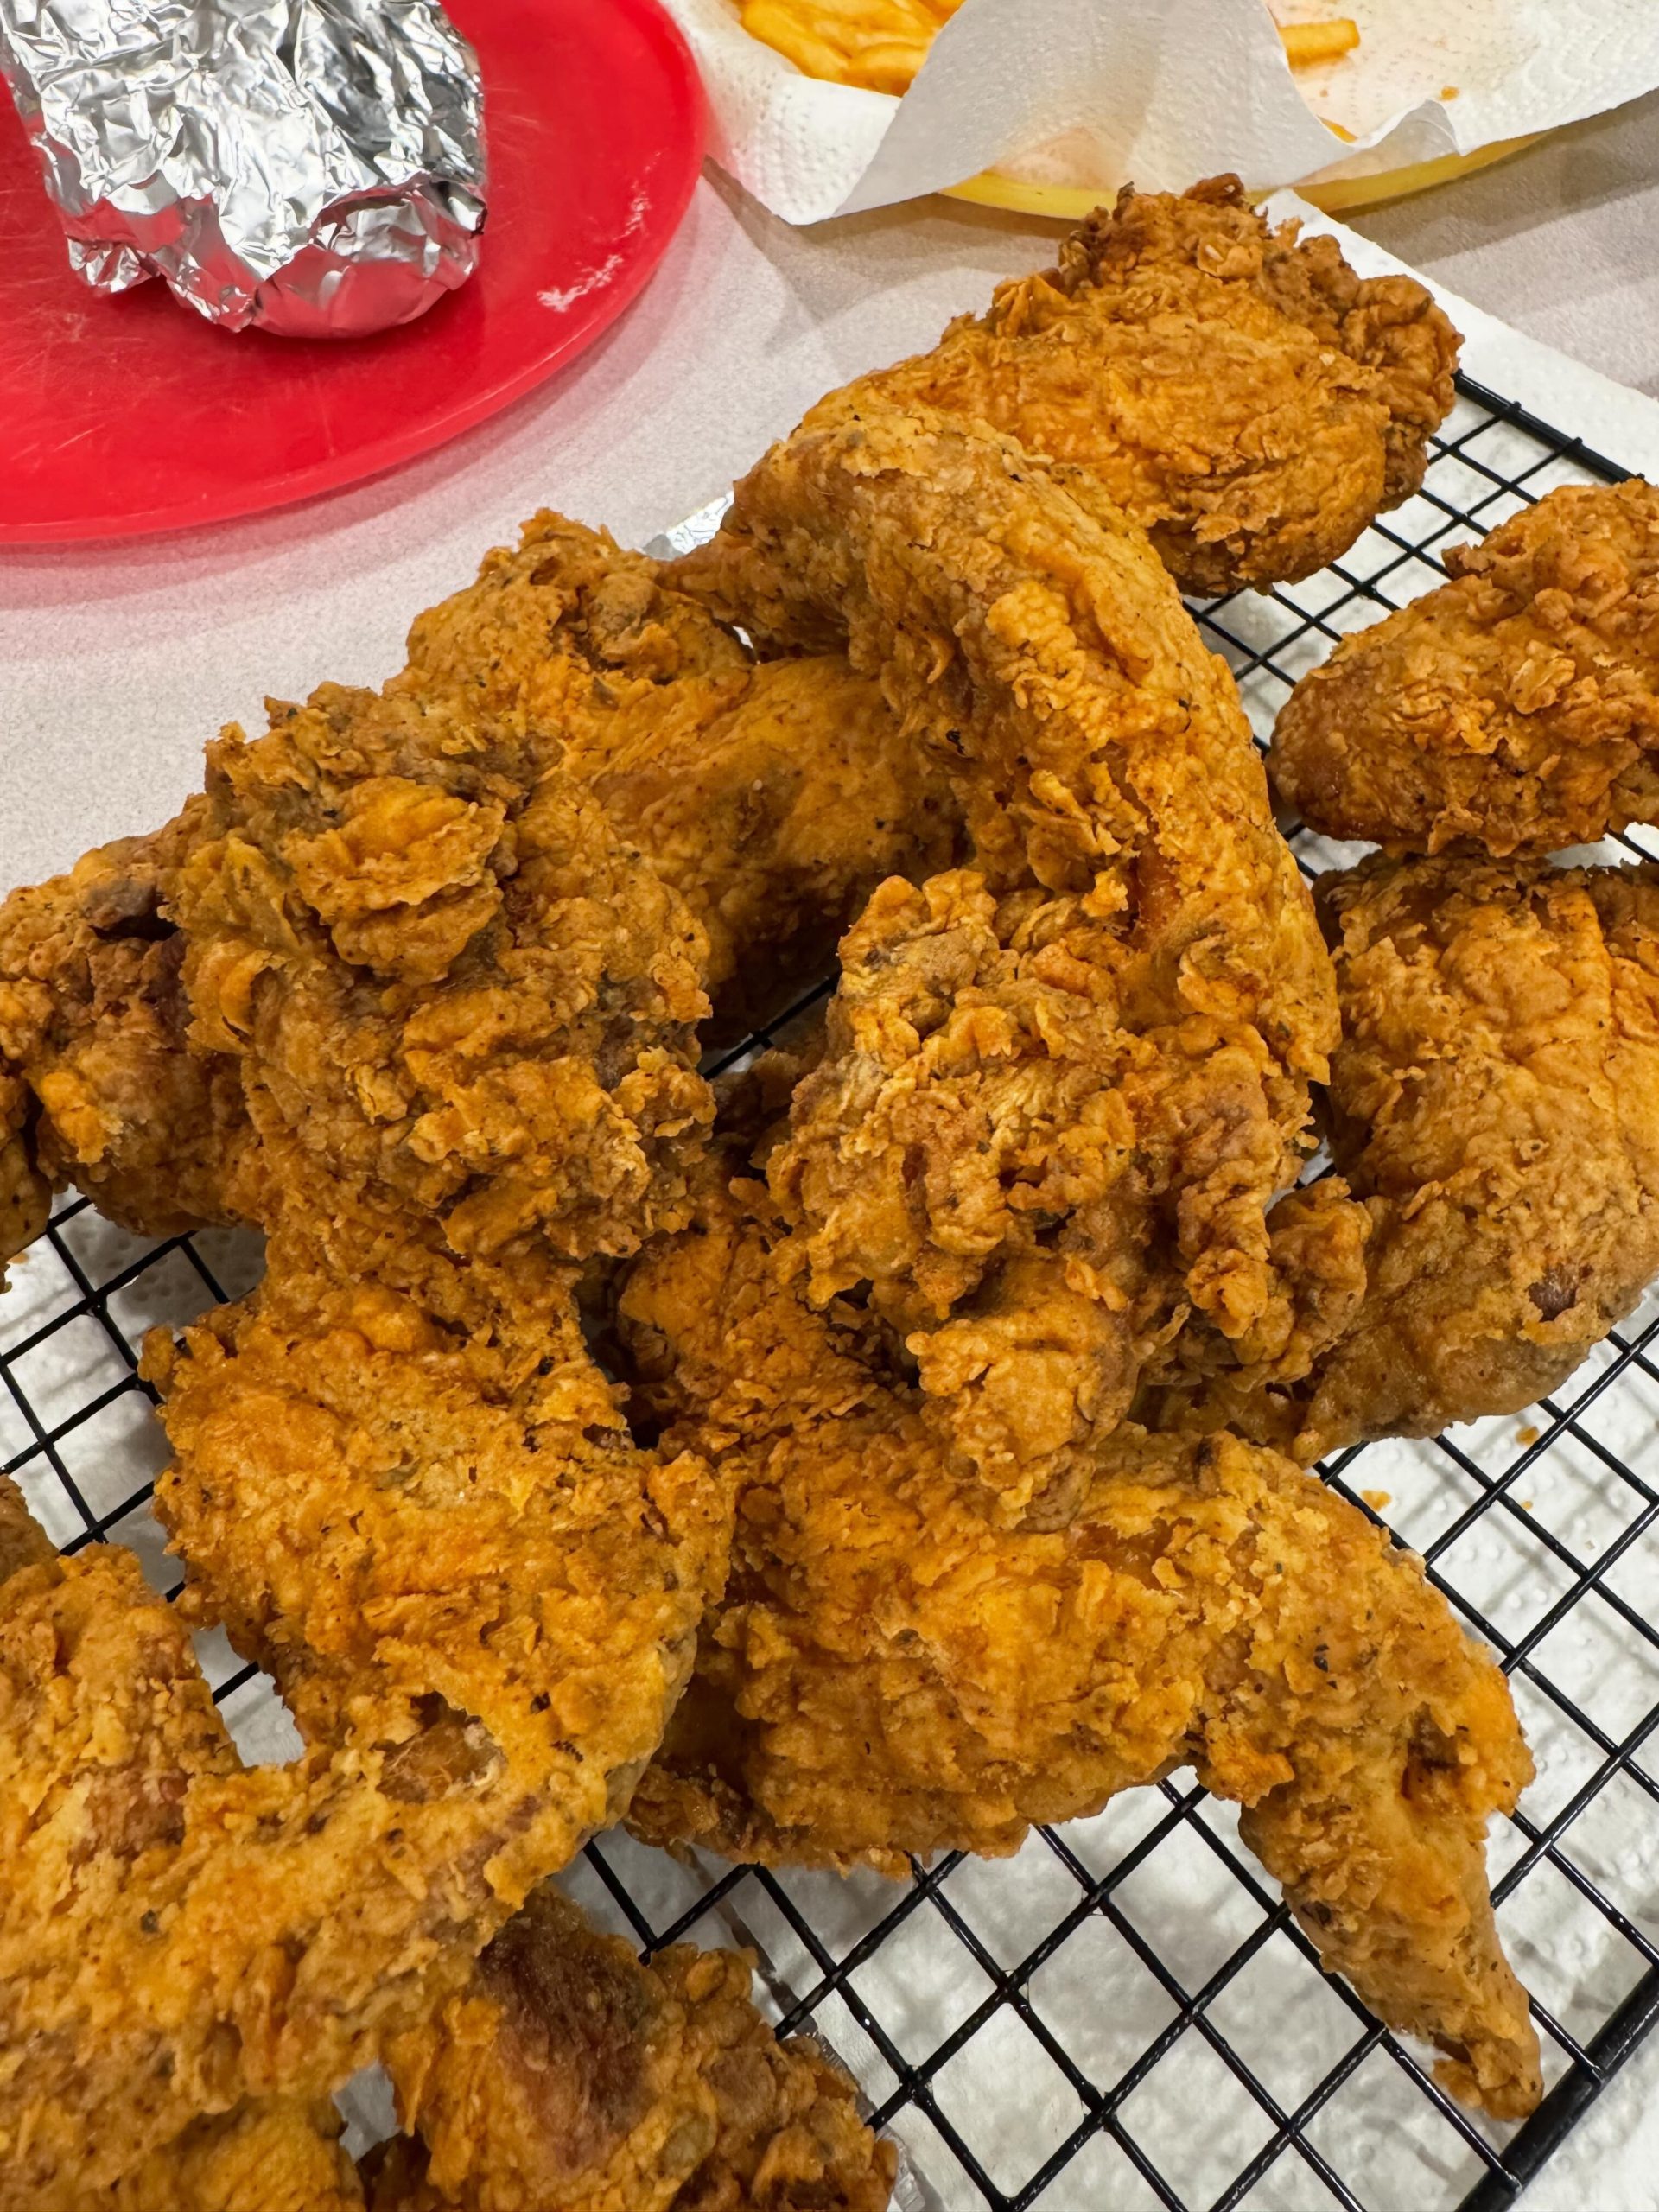
Extra-Crispy Buttermilk Fried Chicken is the ultimate comfort food, featuring juicy, tender chicken wrapped in a thick, golden-brown crust filled with irresistible crunchy ridges.
The secret to this homemade fried chicken lies in three simple techniques: a flavorful buttermilk marinade, a seasoned flour-and-cornstarch coating, and a special method that creates crispy, craggy pieces of breading.
Perfect for family dinners, weekend gatherings, picnics, or special occasions, this recipe delivers restaurant-style fried chicken with a satisfying crunch in every bite.
2. Origin and Cultural Significance
Fried chicken has deep roots in Southern American cuisine, shaped by African American culinary traditions and European frying techniques.
Over generations, cooks developed different approaches to seasoning, marinating, and coating chicken to create a flavorful crust while keeping the meat juicy.
Buttermilk became a popular ingredient in Southern-style fried chicken because its mild acidity helps tenderize the meat and provides a flavorful base for the coating.
Modern recipes often incorporate cornstarch, baking powder, and specialized dredging techniques to produce an exceptionally light, crunchy exterior.
3. Ingredients
Serves 6–8
For the Buttermilk Marinade
- 3–4 lbs (1.4–1.8 kg) bone-in, skin-on chicken pieces (thighs, drumsticks, and wings)
- 2 cups (480 ml) buttermilk
- 2 tablespoons hot sauce
- 1 tablespoon kosher salt (adjust according to salt brand)
- 1 teaspoon freshly ground black pepper
- 1 teaspoon garlic powder
For the Extra-Crispy Breading
- 3 cups (375 g) all-purpose flour
- ½ cup (65 g) cornstarch
- 1 tablespoon baking powder
- 2 tablespoons smoked paprika
- 1 tablespoon onion powder
- 1 tablespoon garlic powder
- 1 tablespoon kosher salt (adjust to taste)
- 1 teaspoon black pepper
- 1 teaspoon cayenne pepper, optional
For Frying
- Peanut oil, canola oil, or another neutral high-heat cooking oil
- Approximately 1½–2 quarts (1.4–1.9 liters), depending on pot size
Use enough oil for approximately 2–3 inches of depth in a deep, heavy-bottomed pot, keeping the oil level safely below halfway.
4. Optional Additions
- Hot honey: Drizzle over the finished chicken for a sweet-and-spicy finish.
- Cajun seasoning: Add 1 teaspoon to the breading for extra flavor.
- Dried thyme: Mix into the flour for a subtle herbal note.
- White pepper: Add ½ teaspoon for additional warmth.
- Pickle juice: Replace a small portion of the buttermilk with pickle juice for tanginess.
- Lemon wedges: Serve alongside the chicken for a fresh citrus contrast.
5. Tips for Success
- Marinate the chicken for at least 4 hours, preferably overnight.
- Keep the chicken refrigerated throughout marination.
- Use cornstarch to create a lighter, crispier coating.
- Add a few tablespoons of marinade to the flour to form crunchy, irregular clumps.
- Press the flour mixture firmly onto the chicken to help it adhere.
- Rest the coated chicken for 15 minutes before frying.
- Maintain the oil temperature around 325–350°F (163–175°C).
- Fry in small batches to prevent overcrowding.
- Use a thermometer to confirm the chicken is fully cooked.
- Drain the fried chicken on a wire rack instead of paper towels.
6. Instructions
Step 1: Prepare the Chicken
Pat the chicken pieces dry with paper towels.
Check for any remaining feathers or excess loose skin and remove them if necessary.
Place the chicken in a large mixing bowl.
Step 2: Make the Buttermilk Marinade
In a separate bowl, whisk together the buttermilk, hot sauce, kosher salt, black pepper, and garlic powder.
Pour the mixture over the chicken, ensuring every piece is fully coated.
Cover the bowl and refrigerate for at least 4 hours, preferably 8–12 hours.
Step 3: Prepare the Seasoned Flour
In a large, shallow dish, combine the all-purpose flour, cornstarch, baking powder, smoked paprika, onion powder, garlic powder, kosher salt, black pepper, and optional cayenne pepper.
Whisk thoroughly until the ingredients are evenly distributed.
Step 4: Create the Signature Crunchy Ridges
Take approximately 3 tablespoons of the buttermilk marinade from the chicken bowl.
Drizzle it over the seasoned flour mixture.
Using your fingertips or a fork, gently rub the liquid into the flour.
Small, irregular clumps should begin to form.
These clumps will adhere to the chicken and develop into crispy, textured ridges during frying.
Step 5: Coat the Chicken
Remove one piece of chicken from the marinade.
Allow excess buttermilk to drip off naturally.
Place the chicken into the seasoned flour mixture.
Press the coating firmly onto all sides, making sure the small flour clumps adhere to the surface.
Repeat with the remaining chicken pieces.
Discard any leftover marinade and flour mixture that have contacted raw chicken.
Step 6: Rest the Breaded Chicken
Arrange the coated chicken pieces on a wire rack placed over a baking sheet.
Allow them to rest for approximately 15 minutes.
This resting period helps the coating hydrate and adhere more securely during frying.
Step 7: Heat the Frying Oil
Pour the oil into a deep Dutch oven or heavy-bottomed pot.
Heat to 350°F (175°C), using a deep-fry thermometer to monitor the temperature.
Make sure the pot has enough empty space to prevent oil from overflowing when the chicken is added.
Step 8: Fry the Chicken in Batches
Carefully lower 3–4 pieces of chicken into the hot oil, depending on the size of the pot.
Avoid overcrowding.
The oil temperature will drop when the chicken is added. Adjust the heat to maintain approximately 325–350°F (163–175°C).
Turn the chicken occasionally for even browning.
Step 9: Cook Until Golden and Crispy
Frying times vary depending on the size and thickness of the pieces.
| Chicken Piece | Approximate Frying Time |
|---|---|
| Wings | 8–12 minutes |
| Drumsticks | 12–16 minutes |
| Bone-in thighs | 14–18 minutes |
| Large bone-in breasts | 15–20 minutes or longer |
These are guidelines only. Always check the internal temperature rather than relying solely on time.
The chicken must reach at least 165°F (74°C) in the thickest part, without touching the bone.
Dark meat often becomes more tender when cooked to approximately 175–185°F (79–85°C).
If the crust becomes dark before the interior is cooked, transfer the chicken to a 350°F (175°C) oven to finish cooking.
Step 10: Drain on a Wire Rack
Remove the cooked chicken from the oil using heat-resistant tongs.
Transfer it to a clean wire rack set over a baking sheet.
Allow excess oil to drip away while air circulates around the crust.
Avoid placing the chicken directly on paper towels, which can trap steam and soften the breading.
Step 11: Rest and Serve
Allow the fried chicken to rest for approximately 5 minutes.
This helps the juices settle and allows the crust to firm up slightly.
Serve hot with your favorite side dishes and dipping sauces.
7. Description
This Extra-Crispy Buttermilk Fried Chicken features a deeply golden, rugged crust with pronounced crunchy ridges.
The flour-and-cornstarch coating creates a light yet substantial crunch, while smoked paprika, garlic, and onion powder provide savory depth.
Inside, the chicken remains tender, juicy, and flavorful thanks to the buttermilk marinade.
Each bite delivers a satisfying contrast between the crisp exterior and succulent meat.
8. Nutritional Information
Approximate values per serving, assuming 8 servings from the recipe.
| Nutrient | Estimated Amount |
|---|---|
| Calories | 450–650 kcal |
| Protein | 30–42 g |
| Carbohydrates | 25–35 g |
| Fat | 25–42 g |
| Fiber | 1–2 g |
| Sodium | Varies significantly with seasoning |
Actual values depend on chicken size, the amount of breading retained, oil absorption, and serving portions.
9. Recipe Details
- Prep Time: 25 minutes
- Marinating Time: 4–12 hours
- Coating Rest Time: 15 minutes
- Cooking Time: 30–45 minutes for multiple batches
- Total Time: Approximately 5–14 hours, including marination
- Servings: 6–8
- Cuisine: Southern American
- Course: Main course
- Difficulty: Moderate
- Cooking Method: Deep-frying
- Equipment: Dutch oven, deep-fry thermometer, mixing bowls, tongs, baking sheet, and wire rack
10. Conclusion
Extra-Crispy Buttermilk Fried Chicken combines classic Southern-inspired flavors with techniques designed to create an exceptionally crunchy crust.
The tangy buttermilk marinade keeps the chicken flavorful and tender, while the flour-and-cornstarch dredge produces a golden, textured coating.
With careful temperature control and proper resting, this homemade fried chicken delivers satisfying crunch and juicy meat in every bite.
11. Recommendation
Serving: Pair with mashed potatoes, coleslaw, macaroni and cheese, cornbread, or crispy French fries.
Dipping Sauces: Serve with honey mustard, ranch dressing, spicy mayonnaise, or hot honey.
Make-ahead: Marinate the chicken overnight and prepare the dry seasoning mixture in advance. Keep them separate until coating.
Storage: Refrigerate cooked chicken promptly in airtight containers for up to 3–4 days.
Freezing: Freeze completely cooled fried chicken in airtight freezer-safe packaging for up to 2–3 months for best quality.
Reheating: Place the chicken on a wire rack over a baking sheet and reheat in a 375°F (190°C) oven until thoroughly heated to 165°F (74°C). Avoid microwaving when possible, as it softens the crust.
Variation: Use boneless chicken thighs for smaller, faster-cooking pieces, adjusting the frying time accordingly.
12. Embracing Healthful Indulgence
Buttermilk Fried Chicken provides protein, iron, zinc, and several B vitamins.
However, deep-frying adds fat and calories, while the seasoned coating can contribute a substantial amount of sodium.
For a more balanced meal, serve moderate portions alongside fresh vegetables, a vinegar-based coleslaw, or a large green salad.
You can also experiment with air-frying smaller, lightly oiled chicken pieces, although the texture will differ from traditional deep-fried chicken.
Enjoyed occasionally and paired with nutritious sides, this extra-crispy fried chicken can be a satisfying part of a varied eating pattern.