
1. Introduction
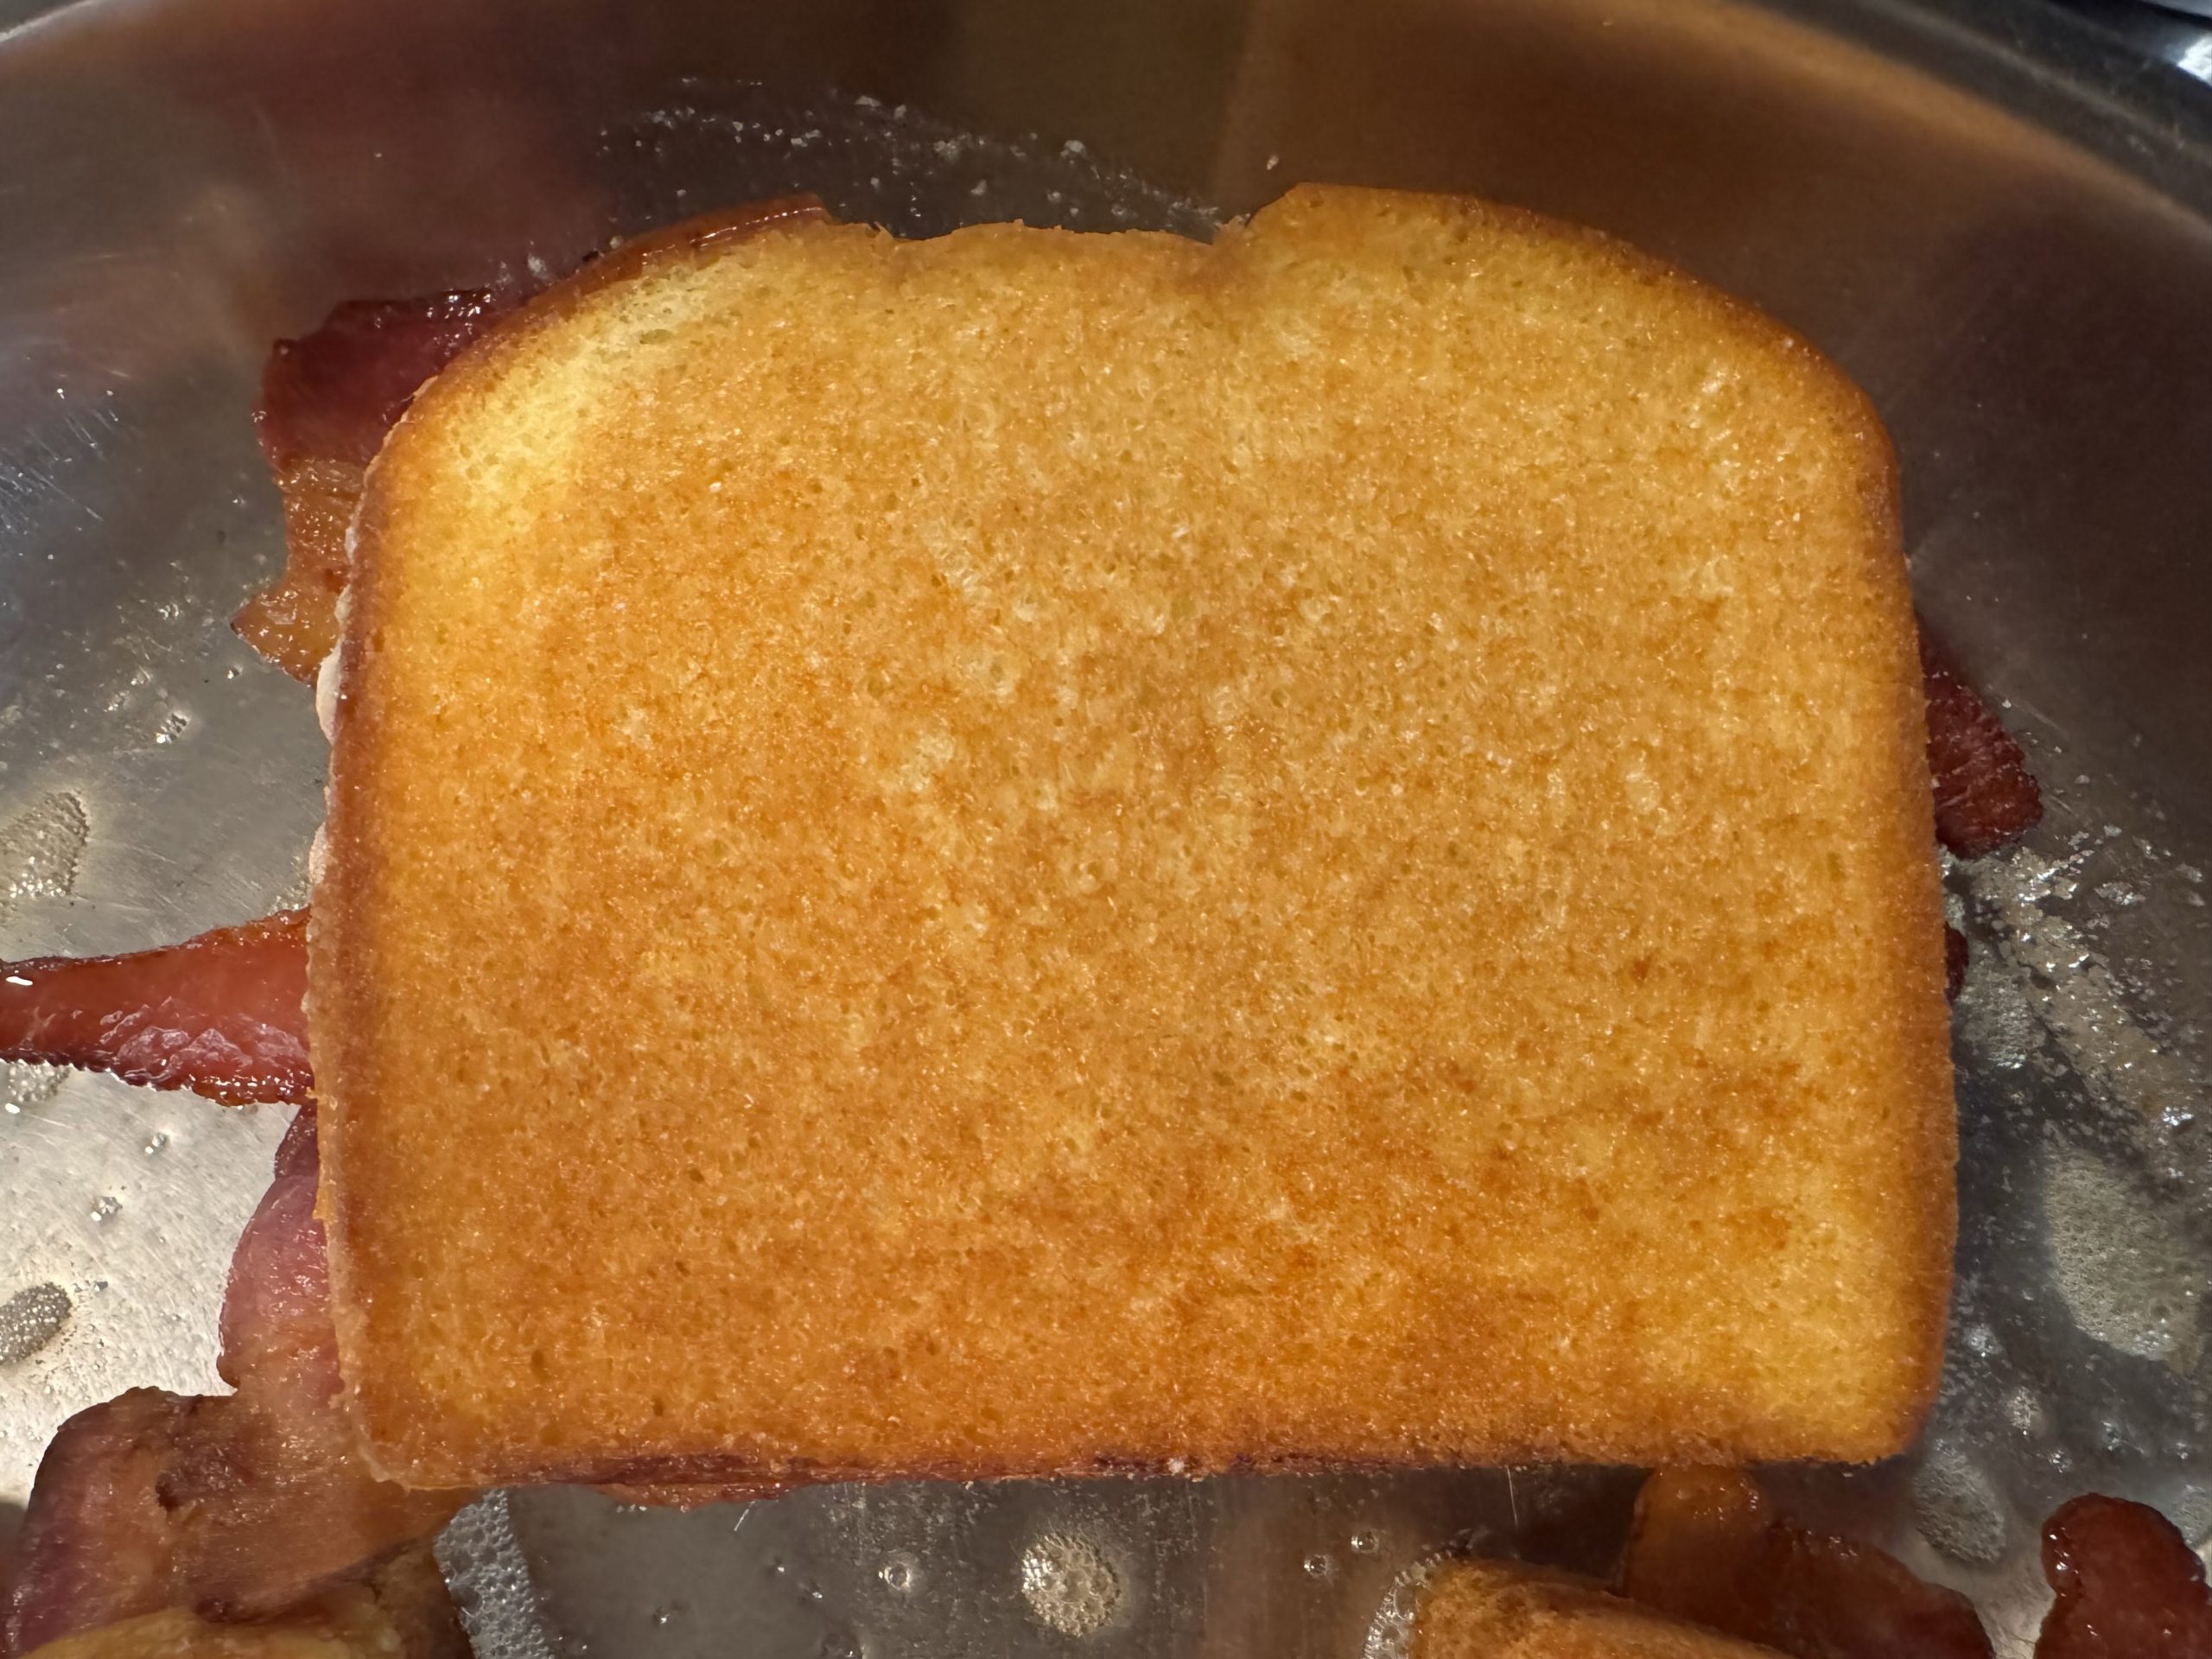
A Crispy Bacon Grilled Cheese Sandwich is the ultimate comfort food, combining thick slices of golden toasted bread, rich melted cheese, and crispy, smoky bacon.
This simple skillet sandwich transforms a handful of everyday ingredients into a warm, satisfying meal with a beautifully crunchy exterior and a soft, cheesy center.
The secret to an exceptional bacon grilled cheese sandwich lies in the cooking technique.
The bacon is cooked first, allowing its flavorful fat to collect in the skillet. A thin layer of these drippings is then used alongside butter or mayonnaise to toast the bread.
This creates a deeply golden crust while adding an extra layer of savory flavor.
For this halal-friendly version, halal beef bacon replaces traditional pork bacon. Halal turkey bacon can also be used, although a little additional butter may be necessary because it usually releases less fat.
The cheese is layered both underneath and above the bacon, ensuring that the crispy strips are surrounded by melted cheese.
Cheddar provides a bold, tangy flavor, American cheese melts into a particularly smooth filling, and Gruyère offers a rich, nutty taste.
The bread is toasted slowly over medium-low heat, allowing the cheese to melt completely before the exterior becomes too dark.
The result is a sandwich with crisp, buttery bread, smoky bacon, and deliciously melted cheese in every bite.
Ready in approximately 15–20 minutes, this recipe is ideal for lunch, a quick dinner, or a comforting homemade snack.
2. Origin and Cultural Significance
Grilled cheese sandwiches are closely associated with American comfort food, although toasted bread and melted cheese have appeared in many cuisines.
Early Cheese Sandwiches
Bread and cheese have been combined for centuries because both ingredients are widely available and easy to prepare.
Heating cheese between or on top of bread creates a simple, satisfying meal.
The American Grilled Cheese Sandwich
The modern American grilled cheese sandwich became especially popular during the twentieth century.
Sliced bread and commercially produced cheese made preparation convenient and affordable.
The Popularity of Skillet Toasting
Cooking a cheese sandwich in a skillet with butter became a familiar household method.
The technique creates a crisp exterior while allowing the cheese to soften and melt.
Bacon as an Addition
Adding bacon introduces a smoky, savory element and creates a more substantial sandwich.
The contrast between crispy bacon and melted cheese makes this variation particularly appealing.
Grilled Cheese as Comfort Food
Grilled cheese sandwiches are commonly served at home, in diners, and in cafés.
They are especially associated with casual lunches and comforting meals.
Modern Variations
Today, grilled cheese sandwiches may feature different breads, cheeses, vegetables, meats, and condiments.
This version maintains the traditional skillet preparation while using halal bacon.
3. Ingredients
Yield: 1 large sandwich
A. Bread
| Ingredient | Quantity |
|---|---|
| Thick-cut white bread or brioche | 2 slices |
B. Bacon
| Ingredient | Quantity |
|---|---|
| Halal beef bacon or turkey bacon | 3–4 strips |
C. Cheese
| Ingredient | Quantity |
|---|---|
| Cheddar, American, or Gruyère-style cheese | 2–3 slices |
For a halal-friendly preparation, choose cheese made with microbial or vegetarian rennet where applicable.
D. Butter or Mayonnaise
| Ingredient | Quantity |
|---|---|
| Softened butter or mayonnaise | 1 tablespoon |
Use this to spread over the outside of the bread.
E. Cooking Fat
| Ingredient | Quantity |
|---|---|
| Rendered bacon drippings | A thin layer left in the skillet |
If the halal bacon releases very little fat, a small amount of additional butter may be used.
F. Equipment
- Stainless steel or cast-iron skillet
- Kitchen tongs
- Spatula
- Butter knife
- Cutting board
- Paper towels
- Plate
- Small knife for slicing the finished sandwich
4. Optional Additions
The classic bacon grilled cheese sandwich requires only bread, bacon, cheese, and butter or mayonnaise.
However, several optional additions can create different flavors.
Caramelized Onions
Add a small portion of caramelized onions for sweetness.
Fresh Tomato
Place thin tomato slices between the cheese layers.
Jalapeños
Add sliced jalapeños for heat.
Hot Sauce
Spread a few drops inside the sandwich.
Dijon Mustard
Add a thin layer for a tangy flavor.
Garlic Butter
Mix a small amount of garlic powder into the softened butter.
Smoked Paprika
Sprinkle a pinch over the cheese.
Sautéed Mushrooms
Add cooked mushrooms for an earthy flavor.
Baby Spinach
Include a small handful of spinach.
Avocado
Add thin avocado slices after cooking.
Extra Cheese
Use an additional slice for a richer filling.
Different Cheese Combinations
Combine cheddar with mozzarella, American cheese, or a halal-friendly Gruyère-style cheese.
Sourdough Bread
Replace white bread with sourdough for a tangier flavor.
Whole-Wheat Bread
Use whole-wheat bread for additional whole grains.
Fresh Chives
Add chopped chives to the filling.
These ingredients are optional and are not required for the original sandwich.
5. Tips for Success
Choose Thick Bread
Thick-cut bread provides structure and holds the filling well.
Use Softened Butter
Softened butter spreads evenly without tearing the bread.
Start Bacon in a Cold Skillet
This allows the bacon to heat gradually.
Cook Bacon Until Crisp
Crispy bacon creates contrast with the melted cheese.
Save a Thin Layer of Drippings
The drippings add flavor to the toasted bread.
Avoid Excess Grease
Too much fat can make the sandwich oily rather than crisp.
Use Medium-Low Heat
Gentle heat allows the cheese to melt while the bread browns.
Layer Cheese on Both Sides of the Bacon
This helps hold the filling together.
Cover Briefly if Necessary
A lid can help melt the cheese if the bread is browning faster than the filling heats.
Flip Carefully
Use a wide spatula to prevent the sandwich from falling apart.
Avoid Pressing Too Hard
Excessive pressure can squeeze melted cheese out of the sandwich.
Watch the Bread Closely
Bread can change from golden to burned quickly.
Let the Sandwich Rest Briefly
A short rest allows the melted cheese to settle slightly.
Serve Warm
The sandwich is best enjoyed while the cheese is still soft and melted.
6. Step-by-Step Instructions
Part A: Gathering the Ingredients
Step 1: Gather all ingredients and equipment.
Step 2: Prepare two thick slices of white bread or brioche.
Step 3: Set out three or four strips of halal beef or turkey bacon.
Step 4: Prepare two or three slices of cheese.
Step 5: Measure 1 tablespoon softened butter or mayonnaise.
Step 6: Place a skillet on the stovetop.
Step 7: Prepare kitchen tongs and a spatula.
Step 8: Line a plate with paper towels.
Part B: Preparing the Bacon
Step 9: Remove the halal bacon from its packaging.
Step 10: Separate the strips carefully.
Step 11: Check that the strips are not stuck together.
Step 12: Arrange them beside the skillet.
Part C: Placing Bacon in the Skillet
Step 13: Make sure the skillet is cool.
Step 14: Place the bacon strips inside.
Step 15: Arrange them in a single layer.
Step 16: Avoid overlapping the strips excessively.
Step 17: Turn the heat to medium.
Part D: Cooking the Bacon
Step 18: Allow the bacon to warm gradually.
Step 19: Watch for the edges to begin browning.
Step 20: Turn the strips with kitchen tongs.
Step 21: Continue cooking.
Step 22: Flip occasionally.
Step 23: Allow the bacon to become crisp.
Step 24: Reduce the heat if the bacon browns too quickly.
Step 25: Continue until the bacon is fully cooked and browned.
Step 26: Follow the package’s cooking guidance, particularly for turkey bacon.
Part E: Removing the Bacon
Step 27: Prepare the paper towel-lined plate.
Step 28: Lift the bacon from the skillet using tongs.
Step 29: Transfer it onto the paper towels.
Step 30: Allow excess fat to drain.
Step 31: Set the bacon aside.
Part F: Preparing the Skillet Drippings
Step 32: Check the fat remaining in the skillet.
Step 33: Leave a thin layer of drippings.
Step 34: Carefully remove excess fat if necessary.
Step 35: If the bacon released little fat, add a small amount of butter.
Step 36: Reduce the heat to medium-low.
Part G: Preparing the Bread
Step 37: Place the bread slices on a cutting board.
Step 38: Arrange them side by side.
Step 39: Identify the outer side of each slice.
Step 40: Prepare the softened butter or mayonnaise.
Part H: Spreading the Bread
Step 41: Use a butter knife to scoop a small amount of butter or mayonnaise.
Step 42: Spread it over one side of the first bread slice.
Step 43: Cover the surface evenly.
Step 44: Spread the remaining butter or mayonnaise over one side of the second slice.
Step 45: Make sure the coating is thin.
Step 46: Avoid leaving large clumps.
Part I: Preparing the Cheese
Step 47: Remove the cheese slices from their packaging.
Step 48: Separate them carefully.
Step 49: Divide the cheese into two portions.
Step 50: Reserve one portion for the bottom layer.
Step 51: Reserve the remaining cheese for the top layer.
Part J: Preparing the Bacon for Assembly
Step 52: Check that the bacon has drained.
Step 53: Break or fold long strips if necessary.
Step 54: Arrange them so they will fit inside the bread.
Step 55: Keep the bacon ready beside the skillet.
Part K: Placing the First Bread Slice
Step 56: Take the first bread slice.
Step 57: Position it butter-side down.
Step 58: Place it carefully into the skillet.
Step 59: Keep the heat at medium-low.
Step 60: Make sure the bread lies flat.
Part L: Adding the First Cheese Layer
Step 61: Take the first portion of cheese.
Step 62: Place it on the bread.
Step 63: Arrange the cheese evenly.
Step 64: Keep it slightly inside the bread edges.
Part M: Adding the Bacon
Step 65: Take the cooked bacon strips.
Step 66: Place them over the cheese.
Step 67: Arrange the strips evenly.
Step 68: Fold any long pieces to fit.
Step 69: Avoid stacking all the bacon in one area.
Part N: Adding the Second Cheese Layer
Step 70: Take the remaining cheese.
Step 71: Place it over the bacon.
Step 72: Distribute it evenly.
Step 73: Check that the bacon is surrounded by cheese.
Part O: Closing the Sandwich
Step 74: Take the second bread slice.
Step 75: Position it butter-side up.
Step 76: Place it over the cheese.
Step 77: Align the bread edges.
Step 78: Press very gently to stabilize the sandwich.
Part P: Toasting the First Side
Step 79: Allow the sandwich to cook over medium-low heat.
Step 80: Avoid moving it constantly.
Step 81: Let the bread begin to toast.
Step 82: Watch for the edges to turn golden.
Step 83: Continue cooking for approximately 3–4 minutes.
Step 84: Lift one edge carefully with a spatula.
Step 85: Check the underside.
Step 86: Look for a deep golden-brown crust.
Step 87: Continue cooking briefly if the bread remains pale.
Part Q: Preparing to Flip
Step 88: Slide a wide spatula underneath the sandwich.
Step 89: Support the entire sandwich.
Step 90: Hold the top gently if necessary.
Step 91: Make sure the filling remains centered.
Part R: Flipping the Sandwich
Step 92: Lift the sandwich carefully.
Step 93: Turn it over in one controlled movement.
Step 94: Lower it back into the skillet.
Step 95: Check that the second buttered side contacts the pan.
Part S: Toasting the Second Side
Step 96: Continue cooking over medium-low heat.
Step 97: Allow the second side to brown.
Step 98: Watch the edges.
Step 99: Cook for approximately 2–3 minutes.
Step 100: Lift the sandwich slightly to check the crust.
Step 101: Look for an even golden-brown color.
Part T: Checking the Cheese
Step 102: Observe the cheese near the bread edges.
Step 103: Check whether it has melted.
Step 104: If necessary, reduce the heat slightly.
Step 105: Cover the skillet briefly with a lid.
Step 106: Allow the trapped heat to melt the cheese.
Step 107: Remove the lid carefully.
Step 108: Check that the cheese is soft and melted.
Part U: Finishing the Sandwich
Step 109: Confirm that both sides are golden and crisp.
Step 110: Check that the filling is heated through.
Step 111: Turn off the heat.
Step 112: Slide the spatula underneath the sandwich.
Step 113: Lift it from the skillet.
Part V: Resting the Sandwich
Step 114: Transfer the sandwich to a cutting board.
Step 115: Allow it to rest for approximately one minute.
Step 116: Let the cheese settle slightly.
Step 117: Avoid pressing down on the sandwich.
Part W: Slicing the Sandwich
Step 118: Prepare a sharp knife.
Step 119: Hold the sandwich gently.
Step 120: Slice diagonally through the center.
Step 121: Separate the two halves.
Step 122: Check that the melted cheese and bacon are visible.
Part X: Final Presentation
Step 123: Place the sandwich halves on a serving plate.
Step 124: Position the cut sides outward.
Step 125: Arrange the halves neatly.
Step 126: Add an optional side dish if desired.
Step 127: Serve immediately while warm.
7. Description
The Crispy Bacon Grilled Cheese Sandwich has a golden-brown exterior and a rich, melted cheese filling.
Appearance
The bread is evenly toasted with a deep golden color.
The edges are lightly crisp.
Melted cheese is visible between the slices.
The bacon forms a savory layer inside.
Texture
The exterior is crunchy and buttery.
The interior remains soft.
The cheese is smooth, creamy, and melted.
The bacon provides a crisp contrast.
Flavor
The bread has a warm, toasted flavor.
The cheese contributes richness and savory notes.
Halal beef or turkey bacon adds smokiness.
Butter or mayonnaise enhances the golden crust.
Aroma
The sandwich has a comforting aroma of toasted bread, melted cheese, and cooked bacon.
Overall Experience
Each bite combines crisp bread, warm melted cheese, and savory bacon.
The result is a rich, satisfying sandwich with contrasting textures.
8. Nutritional Information
Approximate nutritional values for one sandwich:
| Nutrient | Estimated Amount |
|---|---|
| Calories | 550–850 kcal |
| Protein | 25–40 g |
| Carbohydrates | 30–45 g |
| Total Fat | 35–60 g |
| Saturated Fat | 15–25 g |
| Dietary Fiber | 1–3 g |
| Sugar | 3–7 g |
| Sodium | Variable, potentially high |
| Calcium | Present |
| Iron | Present |
| Vitamin B12 | Present |
Values are approximate and depend on bread thickness, bacon type, cheese quantity, and the amount of butter or mayonnaise used.
9. Recipe Details
| Category | Details |
|---|---|
| Recipe Name | Crispy Bacon Grilled Cheese Sandwich |
| Cuisine | American |
| Course | Lunch, Dinner, Snack |
| Preparation Time | Approximately 5 Minutes |
| Bacon Cooking Time | Approximately 6–10 Minutes |
| Sandwich Cooking Time | Approximately 5–7 Minutes |
| Total Time | Approximately 15–20 Minutes |
| Yield | 1 Large Sandwich |
| Servings | 1 |
| Difficulty | Easy |
| Bread | White Bread or Brioche |
| Main Protein | Halal Beef or Turkey Bacon |
| Cheese | Cheddar, American, or Gruyère-Style |
| Cooking Fat | Butter, Mayonnaise, Bacon Drippings |
| Cooking Method | Skillet Toasting |
| Texture | Crispy, Creamy, Melty |
| Flavor Profile | Savory, Buttery, Smoky |
| Best Served | Hot |
| Best For | Quick Lunches, Comfort Meals |
| Storage | Refrigerated |
| Potential Allergens | Wheat, Milk, Eggs if Using Mayonnaise or Brioche |
10. Conclusion
The Crispy Bacon Grilled Cheese Sandwich is a comforting meal made with thick bread, crispy bacon, melted cheese, and butter or mayonnaise.
The recipe begins by cooking halal bacon until browned and crisp.
A thin layer of the flavorful drippings is left in the skillet.
The bread is spread with softened butter or mayonnaise, then layered with cheese and bacon.
The sandwich is cooked slowly over medium-low heat until both sides become golden brown.
This gentle cooking method allows the cheese to melt completely while the bread develops a crisp exterior.
The finished sandwich is warm, rich, and satisfying.
It can be enjoyed on its own or paired with soup, salad, or fresh vegetables.
With just a few ingredients and a simple skillet technique, this sandwich delivers the familiar flavors of a classic grilled cheese with an added smoky bacon layer.
11. Serving and Storage Recommendations
Serve Hot: Enjoy the sandwich immediately after cooking.
Tomato Soup: Pair with a warm bowl of tomato soup.
Green Salad: Serve with a light green salad.
Fresh Tomatoes: Add sliced tomatoes on the side.
Pickles: Serve with crunchy dill pickles.
Roasted Potatoes: Pair with roasted potato wedges.
Sweet Potato Fries: Serve with baked sweet potato fries.
Fresh Fruit: Add apple slices or grapes.
Hot Sauce: Offer hot sauce for dipping.
Extra Cheese: Serve with a little additional melted cheese if desired.
Slicing: Cut diagonally for an attractive presentation.
Refrigeration: Store leftovers in an airtight container in the refrigerator.
Storage Duration: Consume refrigerated leftovers within approximately 3–4 days, assuming the bacon was freshly cooked and stored safely.
Reheating: Reheat in a skillet over low heat to restore crispness.
Oven Reheating: Warm in a moderate oven until heated through.
Microwave: Microwaving is possible but may soften the bread.
Freezing: Freezing is possible, although the texture of the bread may change.
Food Safety: Refrigerate promptly and reheat leftovers thoroughly to 165°F (74°C).
12. Embracing Healthful Indulgence
A Crispy Bacon Grilled Cheese Sandwich is a rich comfort food that combines bread, cheese, and savory bacon.
It can be enjoyed as part of a varied eating pattern.
Bread
Bread provides carbohydrates that contribute energy.
Whole-grain varieties can offer additional dietary fiber.
Cheese
Cheese contributes protein and calcium.
It also provides fat and sodium.
Halal Beef Bacon
Halal beef bacon provides smoky flavor and protein.
Its nutritional composition varies by brand.
Halal Turkey Bacon
Turkey bacon can be a leaner alternative, depending on the product.
It may contain substantial sodium.
Butter
Butter helps create a crisp, golden crust.
It also contributes saturated fat.
Mayonnaise
Mayonnaise can be used instead of butter to coat the bread.
It promotes browning and adds richness.
Protein Content
The cheese and bacon contribute protein to the sandwich.
Portion Awareness
The recipe makes one substantial sandwich.
Serving size can be adjusted by using thinner bread, less cheese, or fewer bacon strips.
Adding Vegetables
Tomatoes, spinach, mushrooms, or avocado can add variety.
Whole-Grain Alternatives
Whole-wheat or whole-grain bread can increase fiber intake.
Cooking Method
Cooking over medium-low heat helps develop a golden crust without excessive burning.
Homemade Preparation
Preparing the sandwich at home allows control over the ingredients, portion size, and cooking fat.
Balanced Meal Pairing
Serving the sandwich with a salad, vegetables, or fresh fruit adds variety.
Enjoying Comfort Food
Rich sandwiches can be enjoyed occasionally as part of a balanced diet.
The Crispy Bacon Grilled Cheese Sandwich demonstrates how a few simple ingredients can create a delicious homemade meal.
With its crunchy golden bread, creamy melted cheese, and smoky halal bacon, it is a satisfying choice for lunch, dinner, or a comforting snack.