
1. Introduction
Homemade Sweet Cream Butter is a delicious dairy product made by transforming fresh heavy whipping cream into smooth, rich, golden butter through a simple churning process.
With just one main ingredient, this traditional recipe produces fresh butter with a delicate, creamy flavor and a luxurious texture.
The process involves whipping heavy cream until the butterfat separates from the liquid buttermilk. The butter is then carefully drained, rinsed, kneaded, and shaped into a beautiful log or block.
Perfect for spreading on warm bread, preparing homemade pastries, cooking savory dishes, or adding richness to everyday meals, homemade butter offers the satisfaction of making a classic kitchen staple from scratch.
2. Origin
Butter-making is one of the oldest dairy-processing traditions in human history, dating back thousands of years.
Early butter production developed in communities that domesticated dairy animals, including cattle, sheep, and goats. Ancient methods involved shaking or churning cream or fermented milk until the fat separated from the liquid.
Butter became an important food ingredient in many European, Middle Eastern, and Asian culinary traditions.
Over time, traditional hand-churning techniques evolved into mechanical and industrial production methods, making butter widely available throughout the world.
Today, homemade butter-making remains a valued traditional skill, allowing home cooks to recreate fresh dairy products using simple ingredients and equipment.
3. Cultural Significance
Butter holds an important place in culinary traditions around the world.
In European cooking, it is commonly used in breads, pastries, cakes, sauces, and everyday meals.
In France, butter is especially associated with classic pastry-making and rich sauces. In other regions, cultured butter is valued for its distinctive tangy flavor developed through controlled cream fermentation.
Traditional butter-making also reflects agricultural heritage, household self-sufficiency, and the preservation of food preparation techniques passed down through generations.
Making butter at home connects modern cooking with these historical food traditions while allowing greater control over the ingredients and flavor.
4. Ingredients and Quantities
MAKES APPROXIMATELY 1 CUP (200–230 G) OF BUTTER
For the Homemade Sweet Cream Butter:
| Ingredient | Quantity |
|---|---|
| Heavy whipping cream (at least 35% milk fat) | 2 cups (500 ml) |
| Fine sea salt (optional) | ¼–½ tsp |
| Ice-cold water for rinsing | As needed |
Optional Ingredients for Cultured Butter:
| Ingredient | Quantity |
|---|---|
| Live-culture cultured buttermilk | 1–2 tbsp |
| Heavy whipping cream | 2 cups (500 ml) |
Cultured butter requires a separate fermentation step before churning. Without that step, the recipe produces traditional sweet cream butter.
5. Optional Additions
Customize your homemade butter with these flavorful ingredients:
- Fresh garlic: 1–2 cloves, finely minced, for garlic butter.
- Fresh parsley: 1 tbsp, chopped, for a refreshing herbal flavor.
- Fresh rosemary: ½ tsp, finely chopped, for an aromatic variation.
- Fresh thyme: ½ tsp for a delicate savory flavor.
- Honey: 1 tbsp for sweet honey butter.
- Ground cinnamon: ½ tsp for a warm, sweet variation.
- Lemon zest: ½ tsp for a refreshing citrus flavor.
- Smoked paprika: ¼ tsp for a gently smoky taste.
- Black pepper: ¼ tsp for a savory finishing butter.
- Maple syrup: 1 tbsp for a breakfast-inspired variation.
These additions transform ordinary homemade butter into delicious flavored compound butters suitable for bread, vegetables, and cooked dishes.
6. Tips for Success
- Choose quality cream: Heavy whipping cream containing at least 35% milk fat produces a rich butter with a smooth texture.
- Use fresh cream: Good-quality cream contributes to better flavor and consistency.
- Avoid overfilling the mixer: Leave enough space for the cream to expand during whipping.
- Be patient during whipping: Cream passes through several stages before separating into butter and buttermilk.
- Watch for separation: When yellow butter solids begin collecting together and liquid appears, the churning process is nearly complete.
- Drain thoroughly: Removing excess buttermilk helps maintain freshness.
- Rinse with cold water: Cold water helps wash away remaining buttermilk while keeping the butter firm.
- Knead gently: Pressing the butter helps remove trapped moisture and creates a smoother texture.
- Add salt gradually: Start with a small amount and adjust according to taste.
- Shape while pliable: Butter is easier to form into a log or block before it becomes completely firm.
- Use clean utensils: Proper sanitation helps preserve the quality of the finished product.
- Refrigerate promptly: Homemade butter should be stored cold in an airtight container.
7. Instructions
Step 1: Prepare the Cream
Pour 2 cups of heavy whipping cream into the bowl of a stand mixer or food processor.
If using a stand mixer, attach the whisk attachment.
Leave sufficient space in the bowl because the cream will increase in volume during whipping.
Step 2: Begin Whipping
Turn the mixer to medium speed and gradually increase to medium-high.
Continue whipping for approximately 5–10 minutes, depending on the equipment and cream temperature.
The cream will first become thick and fluffy, resembling whipped cream.
Step 3: Continue Until Separation
Keep mixing beyond the whipped cream stage.
The cream will become grainy and begin separating.
Eventually, small yellow butterfat clumps will form, leaving a thin, whitish liquid known as buttermilk.
Continue briefly until the butter solids begin gathering together.
Step 4: Drain the Buttermilk
Turn off the mixer.
Place a fine-mesh strainer over a clean bowl.
Pour the mixture into the strainer, allowing the liquid buttermilk to drain away.
Gently press the butter solids using a spatula to release additional liquid.
The drained buttermilk can be refrigerated and used in pancakes, biscuits, or baking recipes.
Step 5: Rinse the Butter
Transfer the butter solids into a clean bowl filled with ice-cold water.
Using clean hands or a spatula, gently press and fold the butter to release trapped buttermilk.
Drain the cloudy water and replace it with fresh cold water.
Repeat until the water becomes mostly clear.
Step 6: Knead the Butter
Transfer the rinsed butter onto a clean surface or into a mixing bowl.
Use a spatula to gently press, fold, and knead the butter.
Continue until excess moisture has been removed and the butter develops a smooth, cohesive texture.
Step 7: Add Salt (Optional)
Sprinkle ¼–½ teaspoon of fine sea salt over the butter.
Knead gently until evenly distributed.
Taste and adjust the seasoning according to your preference.
For unsalted butter, simply skip this step.
Step 8: Shape the Butter
Place the butter onto a sheet of parchment paper.
Use the parchment to roll and shape it into a smooth cylindrical log.
Alternatively, press it into a rectangular butter mold or small container.
Smooth the surface using a spatula.
Step 9: Refrigerate
Wrap the butter tightly in parchment paper or place it in an airtight container.
Transfer it to the refrigerator for approximately 1–2 hours, until firm.
Step 10: Serve and Enjoy
Once chilled, unwrap the butter and cut it into slices or portions.
Serve on freshly baked bread, warm toast, biscuits, or use it in your favorite cooking and baking recipes.
For Cultured Butter: Before Step 1, combine 2 cups of pasteurized heavy cream with 1–2 tablespoons of live-culture cultured buttermilk in a sanitized container. Cover and allow it to culture according to a reliable cultured-butter starter procedure, until thickened and tangy. Refrigerate the cultured cream until cold, then follow the churning, rinsing, and shaping instructions above.
8. Description
Homemade Sweet Cream Butter features a beautiful pale-yellow color, a smooth, creamy texture, and a delicate dairy aroma.
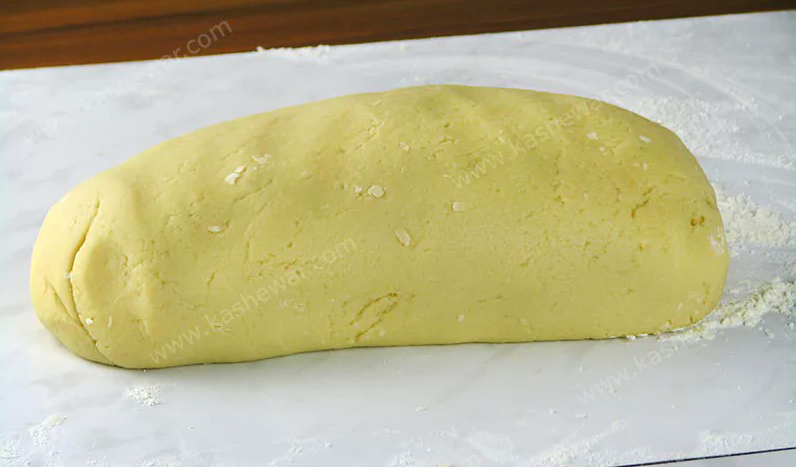
When shaped into a log, the butter forms a neat, uniform block with a soft, slightly glossy surface.
Its rich consistency makes it easy to spread when softened, while refrigeration gives it a firm texture suitable for slicing and cooking.
The flavor is naturally creamy and mildly sweet, with optional sea salt providing a pleasant savory balance.
Cultured butter offers a slightly different experience, developing a richer, tangier flavor through fermentation.
Whether served simply or enhanced with herbs, garlic, or honey, homemade butter is a versatile ingredient that adds richness to both sweet and savory foods.
9. Nutritional Information
APPROXIMATE VALUES PER SERVING · 1 TABLESPOON (14 G)
| Nutrient | Amount |
|---|---|
| Calories | 100–105 kcal |
| Protein | 0.1 g |
| Carbohydrates | Less than 0.1 g |
| Total Fat | 11–12 g |
| Saturated Fat | 7–7.5 g |
| Sugars | Less than 0.1 g |
| Sodium | 0–30 mg, depending on salt |
| Cholesterol | Approximately 30 mg |
Nutritional Characteristics:
- Butterfat: Provides concentrated dietary fat and contributes to butter’s characteristic creamy texture.
- Vitamin A: Butter naturally contains vitamin A, which supports normal vision and immune function.
- Vitamin E: Present in small quantities.
- Vitamin K: Butter contains small amounts of this fat-soluble vitamin.
- Milk fat: Supplies a mixture of saturated and unsaturated fatty acids.
Nutritional values are estimates and vary according to the cream’s fat content, moisture remaining after churning, and added salt or flavorings.
10. Conclusion
Homemade Sweet Cream Butter is a wonderful example of how a simple ingredient can be transformed into a versatile and delicious kitchen staple.
Through whipping, draining, rinsing, kneading, and shaping, fresh heavy cream becomes smooth, rich butter with a delicate flavor and beautiful texture.
Its straightforward preparation makes it an enjoyable introduction to traditional dairy-making techniques.
Whether used for spreading, baking, cooking, or preparing flavored compound butters, homemade butter brings fresh flavor and traditional craftsmanship to everyday meals.
11. Recommendation
Homemade butter is highly recommended for home cooks who enjoy traditional food preparation and creating ingredients from scratch.
For the best serving experience:
- Spread over freshly baked white bread.
- Serve with warm croissants or homemade biscuits.
- Pair with pancakes, waffles, or French toast.
- Use for preparing buttery mashed potatoes.
- Add to freshly cooked vegetables.
- Incorporate into homemade cakes, cookies, and pastries.
- Prepare garlic and herb butter for savory dishes.
- Mix with honey and cinnamon for a sweet breakfast spread.
For an attractive presentation, shape the butter into a neat log, wrap it in parchment paper, and serve it on a small ceramic butter dish.
Storage recommendation: Keep homemade butter in an airtight container in the refrigerator and use within approximately 1–2 weeks. Freeze portions for longer storage, ideally using them within 2–3 months for best quality. Homemade butter containing fresh garlic or herbs should be refrigerated and used more promptly.
12. Embracing Healthful Indulgence
Homemade Sweet Cream Butter demonstrates how traditional food preparation can transform a single dairy ingredient into a flavorful cooking staple.
Butter provides dietary fat and small amounts of fat-soluble vitamins, including vitamin A. Its rich texture and distinctive flavor make it useful in many culinary preparations.
Because butter is concentrated in saturated fat, it can be enjoyed alongside a variety of other fat sources, including olive oil, nuts, and seeds.
Preparing butter at home also allows you to control the amount of added salt and avoid unnecessary flavoring ingredients.
For additional variety, consider incorporating fresh herbs, citrus zest, or mild spices into small portions of homemade butter.
The goal is to appreciate butter’s traditional flavor and culinary versatility while enjoying it as part of a balanced and varied eating pattern.
Ultimately, Homemade Sweet Cream Butter is more than a simple dairy product; it celebrates traditional craftsmanship, fresh ingredients, and the satisfaction of transforming ordinary cream into a rich, smooth, delicious homemade staple. 🧈